Atkins Diet Plan for 14 Days: A Comprehensive Guide
Embark on a transformative 14-day journey with our Atkins Diet plan, leveraging readily available PDF resources for detailed meal plans and guidance.
Discover how to effectively manage carbohydrate intake, prioritizing proteins and fats to unlock your body’s fat-burning potential, as outlined in various downloadable guides.
The Atkins Diet, a revolutionary approach to weight management, has been a prominent dietary strategy since its inception in the 1970s. At its core, the diet centers around significantly reducing carbohydrate consumption while simultaneously increasing the intake of proteins and healthy fats. This metabolic shift encourages the body to transition from utilizing glucose – derived from carbohydrates – as its primary fuel source to burning stored fat for energy.
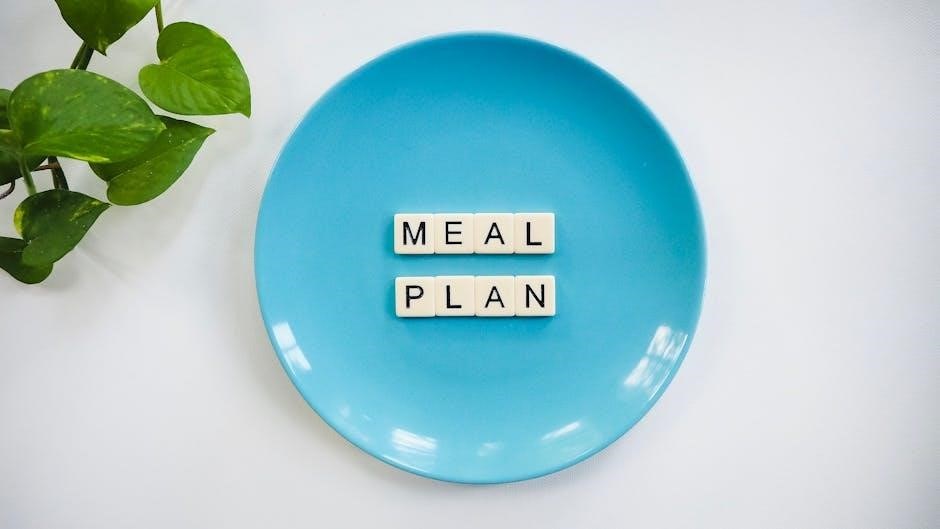
Numerous resources, often available as downloadable PDFs, detail the intricacies of this plan, including 14-day meal plans designed to kickstart the process. These guides, like the “7-Day Atkins Diet Meal Plan” and “14 Day Rapid Fat Loss Diet”, provide structured frameworks for individuals seeking to adopt this lifestyle. The diet isn’t merely about restriction; it’s about retraining the body’s metabolic processes.
Understanding the principles behind carbohydrate control is crucial. The Atkins Diet isn’t a one-size-fits-all solution, but rather a phased approach, starting with a very low-carb induction phase (Atkins 20) and gradually reintroducing carbohydrates based on individual tolerance. PDFs often outline these phases, offering clarity on food choices and expected outcomes. The goal is sustainable weight loss and improved overall health through a carefully managed dietary regimen.
Understanding the Phases of the Atkins Diet
The Atkins Diet isn’t a static plan; it’s a phased approach designed for gradual carbohydrate reintroduction and long-term sustainability. Typically, the diet progresses through four distinct phases: Induction, Balancing, Fine-Tuning, and Maintenance. Detailed PDF guides, such as those offering 14-day meal plans, often illustrate how to navigate these stages effectively.
The initial Induction phase (Atkins 20) is the most restrictive, limiting carbohydrate intake to just 20 grams per day. This phase aims to rapidly shift the body into ketosis, a metabolic state where fat becomes the primary fuel source. Subsequent phases – Balancing, Fine-Tuning – progressively increase carbohydrate allowance, allowing for greater dietary flexibility while monitoring individual responses.
PDF resources emphasize the importance of personalized adjustments. The Fine-Tuning phase helps identify your “Critical Carbohydrate Level for Weight Loss” (CCLW), the maximum carbohydrate intake you can consume without hindering weight loss. Finally, the Maintenance phase focuses on sustaining weight loss and preventing regain.
Understanding these phases, as detailed in downloadable plans, is vital for success. The Atkins Diet isn’t a quick fix, but a lifestyle adaptation guided by individual needs and responses, supported by comprehensive PDF documentation.
Atkins 20: The Initial Phase

Atkins 20, the Induction phase, is the cornerstone of the 14-day plan and the most restrictive stage of the Atkins Diet. This phase dramatically limits daily carbohydrate intake to a strict 20 grams, primarily from non-starchy vegetables. The primary goal is to swiftly induce ketosis, forcing the body to burn stored fat for energy instead of glucose.
PDF guides detailing the 14-day Atkins 20 plan emphasize the importance of adhering to this carbohydrate limit. Initial weight loss during this phase is often significant, largely due to water loss associated with glycogen depletion. However, it sets the stage for sustained fat burning.
Focus is placed on high-protein and high-fat foods to promote satiety and minimize cravings. While seemingly counterintuitive, this approach helps control appetite and supports metabolic shift. Detailed meal plans within the PDF resources provide structure and ensure adequate nutrient intake during this restrictive period.
Successfully navigating Atkins 20 requires discipline and careful food selection. PDF resources offer lists of approved foods and guidance on reading nutrition labels, ensuring adherence to the 20-gram carbohydrate limit and maximizing the benefits of this initial phase.
Foods Allowed on Atkins 20
The Atkins 20 phase centers around a carefully curated selection of foods, detailed within the 14-day plan PDFs. Protein sources are paramount, including beef, poultry, fish, pork, lamb, and eggs. These provide essential amino acids and contribute to satiety, crucial for adhering to the diet.
Healthy fats are also liberally permitted, encompassing oils like olive, avocado, and coconut oil, alongside avocados themselves. These fats support energy levels and aid in nutrient absorption. Non-starchy vegetables – leafy greens (spinach, lettuce), broccoli, cauliflower, asparagus, and zucchini – are allowed, contributing vital fiber and micronutrients, while remaining within the 20-gram carb limit.
Dairy is permissible in moderation, focusing on full-fat options like cheese and cream. However, careful portion control is essential due to carbohydrate content. PDF resources provide specific serving sizes. Water is, of course, encouraged for optimal hydration and metabolic function.
The downloadable guides emphasize prioritizing whole, unprocessed foods. While some condiments are allowed, they must be sugar-free and low in carbohydrates. Understanding these guidelines, as outlined in the PDF, is key to successfully navigating the Atkins 20 phase.
Foods to Avoid on Atkins 20
Strict adherence to food restrictions is vital during the initial Atkins 20 phase, as detailed in the downloadable 14-day plan PDFs. All sugars are completely prohibited, including those found in sweetened beverages, desserts, and processed foods. This is the cornerstone of carb restriction.
Grains – wheat, rice, corn, oats, and barley – are also off-limits, as they rapidly convert to glucose. Similarly, starchy vegetables like potatoes, sweet potatoes, and peas must be avoided due to their high carbohydrate content. Legumes (beans, lentils) are restricted, despite their protein content, due to their carb profile.
Most fruits are excluded, with limited exceptions for small portions of berries in later phases. Low-fat dairy products are discouraged, as they often contain added sugars. Processed foods, including many pre-packaged snacks and meals, are generally unsuitable due to hidden carbohydrates and unhealthy additives.
The PDF guides emphasize careful label reading to identify hidden sugars and carbs. Alcohol is generally restricted, as it can hinder fat burning. Successfully navigating Atkins 20 requires diligent avoidance of these foods, ensuring you remain within the 20-gram daily carb limit.
Sample 14-Day Atkins 20 Meal Plan: Week 1

Kickstart your transformation with this Week 1 sample plan, derived from comprehensive Atkins 20 PDF resources. Each day focuses on protein and healthy fats, keeping carbohydrate intake under 20 grams. Breakfast options include eggs with bacon or sausage, providing a substantial protein boost.
Lunch typically features a salad with grilled chicken or fish, dressed with olive oil and vinegar. Dinner emphasizes protein sources like steak, salmon, or pork chops, accompanied by non-starchy vegetables such as spinach, broccoli, or asparagus. These meals are designed to promote satiety and minimize cravings.
The downloadable PDFs offer variations to prevent monotony, suggesting different protein sources and vegetable combinations. Portion control is crucial; focus on adequate protein intake while limiting overall calories. Snacks, if needed, should consist of cheese, nuts, or celery sticks with cream cheese.
This initial week aims to shift your body into ketosis, the metabolic state where it burns fat for fuel. Consistent adherence to the plan, as detailed in the PDF guides, is key to achieving optimal results. Remember to prioritize hydration throughout the week.
Day 1-7: Detailed Meal Breakdown (Week 1)
Delve into a day-by-day breakdown for Week 1, sourced from detailed Atkins 20 PDF meal plans. Day 1: Scrambled eggs with cheese (breakfast), tuna salad with lettuce (lunch), and baked salmon with steamed broccoli (dinner). Day 2: Bacon and eggs (breakfast), chicken Caesar salad (lunch), and pork chops with green beans (dinner).
Day 3: Omelet with spinach and mushrooms (breakfast), shrimp salad (lunch), and steak with asparagus (dinner). Day 4: Sausage and eggs (breakfast), turkey and cheese roll-ups (lunch), and roasted chicken with cauliflower (dinner). Day 5: Egg and cheese muffins (breakfast), salmon salad (lunch), and lamb chops with spinach (dinner).
Day 6: Ham and cheese omelet (breakfast), chicken wings (lunch), and beef roast with Brussels sprouts (dinner). Day 7: Fried eggs with avocado (breakfast), leftover roast beef salad (lunch), and cod with zucchini (dinner).
These PDFs emphasize protein-rich options and non-starchy vegetables. Snack options, like a handful of almonds or cheese sticks, are included. Remember to drink plenty of water throughout each day to support the metabolic shift and maintain optimal hydration levels, as detailed in the downloadable resources.
Sample 14-Day Atkins 20 Meal Plan: Week 2
Transition into Week 2 with a continuation of the Atkins 20 plan, guided by comprehensive PDF meal plans. Day 8: Cheese and spinach omelet (breakfast), turkey breast slices with avocado (lunch), and grilled pork with sautéed mushrooms (dinner). Day 9: Bacon and eggs (breakfast), tuna salad lettuce wraps (lunch), and baked chicken thighs with broccoli (dinner).
Day 10: Scrambled eggs with ham (breakfast), shrimp cocktail (lunch), and steak with green beans (dinner). Day 11: Sausage patties (breakfast), chicken salad with celery (lunch), and lamb chops with asparagus (dinner). Day 12: Egg muffins with cheese (breakfast), salmon with spinach (lunch), and beef stir-fry with cauliflower rice (dinner).
Day 13: Ham and cheese slices (breakfast), leftover beef stir-fry (lunch), and cod with zucchini noodles (dinner). Day 14: Fried eggs with mushrooms (breakfast), turkey and cheese roll-ups (lunch), and roasted chicken with Brussels sprouts (dinner).
These PDF resources highlight consistent protein intake and low-carb vegetable choices. Incorporate approved snack options, like cheese or nuts, when needed. Maintaining adequate hydration remains crucial throughout Week 2, as emphasized in the downloadable guides, to support the body’s adaptation to fat as its primary fuel source.
Day 8-14: Detailed Meal Breakdown (Week 2)
Delve into a detailed breakdown of Week 2’s Atkins 20 meals, referencing available PDF guides for precise portion sizes. Day 8: 3 eggs, 1oz cheese, spinach (breakfast); 4oz turkey, ½ avocado (lunch); 6oz pork, 1 cup mushrooms (dinner). Day 9: 3 bacon slices, 2 eggs (breakfast); 5oz tuna, lettuce leaves (lunch); 6oz chicken thighs, 1 cup broccoli (dinner).
Day 10: 2 sausage patties, 2 eggs (breakfast); 6oz shrimp (lunch); 6oz steak, 1 cup green beans (dinner). Day 11: Egg and cheese scramble (breakfast); 4oz chicken salad (lunch); 6oz lamb chops, 1 cup asparagus (dinner). Day 12: 2 egg muffins (breakfast); 5oz salmon, 1 cup spinach (lunch); 6oz beef, cauliflower rice (dinner).
Day 13: Ham and cheese roll-ups (breakfast); leftover beef stir-fry (lunch); 6oz cod, zucchini noodles (dinner). Day 14: 2 fried eggs, mushrooms (breakfast); turkey and cheese slices (lunch); 6oz chicken, 1 cup Brussels sprouts (dinner).
PDF resources emphasize limiting carb intake to 20g daily. Prioritize non-starchy vegetables and healthy fats. Consistent adherence, guided by these detailed plans, supports optimal fat adaptation and weight loss during this phase of the Atkins Diet.
Snack Options for the Atkins 20 Phase
Navigate the Atkins 20 phase with satisfying snack choices, detailed in downloadable PDF guides. When hunger strikes between meals, opt for low-carb options to maintain ketosis. Recommended snacks include: 1oz cheese (cheddar, mozzarella), a handful of macadamia nuts (approx. 10 nuts), 2 celery stalks with 1 tbsp cream cheese, or ½ avocado.
Other suitable choices: hard-boiled egg, pork rinds (check carb count), small serving of olives (approx. 10), or a protein shake made with Atkins-approved protein powder and water. PDF resources highlight the importance of portion control – snacks should be small and infrequent, primarily to bridge gaps between meals.
Avoid carb-heavy snacks like fruits, granola bars, or crackers. Focus on protein and healthy fats to keep you feeling full and energized. Consider pre-portioning snacks to prevent overeating. These readily available options, as outlined in the Atkins Diet PDFs, ensure you stay on track with your 20g carb limit and achieve optimal results.

Remember to always check nutrition labels and prioritize whole, unprocessed foods whenever possible.
Hydration and Electrolytes on the Atkins Diet
Maintaining adequate hydration and electrolyte balance is crucial during the Atkins Diet, particularly in the initial 20 phase, as detailed in comprehensive PDF guides. Reduced carbohydrate intake leads to increased water loss, potentially causing dehydration and electrolyte imbalances. Aim to drink at least 8-10 glasses of water daily.
Supplementing with electrolytes – sodium, potassium, and magnesium – is often recommended. PDF resources suggest adding a pinch of sea salt to water, consuming bone broth, or taking an electrolyte supplement. Symptoms of electrolyte imbalance include fatigue, headaches, muscle cramps, and dizziness.
Avoid sugary drinks like soda and juice, as they contribute to carbohydrate intake. Herbal teas and unsweetened sparkling water are excellent alternatives. Pay attention to your body’s signals and adjust fluid intake accordingly, especially during exercise or in hot weather. Proper hydration and electrolyte management, as emphasized in Atkins Diet PDFs, are vital for minimizing side effects and maximizing success.
Prioritize consistent fluid intake throughout the day, not just when you feel thirsty.
Potential Side Effects and How to Manage Them
The initial phase of the Atkins Diet, as outlined in available 14-day PDF plans, can sometimes cause temporary side effects, often referred to as the “Atkins flu.” This isn’t a true flu, but rather a collection of symptoms resulting from carbohydrate withdrawal. Common symptoms include headache, fatigue, constipation, and irritability.
Adequate hydration and electrolyte intake (sodium, potassium, magnesium) are key to mitigating these effects, as detailed in downloadable guides. Increasing fluid intake and supplementing with electrolytes can significantly reduce discomfort. Constipation can be addressed by ensuring sufficient fiber intake from allowed vegetables and considering a magnesium supplement.
Other potential side effects include bad breath (due to ketosis) and leg cramps. Maintaining good oral hygiene and ensuring adequate electrolyte balance can help manage these. If symptoms are severe or persistent, consult a healthcare professional. PDF resources emphasize listening to your body and adjusting the diet as needed to minimize adverse effects.
Remember, these side effects are usually temporary and subside as your body adapts to using fat for fuel.
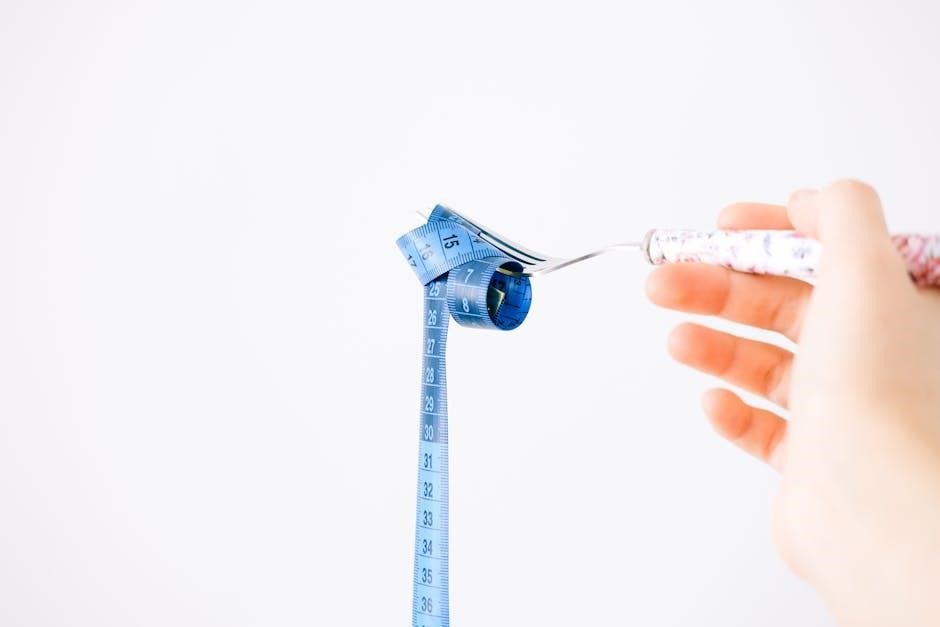
Monitoring Progress and Adjustments
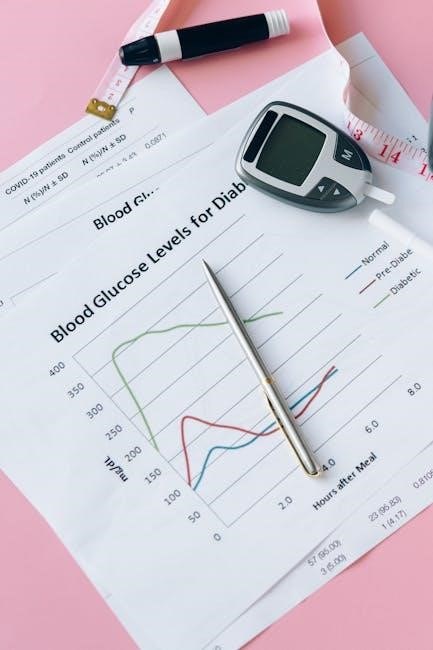
Successfully navigating the 14-day Atkins plan, as detailed in downloadable PDF guides, requires consistent monitoring and a willingness to adjust. Regularly track your weight, measurements (waist, hips), and overall well-being. While weight loss is a primary goal, pay attention to energy levels, sleep quality, and any emerging side effects.
PDF resources often include charts for tracking carbohydrate intake and ketone levels. Monitoring ketones (using urine strips or a blood ketone meter) can confirm you’re in ketosis, the metabolic state where your body burns fat for fuel. Adjust your food choices if ketone levels are consistently low.
Individual responses to the Atkins Diet vary. Some may experience rapid weight loss, while others may progress more slowly. Don’t compare yourself to others; focus on your own progress. If you hit a plateau, re-evaluate your adherence to the plan and consider minor adjustments to your macronutrient ratios.
Remember, the 14-day plan is an initial phase. Continued success relies on transitioning through the subsequent Atkins phases and making sustainable lifestyle changes.
The Role of Protein and Fat in the Atkins Diet
Central to the 14-day Atkins plan, as outlined in available PDF resources, is a strategic shift in macronutrient intake, prioritizing protein and fat. Protein is crucial for preserving lean muscle mass during weight loss, promoting satiety, and supporting metabolic function. Aim for adequate protein intake with each meal, sourced from approved foods listed in the diet guides.

Fat becomes the primary energy source when carbohydrate intake is drastically reduced. However, not all fats are equal. The Atkins Diet emphasizes healthy fats – monounsaturated and polyunsaturated – found in avocados, olive oil, nuts, and fatty fish. These fats support hormone production, brain health, and overall well-being.

PDF meal plans demonstrate how to balance protein and fat intake effectively. Avoid excessive consumption of saturated and trans fats. The goal isn’t a “high-fat” diet, but rather a diet where fat replaces carbohydrates as the dominant fuel source.
Understanding this macronutrient balance is key to achieving successful and sustainable weight loss on the Atkins Diet, as detailed in the provided materials.
Atkins Diet and Biochemical/Clinical Blood Test Parameters (14-Day Observation)
A 14-day observation period, as suggested by research referenced in related PDF documents, reveals notable shifts in biochemical and clinical blood test parameters when following the Atkins Diet. Initial changes often include decreased glucose and insulin levels, reflecting the reduced carbohydrate intake. This is a core principle of the diet, aiming to improve insulin sensitivity.
Lipid profiles may also exhibit alterations, with potential increases in HDL (“good”) cholesterol and decreases in triglycerides. However, LDL (“bad”) cholesterol responses can vary individually. Monitoring these parameters is crucial, and the PDF resources emphasize the importance of regular check-ups.
Ketone levels, indicative of fat metabolism, will typically rise during the initial phases of the diet. Electrolyte balance requires attention, as carbohydrate restriction can lead to increased excretion of sodium, potassium, and magnesium.
These observations highlight the metabolic impact of the Atkins Diet and underscore the need for careful monitoring and potential supplementation, as detailed in the referenced studies and downloadable guides.
Resources and Further Information (PDF Downloads)

To support your 14-day Atkins journey, a wealth of downloadable PDF resources are available. “7-Day Atkins Diet Meal Plan” (100 pages) provides a structured approach to initial implementation, while “14 Day Rapid Fat Loss Diet” (37 pages) offers an accelerated pathway. These guides detail meal planning, food lists, and potential challenges.
For a broader understanding, explore “Lho WMP 1200 Calorie Meal Plan”, offering insights into calorie management within the Atkins framework. The “Copenhagen Diet Plan”, though distinct, provides comparative strategies for carbohydrate restriction. Academic resources, such as the “Mediterranean Diet” study (Front Nutr. 2015), offer context on dietary patterns and health outcomes.
Specific research papers, like those found on jtransplantologiya.ru and ophthalmojournal.com, delve into biochemical changes during dietary interventions. Documents like “SP_14.pdf” (Tskhai V. B., Makarenko T. A., Kelberg V. G.) may contain relevant clinical observations. These PDFs provide a comprehensive foundation for informed decision-making and successful adherence to the Atkins Diet.