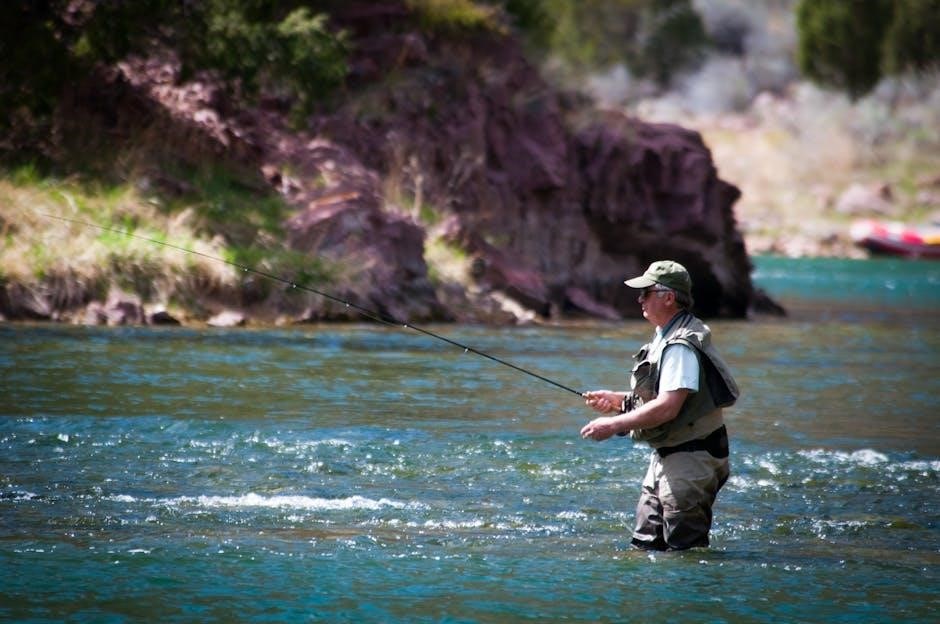
Navigating the world of fly fishing requires understanding fly sizes, crucial for successful angling.
Selecting the correct size directly impacts presentation and fish attraction, mirroring natural insect proportions.
Understanding the Importance of Fly Size
Choosing the appropriate fly size is paramount in fly fishing, directly influencing your success rate. Fish key in on the size of their prey, and a mismatched fly, even with perfect presentation, can be ignored. Accurate fly size selection mimics the natural insects fish are actively feeding on, triggering a strike response.
Larger flies often excel in faster currents or when targeting predatory fish, while smaller flies are ideal for slower waters and selective feeders. Understanding that a size 10 fly is significantly larger than a size 18 fly is fundamental.
Furthermore, fly size impacts the overall presentation; a too-large fly can create excessive drag, while a too-small fly might be overlooked. Mastering fly size selection is a continuous learning process, adapting to varying conditions and insect hatches.
Fly Size and Matching the Hatch
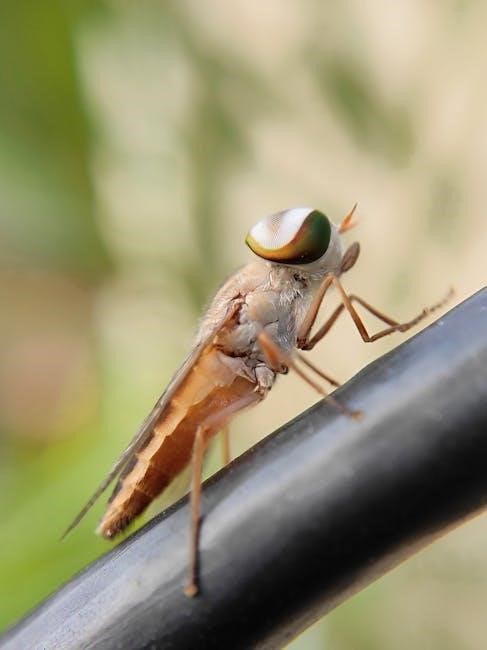
“Matching the hatch” is a cornerstone of effective fly fishing, demanding careful observation of the insects present. This involves identifying not only the insect type but also its size. Observing the natural insects allows anglers to select flies that closely replicate their dimensions.
During a mayfly hatch, for example, noting whether the duns are predominantly size 14 or 16 is crucial. Similarly, when caddis are emerging, matching the size of the pupae and adults is vital.
Successful matching doesn’t always require an exact replica; sometimes, being within one or two sizes is sufficient. However, significant discrepancies can lead to refusals. Skilled anglers carry a range of fly sizes to adapt to fluctuating hatch conditions and ensure a realistic presentation.
Fly Size Chart & Terminology
Understanding fly size involves both numerical designations and ‘X’ ratings for tippet. Charts simplify selection, while terminology clarifies size relationships for effective angling.
Decoding Fly Size Codes (e.g., 10, 12, 14)
Fly sizes are numerically coded, seemingly counterintuitively – a higher number indicates a smaller fly. This system originates from historical hook manufacturing practices. A size 10 fly is larger than a size 12, and a size 14 is even smaller. This scale allows anglers to precisely match the size of the fly to the insect they are imitating.
Generally, sizes range from approximately size 32 (extremely small) to size 2 (very large). Common trout fishing sizes fall between 10 and 20. Bass and warmwater species often require larger flies, typically in the size 4 to 12 range. The specific size chosen depends on the target species, the stage of the insect life cycle being imitated, and current fishing conditions.
Remembering that larger numbers mean smaller flies is key to successful fly selection. Experienced anglers often carry a variety of sizes to adapt to changing conditions and insect hatches.
Understanding ‘X’ Ratings for Tippet and Fly Size
‘X’ ratings represent another system for sizing, primarily used for tippet (the fine line attached to the fly) but also relating to fly size. Similar to numerical sizing, a higher ‘X’ number indicates a smaller diameter tippet. For example, 3X tippet is thicker than 5X. This system is based on a historical standard where 0X was approximately 0.011 inches in diameter, with each increment increasing or decreasing the diameter.
Matching tippet ‘X’ rating to fly size is crucial. A larger fly (e.g., size 8) generally requires a stronger, thicker tippet (e.g., 3X or 4X). Smaller flies (e.g., size 20) demand finer, less visible tippet (e.g., 6X or 7X).
A 4X tippet might be too thick to thread through the eye of a size 20 fly, necessitating a smaller tippet. Understanding this relationship ensures proper presentation and reduces the risk of breaking your line during a fight.
Fly Size for Different Fish Species
Targeting specific fish demands varied fly sizes; trout prefer smaller patterns, while bass and salmon require larger, more substantial offerings for effective angling.
Trout Fly Size Guide
For trout, fly size selection is deeply tied to the specific trout species, water type, and prevalent insect life. Generally, sizes 14-20 cover a broad range of situations. Smaller streams and heavily pressured trout often require delicate presentations with flies in the 18-22 range, mimicking smaller insects. Larger rivers and aggressive trout respond well to sizes 12-16.
During spring hatches of mayflies or caddis, matching the hatch with accurate fly sizes is paramount. Nymphs typically range from size 12-18, while dry flies mirroring emerging insects should be in the 14-20 range. When fishing streamers for larger trout, sizes 6-10 can be highly effective. Remember that clear water necessitates smaller, more subtle flies, while colored water allows for larger, more visible patterns. Adjusting fly size based on observed insect activity and trout behavior is key to success.
Bass Fly Size Guide
Bass fly fishing often utilizes larger fly sizes compared to trout, focusing on imitating baitfish, crustaceans, and larger insects. Sizes 4-10 are commonly employed, depending on the bass species and forage base. For Largemouth and Smallmouth Bass, streamers and poppers in sizes 6-10 effectively mimic baitfish like shad or minnows.
When targeting bass with nymphs or emerging insect patterns, sizes 8-12 can be productive, especially during periods of insect activity. In clear water, downsizing to smaller profiles can increase strikes. Conversely, murky or stained water calls for larger, more visible flies. Clouser Minnows, Woolly Buggers, and Deceiver patterns are popular choices, often tied in various sizes to match local forage. Experimentation is crucial, as bass feeding habits can vary significantly based on location and season.
Salmon & Steelhead Fly Size Guide
Salmon and Steelhead fly fishing demands a diverse range of fly sizes, dictated by river conditions and the life stage of the fish. For early-run steelhead and salmon, larger patterns – sizes 2-6 – effectively attract attention. These often imitate larger prey like sculpins or juvenile salmon. As the season progresses and fish become more selective, downsizing to sizes 8-14 becomes necessary.
Bright, flashy patterns are favored in low-clear water, while darker, more subdued flies work well in stained conditions. Classic patterns like Spey flies, Intruder patterns, and traditional Atlantic salmon flies are tied in a wide spectrum of sizes. Nymphing for steelhead often involves sizes 12-16, mimicking emerging insects. Matching the hatch and understanding the prevalent food sources are key to success when targeting these powerful anadromous fish.

Fly Size Based on Water Conditions
Water clarity significantly influences fly size selection; clear water necessitates smaller flies, while murky conditions demand larger, more visible patterns for effective presentation.
Fly Size for Clear Water
When targeting fish in clear water conditions, subtlety is paramount. Trout and other species become exceptionally selective, scrutinizing any unnatural presentation. Therefore, downsizing your fly is often the key to success. Opt for flies that closely imitate the size and profile of the prevalent insects.
Generally, sizes 16-20 are excellent starting points for dry flies and nymphs in clear streams and rivers. Consider using ultra-fine tippet (6X-7X) to further enhance the natural drift and minimize visibility. Micro-flies, in sizes 22 and smaller, can be incredibly effective when fish are heavily pressured or during delicate hatches.
Remember that clear water allows fish to see everything, so pay close attention to detail. A perfectly matched fly size, combined with a drag-free drift, will significantly increase your chances of fooling even the most cautious fish. Don’t be afraid to experiment with different sizes and patterns until you find what works best on that particular day.
Fly Size for Murky/Colored Water
In murky or colored water, a different approach to fly size is often required. Reduced visibility means fish rely more on scent, vibration, and silhouette to locate prey. Consequently, larger, more visible flies tend to be more effective. Think about presenting a fly that creates a noticeable disturbance, attracting attention in the diminished clarity.
Flies in sizes 12-16 are generally good choices for nymphs and streamers, while dry flies in the 14-18 range can work well. Brighter colors and patterns with contrasting elements can also enhance visibility. Don’t hesitate to use flies with added weight to ensure they sink and stay in the strike zone.
The goal is to give the fish a clear target, even in poor visibility. A larger fly profile helps achieve this, increasing the chances of a strike. Remember to adjust your presentation to account for the increased water flow often associated with murky conditions.
Fly Size for High Water vs. Low Water
Water levels dramatically influence fly selection. High water, characterized by increased flow and volume, demands larger, more robust flies. Fish seek refuge from the current, and a larger fly is easier to spot in the turbulent conditions. Sizes 10-14 for nymphs and streamers, and 12-16 for dries, are often productive. Weighted flies help maintain bottom contact in the stronger currents.
Conversely, low water conditions call for downsizing. Clear, slow-moving water allows fish to scrutinize offerings, making subtlety key. Smaller flies, sizes 16-20 for nymphs and dries, mimic the smaller insects prevalent in these conditions.
Delicate presentations are crucial. Using lighter tippet and avoiding drag will increase your chances of fooling wary fish. Adapting fly size to the water level is fundamental to successful fly fishing.
Matching Fly Size to Insect Life Stages
Effective fly fishing hinges on accurately mimicking insect life stages with appropriately sized flies, from tiny nymphs to larger adult forms.
Fly Size for Mayfly Nymphs
Mayfly nymphs, often residing beneath the water’s surface, demand precise fly size imitations. Generally, sizes range from #10 to #20, though specific hatches dictate the ideal choice. Early season nymphs, larger in size, often require #10 to #14 patterns. As the season progresses and nymphs mature, downsizing to #16 to #20 becomes necessary.
Consider the stream’s characteristics; larger, faster rivers can support larger nymphs, while smaller, slower streams favor smaller imitations. Observing the natural nymphs present in the drift is invaluable. Matching the size, shape, and color closely increases your chances of success. Don’t hesitate to experiment with different sizes within the expected range to determine what the trout are keying on. Remember, subtle adjustments can make all the difference!
Fly Size for Mayfly Duns & Spinners
When mayflies emerge as duns (winged adults) or spinners (returning to lay eggs), fly size remains critical. Dun sizes typically mirror nymph sizes, ranging from #10 to #20, depending on the species and hatch stage. Early hatches often feature larger duns, while later hatches present smaller ones. Spinner falls necessitate even smaller flies, often #18 to #22, as spent spinners are delicate.
Pay attention to the time of day; spinners typically fall in the evening, requiring careful observation of the natural size. Matching the color and silhouette is also vital, as trout readily key in on these subtle details. Carry a range of sizes to adapt to changing conditions and hatch phases. Accurate imitation is key to fooling selective trout during these vulnerable stages.
Fly Size for Caddis Larvae, Pupae & Adults
Caddisflies present a diverse range of sizes throughout their lifecycle, demanding a versatile fly selection. Larvae, dwelling on stream bottoms, are often imitated with sizes #10 to #16, reflecting their varied growth stages. Pupae, drifting towards the surface, require sizes #12 to #18, mimicking their emergence process. Adult caddisflies, fluttering above the water, typically range from #14 to #20, depending on the species.
Consider the specific caddis species present; some, like the Grannom, are larger, while others, like the tiny Midges, are minuscule. Observe the natural insects to determine the predominant size. Emergence patterns also influence fly choice – a heavy emergence calls for pupa imitations, while surface activity demands adult patterns.
Tippet Selection and Fly Size
Matching tippet size to your fly is essential for presentation and knot strength. Smaller flies require finer tippet, while larger flies demand stronger, more visible options.
Choosing the Right Tippet Size for Your Fly
Selecting the appropriate tippet size is paramount for a natural drift and successful hooksets. Generally, a good starting point is to match the tippet size to the recommended range for the fly you’re using. Smaller flies, typically sizes 18 and above, often require finer tippets like 6X or 7X to minimize visibility underwater. Larger flies, such as those size 12 or smaller, can handle heavier tippets like 3X or 4X.
However, consider the fish’s size and the water conditions. For larger trout or bass, a slightly heavier tippet might be necessary to turn their mouths and prevent break-offs. In clear water, stealth is key, so opting for a lighter tippet is advisable, even if it means sacrificing some strength. Conversely, in murky or colored water, fish rely more on feel than sight, allowing for a slightly heavier tippet without compromising your presentation.
Remember that tippet size is often expressed using an ‘X’ rating system, where a higher number indicates a smaller diameter. Experimentation is crucial to find the optimal balance between invisibility, strength, and presentation for your specific fishing situation.
Knot Strength and Tippet Size Considerations
Knot selection significantly impacts your terminal tackle’s strength; a poorly tied knot can drastically reduce it, regardless of tippet size. Improved Clinch, Davy, and Uni-knots are popular choices, but practice tying them correctly to achieve maximum strength. Consider that each knot weakens the tippet to some degree.
When downsizing tippet for finesse presentations, knot strength becomes even more critical. A smaller diameter tippet is inherently weaker, so a reliable knot is essential. Regularly check your knots for wear and retie frequently, especially after catching fish or snagging on obstructions.
Furthermore, the fly’s eyelet size must accommodate the tippet. A 4X tippet might not fit through a size 20 fly’s eyelet, necessitating a smaller fly or a larger tippet. Balancing tippet size, knot strength, and fly compatibility is key to a secure and effective setup, minimizing lost fish and maximizing angling success.

Advanced Fly Size Considerations
Experienced anglers adjust fly size based on silhouette, water clarity, and insect behavior, employing micro-flies for selective trout during challenging hatches and conditions.
The Role of Fly Silhouette
Understanding a fly’s silhouette is paramount for fooling wary fish. It’s not just about matching the insect’s size, but also its overall shape and profile as viewed from below. A fly’s silhouette must convincingly mimic the natural insect’s shadow on the stream bed.
Consider that different insect life stages present distinct silhouettes. A nymph, for example, has a different profile than a mayfly dun or spinner. Factors like fly body thickness, hackle length, and wing shape all contribute to the overall silhouette.
In clear water, fish can easily detect discrepancies in silhouette. A bulky fly presented to a trout feeding on delicate mayflies will likely be rejected. Conversely, a tiny fly in fast water might be lost in the current and not noticed.
Anglers often adjust fly patterns – trimming hackle, modifying wings, or using different materials – to refine the silhouette and achieve a more natural presentation. Observing how natural insects drift and appear underwater is key to replicating their silhouette effectively.
Micro-Flies and Finicky Fish
When fish become selective, particularly during light insect hatches or in heavily pressured waters, “micro-flies” become essential. These are incredibly small flies, often size 20 or smaller, designed to imitate emerging insects with pinpoint accuracy. They demand precise presentation and delicate tackle.
Finicky trout often ignore larger, more visible flies, preferring the subtle realism of a micro-fly. These flies require lighter tippets (6X-8X) to ensure natural drift and avoid spooking the fish. The challenge lies in maintaining control of such a small fly in the current.
Successful micro-fly fishing necessitates careful observation of the hatch, identifying the exact size and profile of the insects. It also requires a slow, deliberate approach, focusing on a drag-free drift. Don’t underestimate the power of downsizing when facing challenging conditions!
Adjusting Fly Size During a Hatch
Observing a hatch closely is paramount; insect sizes change as the hatch progresses. Initially, larger flies imitating emerging insects often work best. As the hatch peaks and spinners appear, downsizing is crucial. Matching the size of the prevalent insect stage dramatically increases your chances of success.
Start with a fly size that closely resembles the majority of insects you see. If fish are consistently ignoring your offering, experiment with slightly smaller or larger sizes. A subtle change – going from a 14 to a 16, for example – can make all the difference.
Pay attention to the fish’s behavior. Are they rising confidently, or are they selectively sipping insects off the surface? Confident rises suggest less precise matching is needed, while selective feeding demands a perfect imitation in size and profile.
Resources for Fly Size Information
Numerous online charts and experienced local fly shop staff provide invaluable guidance on fly sizing. Utilize these resources to refine your angling approach.
Online Fly Size Charts
A wealth of digital resources offers comprehensive fly size charts, proving incredibly beneficial for both novice and seasoned anglers. These charts typically categorize flies by insect type – Mayflies, Caddis, Stoneflies – and then detail appropriate sizes for each life stage: nymph, pupa, and adult. Many websites also correlate fly size with recommended tippet sizes, streamlining your rigging process.
Furthermore, some charts are species-specific, offering tailored recommendations for Trout, Bass, Salmon, and Steelhead. Interactive charts allow you to filter by water conditions (clear, murky, high, low) to further refine your selection. Remember to cross-reference information from multiple sources, as regional variations in insect hatches can influence optimal fly sizes. Websites like Fly Fisherman and Trout Unlimited often host detailed guides and charts, providing a solid starting point for your research. Always consider these charts as guidelines, adapting based on observation and experience.
Local Fly Shop Expertise
Beyond online resources, your local fly shop represents an invaluable asset when determining appropriate fly sizes. Knowledgeable staff possess firsthand insights into current hatches and local fish behavior, offering tailored recommendations that generic charts simply can’t match. They understand the nuances of nearby rivers and streams, including prevalent insect species and their seasonal life cycles.
Don’t hesitate to ask about specific patterns that are currently “hot” or to describe the conditions you’ll be facing. Experienced fly shop employees can help you select not only the correct size but also the appropriate weight and color. They can also provide advice on tippet selection and knot tying, ensuring a more effective presentation. Building a relationship with your local fly shop fosters a continuous learning process, enhancing your overall fly fishing success.