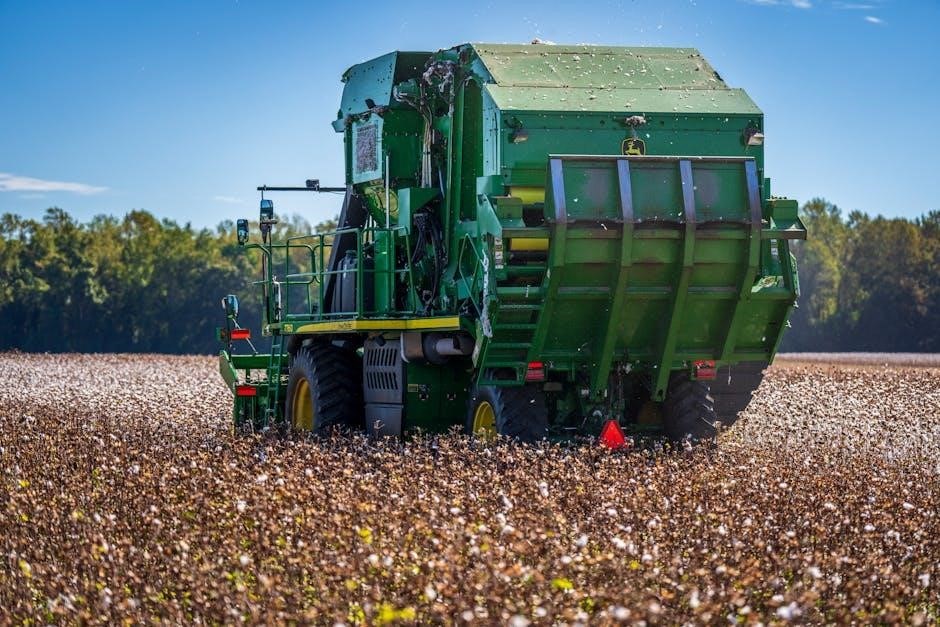
Category Archives: Instructions

raptor liner instructions

Raptor Liner is a durable, 2-part urethane coating for protecting surfaces like truck beds, Jeeps, and more․ This guide provides step-by-step instructions for a professional finish․

Overview of Raptor Liner

Raptor Liner is a high-performance, 2-part urethane coating designed to provide exceptional protection for various surfaces, including metal, wood, and plastic․ It is widely used for truck beds, Jeeps, and other vehicles due to its durability and resistance to scratches, dents, and UV exposure․ The liner is known for its strong adhesion and waterproof properties, making it ideal for both outdoor and heavy-duty applications․ Available as a DIY kit, Raptor Liner comes with everything needed for application, including the coating, spray gun, and sandpaper․ Its versatility and ease of use make it a popular choice for enthusiasts and professionals alike․

Importance of Proper Application

Importance of Proper Application

Proper application of Raptor Liner is crucial for achieving a durable, long-lasting finish․ Improper techniques can lead to peeling, uneven texture, or reduced protection․ Ensuring the surface is clean, dry, and properly prepared is essential for strong adhesion․ Following the recommended mixing ratios and application instructions helps maintain the coating’s integrity․ Light, even coats with adequate drying time between layers are vital for a smooth, professional result․ Neglecting these steps can compromise the liner’s performance, leading to premature wear and potential damage․ Proper application ensures the Raptor Liner provides the protection and appearance you expect․

Materials Needed

The Raptor Liner kit includes 3 liters of coating, a spray gun, and sandpaper․ Additional tools like gloves, goggles, and a pressure washer are recommended for safe, effective application․

Raptor Liner Kit Contents

The Raptor Liner kit typically includes four bottles of coating, totaling approximately 3 liters․ The kit also provides a spray gun for application and sandpaper for surface preparation․ Additional tools like gloves and goggles are recommended for safety․ Some kits may vary, but the core components are designed for a complete DIY application․ Ensure all items are included before starting the project to avoid delays․ Proper use of the provided materials will help achieve a professional-quality finish․ Always check the kit for any missing items and refer to the instructions for specific application requirements․

Additional Tools and Safety Gear

For a successful Raptor Liner application, you’ll need additional tools and safety gear․ A high-volume, low-pressure (HVLP) spray gun or the provided gun is essential for even coverage․ Wear protective gloves, goggles, and a mask to avoid skin and respiratory exposure․ Sandpaper (80-120 grit) is necessary for surface preparation, while acetone or a solvent is recommended for cleaning․ A pressure washer can also be useful for deep cleaning․ Ensure proper ventilation by working in a well-ventilated area or using fans․ Keep rags and a fire extinguisher nearby for safety․ Having all tools ready will streamline the application process and ensure a professional finish․

Surface Preparation

Proper surface preparation is crucial for a durable Raptor Liner application․ Clean the surface thoroughly with water and soap, then sand it with 80-120 grit sandpaper․ Remove all hardware and brackets to ensure a smooth, even coating․ A clean, dry, and properly sanded surface ensures optimal adhesion and a professional finish․

Cleaning the Surface

Cleaning the surface is the first step in preparing for Raptor Liner application; Wash the area thoroughly with water and mild detergent to remove dirt, grime, and oils․ Rinse completely and allow the surface to dry․ This ensures a clean base for the liner to adhere properly․ Avoid using harsh chemicals or abrasive cleaners that might damage the material․ Once dry, inspect the surface for any remaining contaminants and address them before proceeding․ A clean surface is essential for optimal adhesion and a durable finish․ Proper cleaning sets the foundation for a successful application․

Sanding and Scuffing

Sanding and scuffing are critical steps to ensure proper adhesion of the Raptor Liner․ Use 80-180 grit sandpaper to lightly scuff the surface, removing any existing clear coat or smooth finishes․ Focus on creating a rough texture without being overly aggressive, as this can damage the material․ Sand in a consistent, even pattern, working in small sections․ After sanding, wipe away dust and debris with a clean cloth or compressed air․ Scuffing promotes better adhesion and helps the liner bond securely to the surface․ This step is essential for achieving a long-lasting, durable finish․

Removing Hardware and Brackets

Before applying the Raptor Liner, remove all hardware, brackets, and accessories from the surface․ This ensures the liner adheres evenly and prevents uneven textures․ Take photos or notes for easy reinstallation later․ Use basic tools like wrenches or screwdrivers to detach components․ For areas with stubborn bolts or clips, apply penetrating oil to avoid stripping․ Once removed, sand the exposed metal to ensure proper adhesion․ This step is crucial for achieving a smooth, professional-looking finish․ Proper hardware removal prevents peeling and ensures the liner bonds securely to the surface․

Application Process

The application process involves mixing the Raptor Liner, spraying with proper technique, applying recommended coats, and allowing adequate drying time between layers for optimal results․

Mixing the Raptor Liner

Mixing Raptor Liner involves combining the base material with the hardener, following the instructions carefully to achieve the right consistency for proper adhesion and durability․ Start by adding the hardener to the base, then mix thoroughly with a drill mixer․ Ensure the mixture reaches the bottom of the container to prevent unmixed material․ Proper mixing is crucial for the liner’s performance․ Failure to mix correctly can lead to adhesion issues and reduced durability․ Always follow the product’s guidelines for the best results possible․

Spraying Technique

When spraying Raptor Liner, use an HVLP gun set to 40-60 PSI for optimal results․ Maintain a distance of about 20cm from the surface and move the gun in steady, sweeping motions to ensure even coverage․ Apply the liner in thin, consistent coats, allowing the recommended drying time between layers․ Proper technique ensures a smooth, professional finish․ Avoid excessive pressure, which can create uneven textures․ Practice on a test surface first to achieve the desired pattern and flow․ This method ensures durability and a long-lasting protective finish for your truck bed or other surfaces․

Recommended Coats and Drying Times

Raptor Liner typically requires 2-3 thin, even coats for optimal durability․ Allow 45-60 minutes of flash time between coats at 68°F․ For faster drying, use an oven at 140°F for 30 minutes․ Air dry completely for 12 hours before exposure․ Full curing takes 24 hours for maximum protection․ Light-duty use is possible after 12 hours, but full cure ensures long-lasting results․ Follow these guidelines for a professional, durable finish․

Tinting and Coloring

Raptor Liner can be tinted to match your vehicle’s color using U-Pol colorants․ Mix thoroughly before application for consistent results․ This customization enhances durability and aesthetics․

How to Tint Raptor Liner

To tint Raptor Liner, select your desired color and mix it with the liner according to the manufacturer’s instructions․ Start with a small amount of tint to achieve the desired shade, as it’s easier to add more tint than to remove excess․ Mix thoroughly to ensure an even consistency․ Before applying, test the color on a small, inconspicuous area to confirm the result․ Once satisfied, apply the tinted liner using a spray gun or brush, following the recommended application techniques․ Allow the base coat to dry completely before spraying the tinted liner for optimal adhesion and finish․

Color Matching Tips

When tinting Raptor Liner, it’s essential to test the color on a small, inconspicuous area first to ensure it matches your desired shade․ Use a high-quality color chart or sample swatches to guide your selection․ For exact matches, consider consulting a professional or using a spectrophotometer․ Apply a base coat of primer first to ensure the color adheres evenly and appears true to tone․ Avoid mixing too much tint at once, as this can lead to waste․ Opt for gradual adjustments, adding small amounts of tint until you achieve the perfect hue․ Proper lighting conditions are crucial for accurate color matching․

Advanced Techniques

Advanced techniques include layering for enhanced durability and creating custom textures or patterns․ These methods ensure a professional finish and long-lasting protection for various surfaces․

Layering for Added Durability

Layering is a key technique to enhance the durability of Raptor Liner․ Start with a thin base coat, allowing it to dry according to the recommended time․ Subsequent layers should be applied evenly, ensuring proper coverage․ For optimal results, maintain the recommended air pressure of 60 PSI and avoid over-saturation․ Allow each coat to cure fully before applying the next, typically 45-60 minutes․ This method ensures a strong, long-lasting finish․ Proper layering prevents peeling and increases resistance to wear and tear, making it ideal for high-duty applications․ Always follow the manufacturer’s guidelines for best outcomes․

Custom Textures and Patterns

Custom textures and patterns can be achieved with Raptor Liner by adjusting the spray technique and material flow․ For a smoother finish, maintain consistent air pressure and gun distance․ To create a textured look, vary the spray pattern or use a lower PSI setting․ Experiment with layering different colors or tints for unique effects․ Masking or stencils can also be used to create geometric patterns or logos․ For intricate designs, apply multiple thin coats, allowing each to dry before adding the next․ This method ensures a personalized and durable finish tailored to your project’s needs․ Creativity and precision are key to achieving desired results․

Troubleshooting Common Issues

Common issues with Raptor Liner include peeling, bubbling, or uneven textures․ Ensure proper surface preparation, correct application techniques, and ideal environmental conditions to avoid these problems․

Addressing Peeling or Bubbling

If peeling or bubbling occurs, it’s often due to improper surface preparation or uneven application․ Lightly sand the affected area using 120-grit sandpaper to smooth it out․ Ensure the surface is clean and dry before reapplying the Raptor Liner․ Check for air pockets by gently pressing the area; if bubbling persists, remove the coating completely and restart․ Avoid using high-pressure washes, as they can damage the liner further․ Proper adhesion and environmental conditions are crucial to prevent these issues․ Always follow the manufacturer’s instructions for application and drying times to achieve a durable, long-lasting finish․

Fixing Uneven Texture

Uneven texture in Raptor Liner can result from inconsistent spraying or material flow․ To fix this, lightly sand the area with 120-180 grit sandpaper until smooth․ Repaint using short, controlled bursts, maintaining consistent air pressure and distance․ Adjust your spray gun to ensure an even pattern․ Avoid over-saturating the surface, as this can lead to drips or thick spots․ Allow the recommended drying time between coats․ If texture issues persist, check your equipment settings and technique․ Proper application and surface preparation are key to achieving a uniform finish․ Always refer to the manufacturer’s guide for optimal results․

With proper preparation and application, Raptor Liner provides a durable, long-lasting protective coating․ Follow these steps for professional results and maintain your surface with care;

Final Tips for a Successful Application

For a flawless Raptor Liner application, ensure all surfaces are clean and properly prepped․ Test the spray gun on cardboard to achieve the desired pattern․ Apply thin, even coats, allowing adequate drying time between layers․ Avoid over-saturating the surface, as this can lead to peeling․ Maintain consistent air pressure and temperature for optimal results․ After application, let the liner cure fully before exposing it to moisture or heavy use․ Regularly clean the liner with mild soap and water to maintain its appearance and durability․ Following these tips will ensure a professional-grade finish that lasts for years․

Maintenance and Care

Regular maintenance ensures the longevity of your Raptor Liner․ Clean the surface with mild soap and water, avoiding abrasive cleaners or high-pressure washes․ Inspect the liner periodically for damage or wear․ Touch up any damaged areas promptly to prevent further deterioration․ Avoid exposing the liner to harsh chemicals or oils, as they can degrade the coating; For tough stains, use a soft-bristle brush and mild detergent․ Rinse thoroughly after cleaning to remove residue․ Regular care will maintain the liner’s durability and appearance, protecting your surfaces for years to come․

regressor instruction manual chapter 84

1․1 Overview of Chapter 84

Chapter 84 of Regressor Instruction Manual marks the climax of the Third Job Arc‚ focusing on Giyoung’s struggle to adapt and survive in a world filled with crises and challenges․

Chapter 84 of Regressor Instruction Manual delves into the climactic stages of the Third Job Arc‚ marking a pivotal moment in Giyoung’s journey․ The chapter explores his relentless struggle to survive in a world fraught with crises‚ where his abilities are pushed to the limit․ Giyoung‚ a pragmatist‚ navigates the challenges of his newfound role and the complexities of party dynamics‚ revealing his resourcefulness and determination․ The narrative highlights the tension between his low initial talent and his strategic mindset‚ showcasing how he adapts to overcome adversity․ This chapter also sets the stage for future developments‚ as the protagonist’s decisions have far-reaching consequences․ The interplay of survival instincts‚ moral dilemmas‚ and the pursuit of power creates a gripping storyline that keeps readers engaged and invested in Giyoung’s evolution․

1․2 Significance in the Larger Narrative

Chapter 84 of Regressor Instruction Manual holds profound significance within the overarching story‚ serving as a bridge between the Third Job Arc and future chapters․ It encapsulates the themes of survival and adaptation‚ highlighting Giyoung’s pivotal decisions that shape the narrative’s trajectory; The chapter’s climax not only resolves key conflicts but also sets the stage for upcoming arcs‚ such as the Cursed Shrine Arc‚ ensuring continuity and suspense․ Giyoung’s moral dilemmas and strategic choices underscore his growth‚ reflecting the broader exploration of pragmatism and resilience․ This chapter is crucial for understanding the protagonist’s evolution and the escalating stakes‚ making it a cornerstone in the series’ progression․ Its impact reverberates through subsequent chapters‚ solidifying its importance in the story’s intricate structure․

Story Arcs

Chapter 84 explores key arcs‚ including the Third Job Arc‚ highlighting character growth‚ challenges‚ and pivotal events that drive the narrative forward with intense progression and climax․

2․1 The Third Job Arc (Chapters 75-84)

The Third Job Arc‚ spanning chapters 75 to 84‚ is a pivotal segment of Regressor Instruction Manual․ It delves into Giyoung’s journey as he navigates the complexities of obtaining his third job‚ a critical milestone in his survival within the harsh world he inhabits․ This arc is marked by intense challenges‚ strategic decisions‚ and significant character development․ Giyoung’s pragmatism is tested as he confronts numerous obstacles‚ showcasing his ability to adapt and thrive despite the odds․ The arc also explores themes of regression and the implications of power in shaping one’s destiny․ The climax of this arc in chapter 84 reveals crucial insights into Giyoung’s growth and the broader narrative’s direction‚ setting the stage for future developments․

2․2 Progression and Challenges in the Arc

The progression within the Third Job Arc is fraught with challenges that test Giyoung’s resolve and ingenuity․ Each chapter builds upon the last‚ intensifying the stakes as Giyoung faces formidable adversaries and complex puzzles․ The narrative highlights his strategic mindset‚ showcasing how he leverages limited resources to overcome seemingly insurmountable obstacles․ Additionally‚ the arc introduces unexpected twists that force Giyoung to reevaluate his alliances and strategies․ These challenges not only drive the plot forward but also deepen the reader’s understanding of Giyoung’s character‚ revealing both his vulnerabilities and strengths․ The progression is meticulously crafted‚ ensuring a compelling and unpredictable journey that culminates in the pivotal events of chapter 84․

2․3 Climax and Resolution of the Arc

The Third Job Arc reaches its climax in Chapter 84‚ with Giyoung facing a critical juncture that tests his resolve and strategic prowess․ The resolution unfolds as Giyoung uncovers the truth behind Park Deok-Gu’s deceit‚ revealing a complex web of motivations that reshape the party’s dynamics․ The chapter delivers a tense confrontation‚ where Giyoung’s pragmatic approach clashes with the escalating chaos․ The resolution not only ties up immediate conflicts but also sets the stage for future challenges‚ leaving readers with a sense of anticipation․ The arc’s conclusion underscores Giyoung’s growth and the harsh realities of survival in this unforgiving world‚ reinforcing the narrative’s central themes of adaptation and resilience․

Key Characters

The narrative revolves around Giyoung‚ a pragmatic protagonist navigating a world of crises․ Kim Hyun-Sung and Park Deok-Gu play pivotal roles‚ each influencing the story’s direction and conflicts․

3․1 Protagonist: Giyoung

Giyoung is the central figure of Regressor Instruction Manual‚ a pragmatic protagonist thrust into a world of survival and crises․ His abilities are initially subpar‚ making his journey fraught with challenges․ Unlike typical heroes‚ Giyoung isn’t driven by idealism but by sheer will to survive․ His decisions often reflect a utilitarian approach‚ prioritizing strength and alliances over morality․ Despite his limitations‚ he demonstrates remarkable resourcefulness‚ leveraging intellect and strategy to navigate adversities․ Giyoung’s character serves as a stark contrast to traditional power-fantasy protagonists‚ emphasizing realism and adaptability․ His development throughout Chapter 84 highlights his growth from a vulnerable individual to a calculated thinker‚ making him a compelling and relatable anti-hero in the narrative․

3․2 Kim Hyun-Sung: Role and Development

Kim Hyun-Sung plays a pivotal role in Giyoung’s journey‚ offering guidance and support amidst the chaos․ His character serves as a mentor figure‚ providing crucial advice that aids Giyoung in navigating the challenges of the Third Job Arc․ Hyun-Sung’s interactions with Giyoung reveal his own motivations and depth‚ showcasing a blend of wisdom and hidden agendas․ In Chapter 84‚ his consultations with Park Deok-Gu highlight his influence on key decisions‚ demonstrating his strategic importance․ Hyun-Sung’s development underscores his adaptability and foresight‚ making him an essential ally in Giyoung’s quest for survival․ His character adds layers to the story‚ illustrating how supporting figures can shape the protagonist’s path in unexpected ways․

3;3 Park Deok-Gu: Motivations and Impact

Park Deok-Gu’s actions in Chapter 84 are driven by a complex mix of self-interest and strategic planning․ His decision to withhold information and manipulate events stems from a desire to strengthen his own position within the party․ Deok-Gu’s motivations are rooted in a pragmatic approach to survival‚ often leading him to make tough choices that impact the group’s dynamics․ His influence is significant‚ as his actions create tension and force Giyoung and others to adapt․ Despite his questionable methods‚ Deok-Gu’s impact on the narrative is undeniable‚ pushing the story toward unexpected twists and challenges․ His character serves as a reminder that in a world of regression‚ even allies can have hidden agendas․

Themes and Motifs

Chapter 84 explores themes of survival‚ pragmatism‚ and the concept of regression‚ with the third job change symbolizing transformation and adaptation in a world filled with challenges․

4․1 Survival and Pragmatism

Survival and pragmatism are central themes in Regressor Instruction Manual Chapter 84‚ as Giyoung navigates a world filled with crises and challenges․ His ability to adapt and make tough decisions underscores his pragmatic nature‚ emphasizing that survival often requires compromise and strategic thinking․ The narrative highlights how Giyoung’s low initial abilities force him to rely on intelligence and resourcefulness rather than brute strength․ This theme is further reinforced by the contrast between his pragmatic approach and the more idealistic perspectives of other characters․ The chapter illustrates that in a world where power is everything‚ survival depends on one’s ability to make difficult choices and prioritize self-preservation․ This mindset shapes Giyoung’s actions and decisions‚ making him a compelling example of pragmatism in action․ The focus on survival also underscores the harsh realities of the world he inhabits‚ where morality often takes a backseat to necessity․ Through Giyoung’s journey‚ the chapter explores how pragmatism can be both a strength and a burden‚ influencing relationships and the broader narrative․ The interplay between survival instincts and moral dilemmas adds depth to the story‚ making this theme a pivotal element of the chapter’s narrative․

4․2 The Concept of Regression

The concept of regression in Regressor Instruction Manual Chapter 84 is explored through Giyoung’s unique ability to revert to a previous state‚ offering a fresh perspective on personal growth and strategy․ This power allows him to learn from past mistakes‚ optimizing his decisions and enhancing his survival chances․ Regression is portrayed not just as a tool for retrying events but as a means of gaining insight and adapting to challenges․ The chapter delves into the psychological and strategic implications of this ability‚ showing how it influences Giyoung’s approach to conflicts and relationships․ The narrative emphasizes that regression is both a gift and a burden‚ requiring careful use to avoid unnecessary complications․ This motif ties into the broader themes of survival and pragmatism‚ illustrating how regression can be a double-edged sword in a world where knowledge and experience are paramount․ Through Giyoung’s experiences‚ the chapter highlights the potential and pitfalls of regression‚ making it a key narrative device in the story’s progression․ The concept also raises questions about the nature of time and decision-making‚ adding layers to the plot and character development․ The manner in which regression is utilized underscores the protagonist’s resourcefulness and the story’s unique take on the regression genre․ Overall‚ the exploration of regression in this chapter enriches the narrative and deepens the reader’s understanding of the protagonist’s journey․

4․3 The Third Job Change Motif

The Third Job Change Motif in Regressor Instruction Manual Chapter 84 signifies a pivotal shift in the characters’ abilities and roles‚ marking a departure from their previous limitations․ This transformation is central to the narrative‚ as characters like Giyoung and his party members unlock new potential‚ enabling them to confront escalating challenges․ The motif underscores themes of growth and adaptation‚ highlighting the importance of evolution in a high-stakes world․ The process of obtaining the Third Job is depicted as both a privilege and a burden‚ requiring significant effort and strategic foresight․ Through this motif‚ the chapter explores how these changes impact the characters’ dynamics and the overall plot trajectory․ The Third Job Change not only enhances their power but also reveals deeper aspects of their personalities and motivations‚ making it a cornerstone of the chapter’s development and a catalyst for future events․ This motif serves as a testament to the narrative’s emphasis on progression and self-improvement‚ setting the stage for the story’s evolving conflicts and resolutions․ The manner in which characters embrace or struggle with their new roles adds layers to the plot‚ enriching the reader’s engagement with the story․ Ultimately‚ the Third Job Change motif in Chapter 84 is a defining element that drives both character growth and the advancement of the narrative․

Supporting Characters

Supporting characters in Regressor Instruction Manual Chapter 84 play pivotal roles‚ with party members collaborating to overcome challenges and antagonists adding depth to the narrative․

5․1 Party Members and Their Roles

In Regressor Instruction Manual Chapter 84‚ party members play crucial roles in navigating the challenges of the Third Job Arc․ Each character contributes uniquely to the group’s survival and growth․ Kim Hyun-Sung’s strategic thinking and Sun Hee-Young’s legendary potential are instrumental in overcoming obstacles․ Park Deok-Gu’s questionable motives add tension‚ while Giyoung’s pragmatism keeps the group focused․ The dynamic interactions between these characters highlight their strengths and weaknesses‚ showcasing how their collective efforts are essential to progressing through the arc․ Their roles not only drive the plot but also deepen the narrative‚ emphasizing teamwork and adaptability in a high-stakes world․

5․2 Antagonists and Their Influence

In Regressor Instruction Manual Chapter 84‚ antagonists significantly shape the narrative‚ creating obstacles that test the party’s resolve․ Their actions drive the plot’s tension‚ forcing Giyoung and his allies to adapt and strategize․ The antagonists’ motivations‚ often rooted in self-interest or hidden agendas‚ add layers of complexity to the story․ Park Deok-Gu’s deceitful actions‚ for instance‚ challenge the party’s trust dynamics․ These characters’ influence pushes the protagonists to grow‚ highlighting themes of survival and pragmatism․ Their presence underscores the harsh realities of the world‚ where even allies can become threats․ This dynamic keeps readers engaged‚ as the line between friend and foe blurs‚ intensifying the chapter’s dramatic progression and its impact on the overall narrative․

Impact on the Narrative

Chapter 84 significantly advances the story‚ resolving key arcs while setting the stage for future developments․ Its climax strengthens the narrative’s foundation‚ deepening engagement and anticipation․

6․1 Character Development and Growth

In Chapter 84 of Regressor Instruction Manual‚ the protagonist Giyoung undergoes significant character development‚ showcasing his pragmatism and determination to strengthen his position․ His ability to navigate the challenges of the Third Job Arc highlights his growth as a survivor in a harsh world․ The chapter also delves into the complexities of supporting characters like Park Deok-Gu‚ whose motivations and manipulations reveal deeper layers of his personality․ Kim Hyun-Sung’s role in guiding the party further solidifies his importance to the group’s dynamics․ The interactions and decisions made in this chapter underscore the characters’ resilience and adaptability‚ setting the stage for their future actions and relationships․

6․2 Plot Advancements and Twists

Chapter 84 of Regressor Instruction Manual introduces pivotal plot advancements‚ with Giyoung uncovering the truth behind Park Deok-Gu’s deception․ This revelation not only deepens the mystery but also escalates tensions within the group․ The chapter also explores the potential of Sun Hee-Young‚ hinting at her legendary abilities‚ which could alter the dynamics of the story․ Additionally‚ the progression of the Third Job Arc reaches a critical point‚ setting the stage for future conflicts and alliances․ The introduction of new antagonists and unexpected betrayals adds layers of complexity to the narrative‚ ensuring that the story remains engaging and unpredictable․

6․3 Setting Up Future Chapters

Chapter 84 effectively lays the groundwork for future chapters‚ introducing unresolved conflicts and unanswered questions․ The revelation of Park Deok-Gu’s motives and the emergence of Sun Hee-Young’s potential set the stage for significant character development․ The progression of the Third Job Arc hints at upcoming challenges and transformations‚ particularly as the party members’ new roles begin to shape the narrative․ The chapter also subtly introduces the Cursed Shrine Arc‚ teasing forthcoming encounters with powerful adversaries and mysterious locales․ These elements collectively create anticipation‚ ensuring that readers remain invested in the story’s progression and the characters’ evolving journeys․

Chapter 84 of Regressor Instruction Manual serves as a pivotal moment‚ wrapping up key arcs while setting the stage for future growth and unresolved conflicts in Giyoung’s journey․

7․1 Summary of Key Points

Chapter 84 of Regressor Instruction Manual concludes the Third Job Arc‚ showcasing Giyoung’s pragmatic approach to survival and growth․ The chapter highlights his ability to adapt amidst crises‚ emphasizing themes of resilience and strategic decision-making․ Key characters like Kim Hyun-Sung and Park Deok-Gu play pivotal roles‚ with Deok-Gu’s motivations adding depth to the narrative․ The climax of the arc underscores the importance of regression as a motif‚ tying into Giyoung’s journey of self-improvement․ While some plot threads reach resolution‚ others are left open‚ setting the stage for future chapters․ This chapter serves as a turning point‚ reinforcing the story’s focus on survival and character development while maintaining its engaging pace and intricate world-building․

7․2 Reflection on the Chapter’s Importance

Chapter 84 of Regressor Instruction Manual holds significant importance as it concludes the Third Job Arc‚ offering a satisfying resolution while setting the stage for future developments․ Giyoung’s journey through regression and survival is central‚ showcasing his growth from a weaker player to a strategic thinker․ The chapter emphasizes themes of pragmatism and resilience‚ highlighting how characters adapt to challenges․ Park Deok-Gu’s actions and Kim Hyun-Sung’s role add layers to the narrative‚ illustrating the complexity of alliances and rivalries․ This chapter not only ties up key plot points but also deepens the story’s emotional core‚ making it a pivotal moment in the series․ Its impact lies in its ability to balance action with character development‚ ensuring readers remain invested in Giyoung’s evolving story․

instructions for cotton candy machine

Unpacking and Assembling the Cotton Candy Machine

Carefully unpack the cotton candy machine from its box, ensuring all components are included. Assemble the machine following the manufacturer’s instructions provided. Attach the floss head and collection bowl securely.

1.1. Carefully Remove the Machine from Packaging

Start by gently unpacking the cotton candy machine from its box to avoid damaging any components. Ensure all parts, including the machine, floss head, bowl, and instructions, are accounted for. Handle the machine with care, as moving parts may be fragile. Place the machine on a flat, stable surface to prepare for assembly. Verify that no components are bent or damaged during shipping before proceeding to the next steps.

  • Gently lift the machine out of the packaging.
  • Inspect for any visible damage or missing parts.
  • Place the machine on a stable, flat surface.

1.2. Assemble the Machine According to Manufacturer Instructions

Follow the manufacturer’s guide to assemble the cotton candy machine accurately. Attach the floss head and bowl securely, ensuring all parts align properly; Tighten any screws or clips as instructed to maintain stability. Double-check that the machine is level and all components are firmly connected. If unsure, refer to the provided diagrams or instructional videos for clarification. Proper assembly is crucial for safe and efficient operation.

  • Attach the floss head to the machine base.
  • Secure the collection bowl in place.
  • Ensure all parts are tightly fastened.

1.3. Attach the Floss Head and Bowl

Attach the floss head to the machine base by aligning the connectors and securing it with clips or screws as per the instructions. Next, place the collection bowl over the floss head, ensuring it fits snugly. Gently press the bowl into position and verify that it is stable. Make sure all parts are aligned properly and no gaps exist. This ensures even cotton candy distribution and prevents sugar from spilling during operation. Double-check that the bowl is securely attached before use.

  • Align the floss head with the machine base.
  • Secure the bowl firmly over the floss head.
  • Ensure the setup is stable and even.

Preparing the Machine for Use

Plug in the machine, place it on a stable surface, and prepare the sugar container. Allow the machine to warm up before adding sugar.

2.1. Plug in the Machine and Allow It to Warm Up

First, plug the cotton candy machine into a nearby electrical outlet. Ensure the power switch is in the “off” position before plugging it in. Once plugged in, turn the switch to the “on” position and allow the machine to warm up for about 2-5 minutes; This heating period is crucial for the machine to reach the optimal temperature needed to melt and spin sugar into floss. Keep the area clear during this process to ensure smooth operation.

2.2. Ensure the Machine is on a Stable, Level Surface

Place the cotton candy machine on a flat, stable, and level surface to ensure proper operation. An uneven surface may cause vibration or imbalance, affecting performance. Use a level tool to confirm the surface is even. Position the machine on a heat-resistant countertop or table, away from flammable materials. Ensure there are no obstructions around the machine, especially near the spinning head or collection bowl, to allow smooth operation and prevent accidents.

Alright, let me break down how I approached this request. The user provided a specific structure for an article about using a cotton candy machine, with each section having subheadings. They wanted me to generate text for a particular subheading without overlapping with others.

I considered the steps involved: filling the container, using the right sugar type, avoiding overfilling, and ensuring cleanliness. I made sure to mention safety and efficiency, aligning with the user’s emphasis on clear instructions. I structured the response to be concise yet informative, ensuring it fit within the word limit and followed the specified format.

Understanding the Machine Components

The cotton candy machine consists of key parts: a heating element, spinning head, sugar container, and collection bowl. Each component plays a vital role in operation.

3.1. The Heating Element

The heating element is crucial for melting sugar into liquid form before it’s spun into cotton candy. It must be assembled securely during setup and preheated according to instructions. Ensure the element is clean and free from debris for optimal performance. Never touch the heating element while in operation, as it becomes extremely hot. Proper ventilation is essential to prevent overheating and ensure safety during use. Regular maintenance and cleaning of the heating element will extend the machine’s lifespan and efficiency.

3.2. The Spinning Head

The spinning head is where the magic happens, converting liquid sugar into fluffy cotton candy. Ensure it is securely attached during assembly for proper function. Regularly clean the spinning head to remove residue, as buildup can affect performance. Use a soft brush or cloth to wipe it down after each use. Avoid inserting objects into the spinning head, as this can cause damage or safety hazards. Proper maintenance ensures consistent cotton candy production and prolongs the machine’s lifespan. Always follow manufacturer guidelines for cleaning and handling the spinning head to maintain optimal results.

3.3. The Sugar Container

The sugar container is essential for holding the granulated sugar needed for cotton candy production. Ensure it is clean and dry before use. Pour the sugar slowly into the container to avoid spilling. Do not overfill, as this can disrupt the machine’s operation. After each use, clean the container thoroughly to prevent sugar residue buildup. Regularly sanitizing the sugar container helps maintain hygiene and ensures consistent cotton candy quality. Always use the correct type of sugar recommended by the manufacturer for optimal results. Proper care extends the container’s lifespan and machine efficiency.

3.4. The Collection Bowl

The collection bowl is where the spun cotton candy gathers after being produced by the machine. Place it securely under the floss head to catch the cotton candy as it spins. Ensure the bowl is clean and dry before use to prevent moisture from affecting the cotton candy’s texture. Regularly clean the bowl with warm water and mild detergent to maintain hygiene. Allow it to dry thoroughly after cleaning to avoid any residue buildup. Proper use of the collection bowl ensures your cotton candy remains fluffy and fresh.

Preparing the Sugar

Use granulated sugar for best results, as it melts evenly. Add flavorings or colorings if desired. Measure the sugar accurately to avoid overloading the machine.

4.1. Choosing the Right Type of Sugar

Granulated sugar is the most recommended for cotton candy, as it melts evenly and produces consistent floss. Avoid fine or powdered sugars, as they can clog the machine. For unique flavors, you can use flavored sugars or add food coloring to the granulated sugar before spinning. Ensure the sugar is dry and free of lumps to prevent issues during operation.

4.2. Adding Flavorings or Colorings

Enhance your cotton candy by adding food-grade flavorings or colorings. Use a few drops of liquid flavoring or powdered flavorings, mixing them with the sugar before spinning. For colorings, add a few drops of food dye to the sugar and mix well. Avoid over-saturating, as it can clog the machine. Start with small amounts and adjust to achieve the desired taste and color. Experiment with unique flavor combinations to create vibrant and delicious cotton candy treats for any occasion.

4.3. Measuring the Correct Amount of Sugar

Accurately measure granulated sugar for optimal cotton candy production. Use 1 cup of sugar per batch, ensuring it’s dry and free from lumps. Avoid overloading the machine, as this can clog the spinning head. For flavored variations, mix flavorings or colorings with the sugar before adding it to the machine. Proper measurement ensures smooth operation and consistent cotton candy texture. Always refer to the manufacturer’s guidelines for specific sugar recommendations tailored to your machine model.

Operating the Cotton Candy Machine

Add sugar to the machine, start it, and allow it to spin. Collect the cotton candy on a stick or cone as it forms. Monitor the process closely for consistent results.

5.1. Adding Sugar to the Machine

Pour granulated sugar into the machine’s sugar container, ensuring it reaches the recommended level. Avoid overloading to prevent clogging. Place the sugar container securely into the machine, aligning it with the heating head. Gently pour the sugar into the center of the spinning head, using the provided spoon if necessary. Ensure the machine is preheated and ready for operation before adding sugar. Follow the manufacturer’s guidelines for the correct sugar amount and type to achieve optimal results.

5.2. Starting the Machine and Allowing It to Spin

Once the machine is preheated and the sugar is added, turn it on and allow it to spin. Ensure the collection bowl is securely in place before starting. Let the machine run for a few minutes to begin producing cotton candy. Avoid adding too much sugar at once, as this can clog the machine. Keep the machine upright and stable during operation. Allow it to spin freely without interruption to create fluffy, even cotton candy. Always follow the manufacturer’s guidelines for optimal performance.

5.3. Collecting the Cotton Candy on a Stick or Cone

Hold a stick or cone near the spinning head, allowing the cotton candy to wrap around it naturally. Gently move the stick in a counter-clockwise direction to collect the floss evenly. Avoid touching the spinning head or inserting objects into it. Once the desired amount is collected, remove the stick or cone carefully. For larger portions, repeat the process until the cotton candy reaches the preferred size. This method ensures a neat and enjoyable treat every time.

Tips for Making Perfect Cotton Candy

Maintain steady sugar flow, adjust heat and speed settings, and avoid overloading the machine. These tips ensure fluffy, evenly spun cotton candy every time.

6.1. Maintaining the Correct Sugar Flow

Maintaining consistent sugar flow is crucial for perfect cotton candy. Ensure the sugar container is filled appropriately, avoiding overfilling or underfilling. Use the recommended sugar type and amount to prevent clogging. Keep the machine level and stable to facilitate even sugar distribution. Avoid adding too much sugar at once, as this can disrupt the spinning process. Regularly check and adjust the sugar flow during operation to achieve fluffy, consistent cotton candy. This ensures optimal performance and delicious results every time.

6.2. Adjusting the Heat and Speed Settings

Adjusting the heat and speed settings on your cotton candy machine is essential for achieving the perfect texture. Allow the machine to warm up fully before use. Higher heat settings melt sugar faster, while lower settings prevent burning. Adjust the spinning speed to control the fluffiness of the cotton candy. Monitor the machine’s performance and tweak the settings as needed during operation. Proper calibration ensures consistent results and prevents issues like overly sticky or brittle cotton candy.

6.3. Avoiding Overloading the Machine

Avoid overloading the cotton candy machine by adding sugar in moderation. Too much sugar can clog the heating element, reducing performance. Start with small amounts and monitor the machine’s output. If the machine struggles to spin or produces uneven cotton candy, it may be overloaded. Stop and clean the machine if this occurs. Overloading can lead to damage or inconsistent results, so always follow the manufacturer’s guidelines for sugar capacity and flow.

Cleaning and Maintaining the Machine

Regularly clean the machine after each use to remove sugar residue. Deep clean periodically to prevent buildup. Store properly to maintain performance and longevity.

7.1. Cleaning the Machine After Each Use

After each use, turn off and unplug the machine. Remove any leftover sugar and debris from the floss head and bowl using a soft brush or damp cloth. Avoid harsh chemicals to prevent damage. Wipe down the exterior with a clean, dry cloth. Regular cleaning prevents sugar buildup and ensures smooth operation. Allow the machine to cool before storing it in a dry place. Proper maintenance extends the machine’s lifespan and keeps it functioning efficiently for future use.

7.2. Deep Cleaning the Machine Regularly

For deep cleaning, dissolve sugar buildup by mixing warm water with a small amount of vinegar. Use a soft sponge or cloth to gently scrub the floss head, bowl, and exterior surfaces. Remove stubborn residue with a non-abrasive cleaner, but avoid harsh chemicals. Rinse thoroughly and dry with a clean towel. Regular deep cleaning prevents clogging and bacterial growth, ensuring the machine runs efficiently and produces high-quality cotton candy consistently.

7.3. Storing the Machine Properly

After cleaning, store the cotton candy machine in a dry, cool place to prevent moisture buildup. Ensure all parts, such as the floss head and bowl, are completely dry before storage. Avoid exposing the machine to direct sunlight or humidity. Store detachable components in a separate, sealed container to protect them from dust. This will maintain the machine’s performance and longevity, ensuring it remains ready for its next use.

Safety Precautions

Avoid touching moving parts to prevent injury. Keep children away while operating. Ensure good ventilation and never insert objects into spinning heads for safe usage always.

8.1. Avoiding Contact with Moving Parts

Always keep hands and objects away from the spinning head and heating element to prevent accidents. The machine’s moving components can cause injury if touched. Ensure loose clothing or long hair is tied back to avoid entanglement. Never insert objects into the rotating parts, as this can damage the machine or lead to harm. Supervise children closely and educate them on safety practices to ensure safe operation of the cotton candy machine at all times.

8.2. Keeping Children Away While in Use

Ensure children are kept at a safe distance from the cotton candy machine while it is in operation. The machine’s heat, spinning parts, and sharp edges pose a risk of injury. Supervise children closely to prevent accidental contact or tampering. Teach kids about the dangers of the machine and explain why they must stay away. This precaution ensures a safe and enjoyable experience for everyone while operating the cotton candy machine.

8.3. Ensuring Proper Ventilation

Proper ventilation is crucial when operating a cotton candy machine to prevent sugar vapor buildup. Use fans or open windows to circulate air and reduce sugar dust in the environment. Avoid operating the machine in enclosed spaces without ventilation, as this can lead to excessive sugar particles in the air. Ensure good airflow to maintain a safe and clean workspace while making cotton candy.

Troubleshooting Common Issues

Identify common issues like machine malfunction or uneven cotton candy texture. Check sugar quality, ensure proper machine assembly, and clean or replace worn parts as needed.

9.1. The Machine is Not Producing Cotton Candy

If the machine isn’t producing cotton candy, first ensure it’s properly plugged in and preheated; Check that the sugar is evenly distributed and of the correct type. Verify that no blockages exist in the spinning head or sugar container. Consult the user manual for troubleshooting steps or contact customer support if issues persist. Regular cleaning and maintenance can also prevent such problems.

9.2. The Cotton Candy is Too Sticky or Too Dry

If the cotton candy is too sticky, it may be due to high humidity or insufficient heat. Adjust the machine’s temperature settings and ensure proper ventilation. For dry cotton candy, check that the sugar flow is consistent and not clogged. Using the correct type of sugar is essential, as granulated sugar works best. Avoid overloading the machine, as this can disrupt the spinning process. Regular cleaning and maintaining the machine’s components will help achieve the perfect texture every time.

9.3. The Machine is Making Too Much Noise

If the cotton candy machine is making excessive noise, it could be due to improper assembly or blockages. Ensure all parts are securely fitted and aligned correctly. Check for sugar buildup or debris in the spinning head or heating element, as these can cause friction and noise. Regular cleaning and maintenance are essential to prevent such issues. If the noise persists, consult the manufacturer’s troubleshooting guide or contact customer support for assistance.

Creative Uses for Cotton Candy

  1. Experiment with unique flavors like blue raspberry or strawberry for vibrant results.
  2. Add food coloring to create colorful cotton candy for themed events.
  3. Shape the cotton candy into creative forms like clouds or animals for artistic displays.

10.1. Using Different Flavors of Sugar

Experiment with unique sugar flavors like blue raspberry, strawberry, or mango to create vibrant cotton candy; This allows you to tailor the taste to specific events or preferences. For instance, blue raspberry sugar produces a bright, eye-catching treat perfect for themed parties. Strawberry sugar adds a sweet, fruity twist, while mango offers a tropical flavor. By switching up the sugar flavors, you can craft cotton candy that stands out and delights your audience with variety and creativity.

10.2. Adding Food Coloring for Unique Effects

Add a few drops of food coloring to the sugar before spinning to create vibrant, colorful cotton candy. This enhances the visual appeal and adds fun to the treat. For example, blue coloring creates a striking effect, while pink adds a soft, festive look. Mix the coloring thoroughly with the sugar to ensure an even distribution. This simple step allows you to customize the cotton candy’s appearance, making it perfect for themed events or adding a personal touch to your creations.

10.3. Creating Cotton Candy Cones or Shapes

To create cotton candy cones or shapes, spin the cotton candy onto a stick or cone in a counter-clockwise motion. Hold the stick near the machine’s spinning head and gently twirl it to collect the floss. For unique shapes, experiment with different spinning techniques or mold the cotton candy while it’s still sticky. This allows you to craft creative forms, from fluffy clouds to decorative swirls, perfect for parties or as personalized treats for events.

Making cotton candy is an exciting process that requires attention to detail and practice. Always follow safety guidelines and experiment with flavors to create unique treats. Have fun and enjoy the sweet results!

11.1. Summary of Key Steps

Unpack and assemble the machine carefully, following manufacturer instructions. Prepare granulated sugar, ensuring the correct amount is used. Plug in the machine, let it warm up, and place it on a stable surface. Add sugar to the spinning head and start the machine. Collect cotton candy on a stick or cone, adjusting sugar flow and heat settings as needed. Clean the machine after each use and store it properly. Experiment with flavors and colors for unique results, ensuring safety precautions are always followed.

11.2. Encouragement to Experiment and Have Fun

Embrace creativity and enjoy the process of making cotton candy! Experiment with unique flavors, colors, and sugar types to create one-of-a-kind treats. Try adding food coloring or flavorings for vibrant and delicious results. Don’t hesitate to explore different techniques, like layering or shaping cotton candy into cones or creative designs. Remember, practice makes perfect, so don’t be discouraged by initial mishaps. Invite friends or family to join in the fun and make it a memorable experience. Keep experimenting and enjoy the sweet magic of cotton candy!

chamberlain c2202 installation instructions

Preparation for Installation

Begin by unpacking all components and ensuring no parts are damaged. Read the safety materials carefully and follow all precautions. Download the BILT app for interactive 3D instructions to guide you through the process. Charge the remote control and gather all necessary tools before starting. Ensure the garage door is balanced and properly functioning prior to installation. Familiarize yourself with the manual and all included hardware to streamline the process.

  • Unpack and verify all components.
  • Review safety guidelines and precautions.
  • Download the BILT app for 3D instructions.
  • Charge the remote control.
  • Gather tools and hardware.

Tools and Hardware Needed

To successfully install the Chamberlain C2202 garage door opener, gather the necessary tools and hardware beforehand. Start with basic tools like a Phillips screwdriver, flathead screwdriver, adjustable wrench, pliers, and a drill with bits. Ensure you have a ladder or step stool for reaching high areas safely. Safety glasses are recommended to protect your eyes during the process. Additionally, a level will help ensure proper alignment of the rail system. A stud finder is essential for locating wall studs to secure the motor and other components firmly. All required hardware, such as lag screws, bolts, and nuts, should be included in the packaging, but verify this before starting. A mobile device with the BILT app downloaded will provide interactive 3D installation guidance. Charge the remote control and have it ready for programming later. Organize all parts and tools in a workspace to streamline the installation process. Double-check that no components are missing or damaged to avoid delays. Having everything prepared will make the installation smoother and less time-consuming.

  • Phillips and flathead screwdrivers
  • Adjustable wrench and pliers
  • Drill with bits
  • Ladder or step stool
  • Safety glasses
  • Level
  • Stud finder
  • Lag screws, bolts, and nuts
  • Mobile device with BILT app
  • Charged remote control

Safety Precautions

Before starting the installation of the Chamberlain C2202 garage door opener, it is crucial to follow all safety precautions to avoid accidents and ensure a smooth process. First, disconnect the garage door from the existing opener to prevent any unexpected movement during installation. Always wear safety glasses and gloves to protect yourself from potential hazards. Ensure the garage door is properly balanced and functioning correctly before proceeding, as an unbalanced door can cause serious injury or damage. Keep children and pets away from the installation area to minimize distractions and risks. Avoid overreaching or standing directly under heavy components while installing. If you are unsure about any step, consult a professional or contact Chamberlain customer support for assistance. Always follow the manufacturer’s guidelines and safety materials provided with the product. Properly secure all components to avoid loose parts that could fail during operation. Never operate the garage door opener until the installation is complete and tested. By adhering to these safety precautions, you can ensure a safe and successful installation process.

  • Disconnect the garage door from the existing opener.
  • Wear safety glasses and gloves.
  • Ensure the garage door is balanced and functional.
  • Keep children and pets away from the area.
  • Avoid overreaching or standing under heavy components.
  • Consult a professional if unsure about any step.
  • Follow manufacturer’s guidelines and safety materials.
  • Secure all components properly.
  • Test the opener only after installation is complete.

Understanding the Components

Familiarizing yourself with the components of the Chamberlain C2202 garage door opener is essential for a successful installation. The package includes the motor unit, rail system, chain, door control, remote control, and necessary hardware. The motor unit powers the opener and features built-in Wi-Fi for smart home integration. The rail system connects the motor to the garage door, ensuring smooth operation. The chain drives the trolley along the rail, lifting and lowering the door. The door control panel mounts on the wall and includes buttons to open, close, and lock the door. The remote control allows convenient operation from a distance. Additional components like brackets, screws, and safety sensors are provided to ensure proper installation and functionality. Understanding each part’s role helps in identifying potential issues and ensures all parts are correctly assembled. Take time to inventory all items before starting to avoid missing pieces. Properly organizing the components will streamline the installation process and reduce the risk of errors.

  • Motor unit with built-in Wi-Fi.
  • Rail system for smooth door movement.
  • Chain for lifting and lowering the door.
  • Door control panel for wall mounting.
  • Remote control for convenient operation.
  • Hardware and brackets for secure installation.
  • Safety sensors for enhanced protection.

Installation Process

The installation process involves mounting the opener, installing the rail system, attaching the chain, and securing the motor. Follow step-by-step instructions, ensure all components are properly aligned, and test the system after installation. Proper assembly is crucial for safe and efficient operation.

  • Mount the opener securely.
  • Install the rail system accurately.
  • Attach the chain properly.
  • Secure the motor firmly.
  • Test the system after installation.

Mounting the Opener

Mounting the Chamberlain C2202 opener requires careful planning and precise execution. Start by locating the center of your garage door opening and mark the spot for the opener’s installation bracket. Ensure the area is clear of obstructions and that the surface is level. Use the provided hardware to secure the mounting bracket firmly to the ceiling or wall, following the manufacturer’s instructions for proper torque specifications. Once the bracket is in place, carefully lift the opener unit and align it with the mounting bracket. Ensure all screws and bolts are tightened securely to prevent any movement during operation. Double-check the alignment to avoid any imbalance, which could lead to improper door movement. Consult the manual or the BILT app for visual guidance if needed. Proper mounting is essential for the opener’s performance and safety.

  • Locate the center of the garage door opening.
  • Mark the spot for the installation bracket.
  • Secure the bracket firmly to the ceiling or wall.
  • Align and mount the opener unit.
  • Tighten all screws and bolts properly.
  • Verify alignment and balance.

Installing the Rail System

Installing the rail system for the Chamberlain C2202 garage door opener involves assembling and attaching the rail segments to the motor unit and the garage door. Begin by attaching the trolley to the rail segment closest to the motor. Ensure the rail is properly aligned and securely connected to the motor. Next, extend the rail system toward the garage door, connecting each segment according to the manufacturer’s instructions. The front rail features a cut-out window near the door end, which must be correctly positioned to ensure proper functionality. Use the provided hardware to secure the rail to the trolley and the door. Make sure all connections are tight and properly aligned to avoid any issues during operation. Refer to the manual or the BILT app for detailed visual guidance. Once the rail system is installed, proceed to attach the chain as instructed in the next section. Proper installation of the rail system is critical for smooth and safe operation of the garage door opener.

  • Attach the trolley to the motor-end rail segment.
  • Align and secure the rail to the motor.
  • Extend the rail toward the garage door.
  • Connect each rail segment properly.
  • Ensure the cut-out window is correctly positioned.
  • Secure the rail to the trolley and door.
  • Refer to the manual or BILT app for guidance.

Attaching the Chain

Attaching the chain to the Chamberlain C2202 garage door opener is a critical step that ensures proper operation. Begin by threading one end of the chain through the trolley pulley, making sure it aligns correctly with the motor’s sprocket. Secure the chain to the trolley using the provided clip or hook. On the other end, attach the chain to the door’s lifting mechanism, such as the door handle or a designated attachment point. Tighten the chain until it is snug but not overly taut, leaving enough slack for smooth movement. Use the included tension adjustment tool to fine-tune the chain’s tension. Ensure the chain is properly seated in the rail system to prevent misalignment. If the chain is too loose or too tight, it may cause the opener to malfunction. Double-check all connections and test the door’s movement by manually lifting it to ensure the chain engages smoothly. Properly attaching the chain ensures reliable performance and safety.

  • Thread the chain through the trolley pulley.
  • Secure the chain to the trolley.
  • Attach the other end to the door’s lifting mechanism.
  • Adjust the chain tension for proper operation.
  • Ensure the chain is seated correctly in the rail system.
  • Test the door’s movement to confirm smooth operation.

Securing the Motor

Securing the motor unit is a vital step in the installation process of the Chamberlain C2202 garage door opener. Begin by positioning the motor on the ceiling, ensuring it is centered and aligned with the garage door. Use the provided mounting bracket to attach the motor securely to the ceiling. Tighten the screws firmly to prevent any movement or vibration during operation. Ensure the area around the motor is clear of obstructions for proper airflow and function. Once the motor is mounted, connect the rail system to the motor’s output shaft, making sure it is properly seated and aligned. Double-check the motor’s position to ensure it is level and evenly balanced. Finally, test the motor by manually lifting the garage door to confirm it moves smoothly without strain. Properly securing the motor ensures reliable performance and longevity of the opener.

  • Position the motor on the ceiling, centered and aligned with the door.
  • Attach the motor to the ceiling using the mounting bracket.
  • Tighten screws to secure the motor firmly.
  • Connect the rail system to the motor’s output shaft.
  • Ensure the motor is level and evenly balanced.
  • Test the motor by manually lifting the garage door.

Control Panel Setup

Install the door control within sight of the garage door, ensuring it is out of reach of children. Program the remote control and connect the opener to Wi-Fi for smart functionality through the myQ app. Securely mount and configure all components.

  • Mount the door control at least 5 feet above the floor.
  • Program the remote control following the manual’s instructions.
  • Connect the opener to Wi-Fi for remote access.

Installing the Door Control

First, locate a suitable spot for the door control, ensuring it is within clear sight of the garage door and out of reach of small children. The ideal installation height is at least 5 feet above the floor, landings, or steps to prevent accidental activation. Once the location is determined, use a level to ensure the control panel is straight and securely fasten it to the wall using the provided screws or appropriate hardware. Avoid placing the control near moving parts of the door or in areas where it could be easily damaged.

  • Choose a visible and safe location for the door control.
  • Mount the control at least 5 feet above the floor.
  • Use a level to ensure proper alignment.
  • Secure the control panel firmly to the wall.

After installation, test the door control to ensure it operates the opener correctly and adjust its position if necessary for optimal functionality.

Programming the Remote Control

Programming the remote control for your Chamberlain C2202 garage door opener is a straightforward process. Start by ensuring the garage door is closed and the opener is powered on. Locate the “Learn” button on the motor unit, typically found near the antenna or under a light cover. Press and hold the button until the indicator light flashes, indicating the system is ready to accept a new code. Release the button and immediately enter a 4-digit code of your choice on the remote control. Press the button again to confirm the code, and test the remote to ensure it works properly. If the remote does not respond, repeat the process, ensuring the timing is precise. For additional security, consider programming multiple remotes or using the myQ app for smartphone control. Always test the remote after programming to ensure smooth operation. If issues arise, consult the user manual or contact Chamberlain support for assistance.

Connecting to Wi-Fi

To connect your Chamberlain C2202 garage door opener to Wi-Fi, start by downloading and installing the myQ app from the App Store or Google Play. Open the app and follow the in-app instructions to create an account or log in if you already have one. Once logged in, select “Add a Device” and choose the Chamberlain C2202 model from the list of available devices. The app will guide you to press the “Learn” button on the motor unit to put it into Wi-Fi setup mode. After the opener is in setup mode, the app will prompt you to select your home Wi-Fi network from the list of available networks. Enter your Wi-Fi password and wait for the device to connect. Once connected, the app will confirm the successful setup, and you can begin controlling your garage door remotely. If you encounter issues, ensure your router is nearby and restart both the opener and router before retrying the process.

  • Download and install the myQ app.
  • Create an account or log in.
  • Select “Add a Device” and choose the C2202.
  • Press the “Learn” button to enter Wi-Fi mode.
  • Select your home Wi-Fi network and enter the password.

Testing and Troubleshooting

Test the opener’s functionality by opening and closing the door. Ensure safety features work, like automatic reversal. Check for smooth operation and proper alignment. Troubleshoot common issues like sensor misalignment or incorrect limits in the settings. Adjust as needed for optimal performance.

  • Test door operation and safety features.
  • Check for smooth and proper alignment.
  • Troubleshoot common issues like sensor alignment.
  • Adjust settings for optimal performance.

Testing the Opener’s Functionality

After completing the installation, thoroughly test the Chamberlain C2202 garage door opener to ensure proper operation. Start by pressing the wall control button to activate the opener. Observe the door’s movement, ensuring it opens and closes smoothly and stops correctly at the set limits. Verify that the opener responds to both the wall control and remote control. Perform these tests with the door unloaded to assess the motor’s performance. Check for any unusual noises or jerky movements, which may indicate misalignment or hardware issues. If the door reverses unexpectedly, inspect the safety sensors for proper alignment and obstruction-free paths. Ensure the opener’s lights illuminate during operation, as this indicates the system is functioning correctly. If the door does not respond to controls, refer to the troubleshooting section for potential solutions. Repeat the tests multiple times to confirm consistent functionality. A successful test confirms the opener is installed and operating as intended.

  1. Activate the opener using the wall control.
  2. Observe smooth opening and closing cycles.
  3. Test responsiveness to remote control.
  4. Check for unusual noises or movements.
  5. Verify proper operation of safety sensors.
  6. Ensure consistent functionality across multiple tests.

Testing Safety Features

After installing the Chamberlain C2202, thoroughly test its safety features to ensure they function correctly. Start by verifying the auto-reverse feature. Place a small object, like a cardboard box, on the garage floor where the door would normally close. Activate the opener and observe if the door stops and reverses upon contact with the object. Repeat this test with a larger item, such as a plastic bin, to confirm consistent performance. Next, check the safety sensors by obstructing the infrared beam while the door is closing. The door should immediately stop and reverse direction when the beam is blocked. Ensure the sensors are properly aligned and free from obstructions. Additionally, test the manual release mechanism by pulling the emergency handle to disengage the opener, allowing you to open the door manually. This ensures functionality in case of a power outage. Finally, verify that the opener’s lights illuminate when the door is activated, providing visibility and enhancing safety. These tests confirm that all safety mechanisms are operational and protect against potential hazards.

  1. Test auto-reverse with a small object like a box.
  2. Verify the door stops and reverses upon contact.
  3. Check safety sensors by blocking the infrared beam.
  4. Ensure sensors are aligned and unobstructed.
  5. Test the manual release for emergencies.
  6. Confirm the opener’s lights function properly.

Troubleshooting Common Issues

During or after installation, you may encounter issues with your Chamberlain C2202. Start by checking the power supply to ensure the opener is properly plugged in. If the door doesn’t close, inspect the safety sensors for alignment and cleanliness. Misaligned sensors can prevent the door from closing, so adjust them as needed. If the remote control isn’t functioning, replace the batteries or reprogram it using the instructions in the manual. For connectivity issues with the myQ app, restart your router and ensure the opener is connected to Wi-Fi. If the motor makes unusual noises, check for loose hardware and tighten any bolts or screws. If the chain is misaligned, refer to the manual for adjustment steps. Finally, if the door reverses unexpectedly, test the auto-reverse feature by placing an object under the door and observing its response. Always refer to the troubleshooting section in the manual for specific solutions, and contact Chamberlain support if issues persist.

  • Check power supply and connections.
  • Inspect and clean safety sensors.
  • Reprogram the remote control if necessary.
  • Restart router for Wi-Fi connectivity issues.
  • Tighten loose hardware to reduce noise.
  • Test auto-reverse with an object.

Completion of Installation

After completing the installation, clean the work area and dispose of packaging materials. Fasten the manual near the garage door for easy reference. Register your product on Chamberlain’s website for warranty and updates.

  • Clean the workspace thoroughly.
  • Secure the manual for future use.
  • Register the product online.

Cleaning Up

After completing the installation, thoroughly clean the work area to ensure safety and organization. Dispose of all packaging materials, screws, and unused hardware responsibly. Wipe down any surfaces that may have been exposed to dust or debris during the process. Check the garage floor and surrounding areas for any tools or small parts that might have been misplaced. Properly store all tools used during installation. Ensure the garage door and opener are free from obstructions and debris. Finally, review the workspace to make sure no components or materials are left behind that could pose a hazard.

  • Dispose of packaging and unused materials.
  • Wipe down surfaces exposed to dust.
  • Ensure the garage floor is clear of tools and debris.
  • Store all tools securely.
  • Verify the workspace is hazard-free.

Fastening the Manual

Once the installation is complete, it is essential to fasten the manual in a convenient and accessible location near the garage door. This ensures that the manual is readily available for future reference, troubleshooting, or programming needs. Use a sturdy method to secure the manual, such as placing it in a protective sleeve or folder and attaching it to the wall or near the control panel. Avoid leaving the manual in a location where it could be damaged or lost. Additionally, consider taking a photo of the manual’s key pages or saving a digital copy for easy access. By keeping the manual secure and organized, you can ensure that all necessary information remains available for years to come.

  • Secure the manual near the garage door.
  • Use a protective sleeve or folder.
  • Attach it to the wall or control panel.
  • Consider digitizing key pages for backup.
  • Ensure the manual is easily accessible.

Registering the Product

Registering your Chamberlain C2202 garage door opener is a crucial step to ensure you receive updates, notifications, and exclusive offers from Chamberlain. To register, visit chamberlain.registria.com and follow the prompts. Additionally, you can use the provided icon in the manual to complete the registration process. For a quick and easy method, take a photo of the product label, which includes the necessary information, and text it to 71403 (US only). This ensures your product is linked to your account for seamless support and feature updates. Registration also helps in tracking your warranty and provides access to customer support resources. Make sure to complete this step after installation to fully benefit from Chamberlain’s services and myQ app integration. Keep the registration confirmation in a safe place for future reference.

  • Visit chamberlain.registria.com to register.
  • Use the icon in the manual for registration.
  • Text a photo of the product label to 71403 (US only).
  • Keep the registration confirmation for records.

canon pixma mx490 instruction manual

The Canon Pixma MX490 manual is an essential guide for understanding printer setup‚ features‚ and troubleshooting. It ensures optimal performance and addresses common user questions effectively.

Overview of the Canon Pixma MX490 Printer

The Canon Pixma MX490 is a versatile all-in-one printer designed for home and small office use. It offers printing‚ scanning‚ and copying capabilities with wireless connectivity for seamless mobile printing. The printer features a compact design‚ hybrid ink system‚ and automatic document feeder for efficient multitasking. With a maximum color resolution of 4800 x 1200 dpi‚ it delivers sharp text and vibrant photos. Its user-friendly interface and compatibility with various devices make it a practical choice for everyday printing needs‚ ensuring reliable performance and convenience.

Importance of Reading the Instruction Manual

Reading the Canon Pixma MX490 instruction manual is crucial for understanding its features‚ troubleshooting common issues‚ and optimizing printing performance. It provides step-by-step guides for setup‚ maintenance‚ and resolving errors‚ ensuring users avoid costly mistakes. The manual also explains how to utilize advanced functions like wireless printing and mobile connectivity effectively. By following the manual‚ users can enhance their printing experience‚ resolve problems quickly‚ and extend the printer’s lifespan‚ making it an essential resource for both beginners and experienced users.

Structure and Content of the Manual

The Canon Pixma MX490 manual is structured to guide users through setup‚ operation‚ and troubleshooting. It includes sections on printer features‚ wireless connectivity‚ and maintenance. The manual covers basic printing‚ scanning‚ and copying‚ as well as advanced options like mobile printing. Detailed troubleshooting guides address common issues like paper jams and ink errors. Additional resources‚ such as firmware updates and driver installations‚ are also explained. The manual is designed to be user-friendly‚ ensuring easy navigation for both beginners and experienced users to maximize printer functionality and efficiency.

Key Features and Specifications

The Canon Pixma MX490 features wireless connectivity‚ a hybrid ink system‚ and a 4800 x 1200 dpi print resolution. It includes an automatic document feeder and supports XL ink cartridges for extended printing capacity.

Printing‚ Scanning‚ and Copying Capabilities

The Canon Pixma MX490 offers versatile printing‚ scanning‚ and copying functions. It supports high-quality photo printing with a resolution of 4800 x 1200 dpi and delivers crisp text documents. The scanner provides clear image reproduction‚ allowing users to digitize photos and documents effortlessly. Copying is streamlined with features like auto-exposure and borderless copying‚ ensuring professional-grade results. Additionally‚ the printer’s hybrid ink system ensures vibrant colors and sharp text‚ making it ideal for both home and small office environments. The MX490 also supports wireless scanning to compatible devices‚ enhancing convenience and productivity for users.

Wireless Connectivity and Mobile Printing

The Canon Pixma MX490 supports wireless connectivity‚ enabling seamless printing and scanning from smartphones‚ tablets‚ and laptops. Using the Canon Print App‚ users can effortlessly print photos and documents wirelessly. The printer also supports direct mobile printing via services like Google Cloud Print and Apple AirPrint. Additionally‚ the MX490 integrates with the Canon Inkjet Cloud Printing Center‚ allowing users to print and scan documents directly from cloud storage. This feature enhances productivity and convenience for home and small office environments‚ ensuring easy access and efficient printing on the go.

DPI Resolution and Ink System

The Canon Pixma MX490 delivers crisp prints with a maximum color resolution of 4800 x 1200 dpi. It utilizes a hybrid ink system‚ combining pigment black ink for sharp text and dye-based ink for vibrant photos. This system ensures precise detail and rich color reproduction. Additionally‚ the printer supports optional XL ink cartridges‚ offering higher page yields and reduced replacement frequency‚ making it ideal for users with high printing demands while maintaining cost-efficiency and quality.

Automatic Document Feeder (ADF)

The Canon Pixma MX490 features a built-in Automatic Document Feeder (ADF) capable of holding up to 20 sheets. This convenient feature allows for efficient scanning‚ copying‚ and faxing of multi-page documents without manual intervention. The ADF simplifies tasks‚ saving time and increasing productivity. It is particularly useful for office environments or home users who frequently handle large documents‚ ensuring smooth and continuous operation during bulk processing.

Optional XL Ink Cartridges

The Canon Pixma MX490 supports optional XL ink cartridges‚ designed for high-volume printing. These cartridges offer a cost-effective solution‚ reducing replacement frequency and lowering overall printing costs. They are compatible with the printer’s hybrid ink system‚ ensuring crisp text and vibrant photos. While standard cartridges are sufficient for average use‚ XL cartridges are ideal for users with higher printing demands‚ providing better value and convenience without compromising print quality.

Setup and Installation

The Canon Pixma MX490 setup involves unboxing‚ connecting to power‚ installing ink cartridges‚ and wireless network configuration. Downloading drivers ensures optimal printer functionality and compatibility with devices.

Unboxing and Physical Setup

Unbox the Canon Pixma MX490 carefully‚ removing all packaging materials. Place it on a flat surface‚ ensuring good ventilation. Attach the paper support and extension. Connect the power cord securely to both the printer and a nearby outlet. Install the print head by following the manual’s steps. Next‚ insert the ink cartridges‚ aligning them properly. Finally‚ load paper into the rear tray‚ adjusting the guides to fit the paper size. This completes the physical setup.

Connecting the Printer to a Power Source

Ensure the power cord is securely plugged into both the printer and a nearby electrical outlet. Verify the connection is firm to avoid any loose contacts. Check the power cord for visible damage or frays; replace it if necessary. If the printer does not power on‚ try using a different outlet to rule out electrical issues. Once connected‚ press the power button to turn on the printer and complete the setup process.

Installing the Print Head and Ink Cartridges

Turn on the printer and open the print head cover. Remove the print head from its packaging and align it with the guide inside the printer. Gently push it down until it clicks. Next‚ unwrap the ink cartridges and insert them into their respective slots‚ ensuring they snap securely into place. Close the print head cover and wait for the printer to recognize the cartridges. A confirmation message will appear on the printer’s display once installation is complete.

Connecting to a Wireless Network

Press the printer’s Setup button and navigate to Wireless LAN Setup. Select Easy Setup and follow on-screen instructions. Enter your network name (SSID) and password when prompted. The printer will connect automatically. Ensure your router is nearby and the printer is turned on. If issues arise‚ restart your router or check your network settings. A successful connection allows wireless printing from devices like smartphones and tablets.

Downloading and Installing Drivers

Visit the official Canon support website and select your printer model‚ PIXMA MX490. Download the latest driver suitable for your operating system. Run the installer and follow on-screen instructions to complete the installation. Ensure your printer is connected to the same network during setup. Drivers are essential for enabling printer functions and ensuring compatibility with your device. Regular updates may be required for optimal performance and new feature support.

Loading Paper and Ink

Load paper by pulling out the support extension and adjusting guides. Insert the stack gently‚ aligning edges. Install genuine Canon ink cartridges as instructed for optimal performance.

Guidelines for Loading Paper

To load paper‚ open the paper support and extend the output tray. Pull out the paper support extension and adjust the guides to match your paper size. Place the paper stack gently into the rear tray‚ ensuring it is aligned properly. The paper should be loaded with the print side facing down. For photo paper or other specialized media‚ refer to the manual for specific loading instructions. Always use the correct paper type and size for optimal printing results.

Installing Genuine Canon Ink Cartridges

Open the printer cover and locate the cartridge holder. Remove the protective tape from the new cartridge‚ ensuring not to touch the ink nozzles. Align the cartridge with its corresponding slot and gently push until it clicks. Replace the cover and perform a test print to verify installation. Using genuine Canon cartridges ensures optimal print quality and prevents potential printer damage. Always refer to the manual for detailed installation steps and troubleshooting tips.

Handling Different Paper Types

The Canon Pixma MX490 supports various paper types‚ including plain paper‚ photo paper‚ envelopes‚ and cardstock. For optimal results‚ adjust the paper guides in the rear tray to fit the paper size. Always load paper with the print side facing the correct direction. Use the printer settings to select the appropriate paper type for your print job. Avoid mixing different paper types in the tray to prevent jams. Refer to the manual for specific guidelines on handling specialty papers and troubleshooting common issues with various media.

Basic Printing‚ Scanning‚ and Copying

The Canon Pixma MX490 offers intuitive printing‚ scanning‚ and copying functions. Print documents and photos‚ scan to digital formats‚ and copy with ease using the control panel or wireless connection.

Printing Documents and Photos

Print documents and photos with the Canon Pixma MX490 by selecting the appropriate settings in your printer driver. Choose paper type‚ size‚ and layout for optimal results. For photos‚ use high-quality paper and adjust settings like color intensity and brightness. Wireless printing allows you to send jobs from devices via Canon Print App. Ensure proper paper alignment in the tray and confirm print settings before starting. The printer supports borderless printing for photos and auto-duplex for double-sided documents‚ enhancing convenience and efficiency.

Scanning Documents and Photos

Scan documents and photos using the Canon Pixma MX490 by placing items on the scanner glass or ADF. Use the control panel or Canon Print App for wireless scanning. Select scan type‚ resolution‚ and destination. Save scans as PDF‚ JPEG‚ or other formats. Adjust settings for color‚ grayscale‚ or black-and-white scanning. Wireless scanning enables sending files to devices or cloud services. Ensure proper alignment and clean the scanner glass regularly for clear results. The ADF allows batch scanning of multiple pages efficiently.

Copying Documents

Copy documents using the Canon Pixma MX490 by placing the original on the scanner glass or ADF. Select copy settings via the control panel‚ choosing options like black-and-white or color. Adjust copy quality‚ brightness‚ and number of copies. Use the ADF for multiple-page documents‚ ensuring efficient batch copying. The printer automatically detects paper size and type‚ optimizing the copy process. For best results‚ ensure the print head is aligned and ink levels are sufficient. The MX490 allows resizing from 25% to 400% for customized copies.

Wireless Printing from Smartphones and Tablets

Print wirelessly from smartphones and tablets using the Canon Print App. Ensure the printer and device are connected to the same Wi-Fi network. Select the printer from the app‚ choose your document or photo‚ and print. The MX490 also supports AirPrint for iOS devices and Google Cloud Print for Android. For troubleshooting‚ restart the printer and device‚ check network settings‚ and ensure the printer is added to the device’s printer list. This feature offers convenience for mobile users‚ enabling seamless printing without cables.

Troubleshooting Common Issues

Resolve common issues like paper jams‚ ink errors‚ or connectivity problems by restarting the printer‚ checking connections‚ and following manual guidelines for detailed solutions and maintenance tips.

Resolving Paper Jams

To resolve paper jams‚ gently pull the paper out of the printer. Turn the printer off and ensure no paper remains inside. For stubborn jams‚ carefully open the printer cover and remove any trapped paper. Avoid using force to prevent damaging internal components. Regularly cleaning the printer and ensuring paper is loaded correctly can help prevent future jams. Always refer to the manual for specific guidance on handling paper jams effectively and safely.

Fixing Ink-Related Errors

Fixing ink-related errors on the Canon Pixma MX490 involves checking ink levels via the control panel or Canon Print App. Replace empty cartridges with genuine Canon ones‚ as non-genuine cartridges may cause errors. Clean the print head using the printer’s maintenance function to remove dried ink. Align the print head through settings if misaligned‚ and update firmware for compatibility. If issues persist‚ reset the printer to factory settings or contact Canon support for further assistance.

Addressing Wireless Connectivity Problems

Resolve wireless issues by restarting the printer and router‚ then reconnecting. Ensure the printer is on the same network as your device. Use the WPS button for easy setup or manually enter the SSID and password. Update the printer firmware and reinstall drivers if necessary. Check for network congestion and physical obstructions. If problems persist‚ reset the printer to factory settings or contact Canon support for further assistance.

Improving Print Quality

To enhance print quality‚ ensure ink cartridges are sufficiently filled and properly installed. Clean the print head regularly to remove clogs and dried ink. Align the print head through the printer settings to ensure precise printing. Use genuine Canon cartridges for optimal performance. Adjust print settings to match paper type and desired quality. Avoid using low-quality paper‚ as it can affect results. Regularly update printer drivers and firmware to maintain performance and resolve potential issues.

Resolving Error Codes

Common error codes like B21 or 5B04 indicate issues such as low ink levels or cartridge problems. Restart the printer and ensure cartridges are properly installed. Check ink levels and replace cartridges if necessary. For persistent errors‚ consult the manual or Canon support for specific solutions. Regularly updating firmware and aligning the print head can also resolve issues. If error codes persist‚ contact Canon customer service for further assistance to restore printer functionality effectively.

Maintenance and Upkeep

Regularly clean the printer‚ align the print head‚ and update firmware to ensure optimal performance. These steps help maintain print quality and extend the printer’s lifespan effectively.

Cleaning the Printer

To clean the Canon Pixma MX490‚ turn it off and unplug it for safety. Use a soft‚ dry cloth to wipe the exterior and a slightly damp cloth for stubborn marks. For the interior‚ use compressed air to remove dust and debris gently. Avoid harsh chemicals. Clean the print head using the built-in cleaning function in the printer settings. If print quality issues persist‚ align the print head again. Regular cleaning ensures optimal performance and prevents dust buildup. Always refer to the manual for detailed instructions.

Aligning the Print Head

To align the print head on your Canon Pixma MX490‚ access the printer settings via the control panel. Navigate to the Maintenance or Setup menu‚ then select Print Head Alignment. Follow the on-screen instructions to print the alignment sheet. Load A4-sized paper‚ print the alignment pattern‚ and scan the sheet to complete the process. If misalignment persists‚ repeat the process or clean the print head first. Proper alignment ensures sharp and accurate prints. Refer to the manual for detailed steps and images.

Updating Firmware

Updating the firmware on your Canon Pixma MX490 ensures optimal performance and resolves potential issues. Visit the official Canon website‚ navigate to the support section‚ and search for your printer model. Download the latest firmware version compatible with your operating system. Follow the on-screen instructions to install the update‚ ensuring the printer is connected to a power source; Do not interrupt the update process to avoid firmware corruption. After completion‚ restart the printer to apply the changes. Regular updates keep your printer running smoothly and securely. Always use genuine Canon firmware for reliability.

Additional Features and Services

The Canon Pixma MX490 offers enhanced functionality through the Canon Print App‚ enabling wireless printing and scanning from smartphones. The Canon Inkjet Cloud Printing Center allows remote printing‚ while the Auto Replenishment Service ensures timely ink delivery‚ optimizing printing convenience and efficiency for users.

Canon Print App

The Canon Print App simplifies wireless printing and scanning directly from smartphones and tablets. Users can effortlessly print photos and documents‚ scan files‚ and access printer settings. The app supports various paper sizes and print qualities‚ ensuring convenience and flexibility. It also integrates with cloud services‚ allowing direct printing from platforms like Google Drive. This feature enhances productivity for both home and office environments‚ making mobile printing seamless and efficient for Canon Pixma MX490 users.

Canon Inkjet Cloud Printing Center

The Canon Inkjet Cloud Printing Center allows users to print and scan documents remotely via the internet. It enables access to cloud storage services‚ such as Google Drive and Dropbox‚ for seamless printing. Users can also send emails with attachments directly to the printer; This feature enhances flexibility and convenience‚ allowing printing from anywhere with an internet connection. The service ensures secure and efficient cloud-based printing solutions for Canon Pixma MX490 users‚ making it ideal for remote workflows and mobile productivity.

Canon Auto Replenishment Service

Canon’s Auto Replenishment Service automatically detects when your printer’s ink or toner levels are low and places an order for replacement cartridges. This convenient service ensures you never run out of supplies‚ delivering them directly to your doorstep. You only pay for what you need‚ with shipments timed to arrive before you run out. This feature enhances productivity and reduces downtime‚ making it ideal for users who prioritize convenience and seamless printing experiences with their Canon Pixma MX490 printer.

Technical Specifications

The Canon Pixma MX490 offers a maximum print resolution of 4800×1200 dpi‚ wireless connectivity‚ and a 20-sheet ADF. It supports Windows and Mac operating systems seamlessly.

Printer Dimensions and Weight

The Canon Pixma MX490 measures approximately 8.8 inches in height‚ 16.0 inches in width‚ and 20.0 inches in depth‚ making it compact for small spaces. It weighs around 13.6 pounds‚ ensuring easy placement on desks or shelves without requiring excessive space. Its lightweight and sleek design allow for convenient relocation‚ while its dimensions ensure it fits seamlessly into home or office environments‚ providing a practical solution for users seeking a space-efficient printing option.

Print Speed and Resolution

The Canon Pixma MX490 offers a print speed of up to 8.8 ipm for black and 5.2 ipm for color. It delivers a maximum color resolution of 4800 x 1200 dpi‚ ensuring sharp text and vibrant photos. Utilizing a hybrid ink system‚ the printer combines pigment black ink for crisp documents and dye ink for colorful images‚ providing both efficiency and quality for home and small office printing needs effectively.

Compatibility with Operating Systems

The Canon Pixma MX490 is compatible with Windows 10‚ 8.1‚ 8‚ 7‚ and macOS 10;7.1 or later. It also supports wireless printing from iOS and Android devices via AirPrint and the Canon Print App‚ ensuring seamless connectivity across various platforms. This versatility makes it ideal for households or small offices using diverse devices‚ allowing users to print and scan effortlessly from smartphones‚ tablets‚ or computers with compatible operating systems installed.

Warranty and Support

The Canon Pixma MX490 comes with a limited warranty covering defects in materials and workmanship. Dedicated support resources‚ including online troubleshooting and downloadable drivers‚ are available.

Canon Warranty Terms

The Canon Pixma MX490 is covered by a limited warranty for one year from the date of purchase. This warranty addresses manufacturing defects in materials and workmanship. During this period‚ Canon may repair or replace defective parts at no additional cost. The warranty does not cover damage caused by misuse‚ third-party accessories‚ or normal wear and tear. For detailed terms and conditions‚ visit the Canon support website or contact their customer service team. Registration may be required to activate warranty benefits.

Contacting Canon Support

Canon provides comprehensive support for the Pixma MX490 through its official website‚ phone‚ live chat‚ and email. Visit the Canon support website at support.canon.com to access drivers‚ manuals‚ troubleshooting guides‚ and FAQs. For direct assistance‚ contact Canon’s customer service team via phone or live chat. Email support is also available for less urgent inquiries. Ensure to have the printer model and serial number ready for efficient assistance. These resources help users maintain optimal printer performance and resolve issues promptly.

Frequently Asked Questions

The FAQs address common issues like error codes‚ wireless setup‚ print quality‚ and ink cartridge problems‚ providing quick solutions to help users troubleshoot and maintain their printer effectively.

Common User Questions

Users often inquire about resolving error codes‚ wireless connectivity issues‚ and print quality problems. The manual addresses these concerns‚ offering step-by-step solutions for troubleshooting and maintaining optimal printer performance. Additionally‚ questions about ink cartridge replacement‚ scanning multiple pages‚ and paper size adjustments are frequently asked. The guide provides clear instructions to help users overcome these challenges and ensure smooth operation of their Canon Pixma MX490 printer.

Troubleshooting Tips

For common issues like paper jams‚ turn off the printer‚ gently remove the jammed paper‚ and restart. Ink-related errors may require cleaning the print head or replacing cartridges. Connectivity problems can be resolved by resetting the printer‚ checking Wi-Fi settings‚ or reinstalling drivers. Poor print quality can be addressed by aligning the print head or using genuine Canon cartridges; Regularly cleaning the printer and updating firmware helps maintain performance and prevent errors.

Advanced Printing Options

The Canon Pixma MX490 offers advanced features like wireless printing from smartphones and tablets via the Canon Print App. Users can also print directly from cloud services using Canon’s Inkjet Cloud Printing Center. The printer supports scanning multiple pages into a single PDF document‚ enhancing efficiency for document management. Additionally‚ borderless photo printing allows users to create professional-looking images without trimming edges‚ making it ideal for photography enthusiasts. These features provide versatility and convenience for both home and office use.

priv bar turbo instructions

The Priv Bar Turbo offers a powerful vaping experience with its mesh coil, 16ml capacity, and 800mAh battery, catering to both newcomers and experienced vapers alike.

Overview of the Priv Bar Turbo

The Priv Bar Turbo is a high-performance rechargeable disposable vape designed for extended use and convenience. With a 16ml e-liquid capacity and an 800mAh battery, it delivers up to 15,000 puffs in Norm mode and 10,000 puffs in Turbo mode. Equipped with mesh coil technology for enhanced flavor and a draw-activated mechanism, it offers a seamless vaping experience. Its adjustable airflow system and anti-leak technology ensure customization and mess-free use, making it a versatile choice for both beginners and experienced vapers.

Why Choose the Priv Bar Turbo?

The Priv Bar Turbo stands out for its exceptional performance, versatility, and convenience. It features a mesh coil for superior flavor and longevity, a 16ml e-liquid capacity, and an 800mAh rechargeable battery for extended use. With dual vaping modes (Norm and Turbo), it offers flexibility for different preferences, delivering up to 15,000 puffs in Norm mode. The adjustable airflow system and anti-leak technology ensure a customizable and mess-free experience. Its sleek design and user-friendly operation make it ideal for both newcomers and experienced vapers seeking a high-quality vaping solution.

Target Audience for the Priv Bar Turbo

The Priv Bar Turbo is designed for both experienced vapers and newcomers, offering a versatile vaping experience. Its user-friendly design and automatic draw activation make it ideal for those new to vaping. For experienced users, features like adjustable airflow and dual modes (Norm and Turbo) provide customization options. With nicotine strengths of 3% or 5%, it caters to a wide range of preferences, from light to stronger hits, making it a suitable choice for anyone seeking a high-quality, convenient vaping solution.

Key Features and Benefits

The Priv Bar Turbo excels with its mesh coil technology, delivering enhanced flavor and longevity. Its 16ml e-liquid capacity and 800mAh battery ensure extended use, while the adjustable airflow and dual vaping modes provide customization for a tailored experience.

Mesh Coil Technology

The Priv Bar Turbo features advanced mesh coil technology, designed to optimize heating and wicking efficiency. This innovative design enhances flavor consistency and vapor production, ensuring a smooth and satisfying vaping experience. The mesh coil also contributes to longer coil longevity and reduced risk of dry hits or burnt tastes. By evenly distributing heat, it maximizes e-liquid utilization, making every puff flavorful and enjoyable. This technology is a key factor in the device’s reputation for reliability and performance.

16ml E-Liquid Capacity

The Priv Bar Turbo boasts an impressive 16ml e-liquid capacity, significantly larger than most disposable vapes. This generous tank ensures extended vaping sessions without frequent refills, making it ideal for heavy users. With up to 15,000 puffs in Norm mode and 10,000 in Turbo, it offers exceptional value. The large capacity, combined with its rechargeable design, provides unparalleled convenience and longevity. This feature makes it a top choice for those seeking a high-performance, long-lasting vaping solution.

800mAh Rechargeable Battery

The Priv Bar Turbo is equipped with a robust 800mAh rechargeable battery, designed to deliver a long-lasting vaping experience. This battery supports up to 15,000 puffs in Norm mode and 10,000 puffs in Turbo mode, ensuring extended use without the need for frequent recharging. The rechargeable design enhances convenience and sustainability, allowing users to enjoy their device for a prolonged period. This battery capacity is a significant upgrade compared to standard disposable vapes, making it a reliable choice for all-day vaping.

Adjustable Airflow System

The Priv Bar Turbo features an adjustable airflow system, allowing users to customize their vaping experience. This innovative design enables vapers to tailor the airflow to their preference, whether they enjoy a loose or tight draw. The adjustable airflow enhances flavor production and vapor quality, making it suitable for both experienced vapers and newcomers. This feature ensures a personalized vaping experience, catering to individual preferences and delivering consistent performance. The adjustable airflow system is a standout feature that sets the Priv Bar Turbo apart from other disposable vapes.

Dual Vaping Modes (Norm and Turbo)

The Priv Bar Turbo offers dual vaping modes to cater to different preferences. In Norm mode, it delivers up to 15,000 puffs, ideal for extended vaping sessions. Switching to Turbo mode reduces puff capacity to around 10,000 but intensifies the experience with faster heating and stronger hits. This flexibility allows users to choose between longevity and intensity, making it suitable for both casual and experienced vapers. The dual modes ensure a customizable experience, enhancing overall satisfaction.

Charging Instructions

The Priv Bar Turbo features an 800mAh rechargeable battery. Use the provided USB cable to charge via a power source, with indicators showing charge progress and completion.

Locating the Charging Port

The charging port on the Priv Bar Turbo is conveniently located at the bottom of the device. To access it, gently flip the vape or rotate it to view the base. You’ll find a small USB-C port, designed for easy connection. Ensure the area is free from debris or e-liquid residue to maintain proper charging functionality. Always use the provided cable or a compatible USB-C charger to avoid damage. The port is clearly visible and straightforward to locate for hassle-free charging.

Using the USB Cable

To charge your Priv Bar Turbo, insert the USB-C end of the provided cable into the charging port at the base of the device. Connect the other end to a compatible USB charger or power source. Ensure the cable is fully secured to establish a proper connection. Avoid using damaged cables or non-compatible chargers, as they may damage the device. The LED indicator will typically light up to confirm charging is underway. Always use the original cable for optimal safety and performance.

Connecting to a Power Source

Once the USB cable is securely attached to your Priv Bar Turbo, connect the other end to a compatible USB power source, such as a wall adapter or computer USB port. Ensure the power source is stable and meets the device’s charging requirements. Avoid using damaged or non-certified chargers to prevent damage. The LED indicator will typically illuminate to confirm the connection is successful and charging has begun. Always prioritize safety by using original or high-quality charging accessories.

Understanding Charging Indicators

The Priv Bar Turbo features LED indicators to monitor the charging process. When connected to a power source, the LED light will illuminate, typically in red, indicating that charging is in progress. Once the battery is fully charged, the light will change to green or turn off completely. If the LED blinks or displays an unusual pattern, it may signal a charging error or malfunction. Refer to the user manual for specific indicator meanings to ensure proper charging and device functionality. Always monitor the indicators to avoid overcharging.

Usage Guidelines

The Priv Bar Turbo is draw-activated for easy use. Simply inhale to activate the device and enjoy a smooth vaping experience with its advanced mesh coil technology.

Activating the Device

The Priv Bar Turbo is designed for simplicity, featuring a draw-activated mechanism. To use the device, inhale through the mouthpiece, and the system will automatically detect your draw, initiating vapor production. No buttons or complex settings are required, making it incredibly user-friendly. This feature prevents accidental activation and ensures a seamless vaping experience. The device is ready to use straight out of the packaging, offering convenience for both new and experienced vapers.

Switching Between Norm and Turbo Modes

The Priv Bar Turbo offers dual vaping modes to suit your preferences. To switch between Norm and Turbo modes, locate the mode-selection button on the device. Pressing this button will toggle between the two modes. Norm mode provides a smoother experience with up to 15,000 puffs, while Turbo mode delivers faster vapor production with approximately 10,000 puffs. This flexibility allows users to customize their vaping experience based on their desired intensity and duration.

Monitoring E-Liquid Levels

To ensure optimal performance, regularly check the e-liquid levels in your Priv Bar Turbo. The device features a clear viewing window that allows you to visually inspect the remaining e-liquid. Additionally, the display panel provides indicators to alert you when levels are low. Keeping the tank adequately filled prevents dry hits and maintains consistent flavor. Refill the tank as needed, ensuring not to overfill, which could cause leakage. Proper monitoring ensures a smooth and enjoyable vaping experience.

Adjusting Airflow Settings

The Priv Bar Turbo features an adjustable airflow system, allowing users to customize their vaping experience. To modify the airflow, locate the airflow control ring or dial, typically found at the base of the device. Rotate it to increase or decrease airflow based on your preference for a tighter or looser draw. Adjusting the airflow enhances vapor production, flavor intensity, and overall comfort. Experiment with different settings to find your ideal balance for a satisfying vape session. Proper airflow adjustment ensures optimal performance and personalized enjoyment.

Troubleshooting Common Issues

Addressing common issues like charging problems, low vapor production, and e-liquid leaks is essential for maintaining the Priv Bar Turbo’s performance and ensuring a longer lifespan effectively.

Device Not Charging

If your Priv Bar Turbo isn’t charging, start by inspecting the USB cable and charging port for damage or debris. Clean the charging port gently with a soft cloth or brush to remove dirt. Ensure you’re using the original USB cable and a compatible power source. If the issue persists, the battery or charging port may be faulty. Check the charging indicators; a blinking light often signals low battery or charging status. If problems remain, contact customer support for further assistance or potential replacement. Always follow proper charging practices to avoid damage.

Low Vapor Production

Low vapor production in the Priv Bar Turbo can stem from coil issues, low e-liquid levels, or restricted airflow. Check if the coil is clean and free of debris. Ensure the e-liquid level is sufficient, as running low can reduce vapor output. Adjust the airflow settings to open it further for better draw. Additionally, ensure the device is properly charged, as a low battery can weaken performance. If issues persist, consider replacing the coil or consulting the user manual for troubleshooting tips. Regular maintenance can help optimize vapor production.

Coil-Related Issues

Coil-related issues in the Priv Bar Turbo often arise from improper priming, dry hits, or blockages. Ensure the coil is saturated with e-liquid before use. If the coil is dry, allow it to soak for a few minutes. Clean the coil regularly to remove debris and residue. If the issue persists, check for blockages in the airflow or wicking holes. A damaged coil may need replacement. Proper coil maintenance ensures consistent flavor and vapor production, enhancing your vaping experience.

E-Liquid Level Problems

Low e-liquid levels in the Priv Bar Turbo can cause dry hits or weak vapor production. Monitor the juice level through the transparent window. If the e-liquid is low, refill or replace the cartridge. Avoid overfilling, as it may lead to leaking. Ensure the coil is saturated before vaping to prevent burnt tastes. Regularly check and maintain adequate e-liquid levels to optimize performance and flavor. Proper e-liquid management is key to a smooth and enjoyable vaping experience with the Priv Bar Turbo.

Leaking E-Liquid

Leaking e-liquid can be frustrating and messy. It is often caused by overfilling the tank or improper assembly. To prevent this, ensure the tank is sealed tightly and avoid overfilling. The Priv Bar Turbo features anti-leak technology, but proper handling is still essential. If you notice leaks, check for any damage to the tank or connections. Gently tighten any loose parts and ensure all seals are intact. Regular maintenance can help prevent e-liquid leaks and maintain optimal performance.

Burnt Taste or Dry Hits

A burnt taste or dry hits occur when the coil is too hot or the e-liquid level is low. This can damage the coil and ruin the vaping experience. To fix this, ensure the Priv Bar Turbo has enough e-liquid and avoid chain vaping. Let the device cool down between puffs. If the issue persists, check for proper coil priming or replace the coil if necessary. Regular monitoring of e-liquid levels and coil condition helps prevent this problem. Always follow the manufacturer’s guidelines for optimal performance.

Maintenance and Care

Regularly clean the Priv Bar Turbo to prevent residue buildup. Store it in a cool, dry place, monitor battery health, and check for e-liquid leaks for optimal performance.

Cleaning the Device

Regular cleaning is essential for maintaining the Priv Bar Turbo’s performance. Use a soft cloth to wipe the exterior and charging port, ensuring no residue or debris accumulates. Avoid using liquids, as they may damage the device. Gently clean the mouthpiece to prevent e-liquid leaks and ensure a smooth vaping experience. Proper cleaning helps maintain flavor quality and prevents clogging. Always dry the device thoroughly after cleaning to preserve its functionality and extend its lifespan.

Storing the Priv Bar Turbo

To maintain the Priv Bar Turbo’s performance, store it in a cool, dry place away from direct sunlight and moisture. Avoid extreme temperatures or humidity, as this can damage the battery or e-liquid. Keep the device upright to prevent e-liquid leakage. If not in use for an extended period, ensure the battery is partially charged (not fully depleted) to maintain its health. Store it in a protective case to avoid scratches or physical damage. Proper storage ensures longevity and optimal functionality when you resume use.

Monitoring Battery Health

Regularly monitor the Priv Bar Turbo’s battery health to ensure optimal performance. Check the charge level using the device’s indicator lights or display panel. Avoid overcharging, as it can degrade battery life. Store the device in a cool, dry place when not in use to prevent overheating. If you notice a significant reduction in puff count or battery life, it may indicate aging. Replace or recharge the battery as needed to maintain reliable operation and extend its lifespan. Proper care ensures consistent vaping satisfaction.

User Manual Highlights

The Priv Bar Turbo manual provides essential guidelines for troubleshooting, charging, and maintenance. It includes detailed instructions for optimizing performance and resolving common issues efficiently.

Quick Start Guide

To begin using your Priv Bar Turbo, unbox the device and ensure all components are included. Charge the battery using the provided USB cable until the indicator light turns off. Once charged, activate the device by drawing on the mouthpiece. Switch between Norm and Turbo modes by clicking the power button twice. Monitor the e-liquid level through the viewing window and adjust the airflow to your preference. Regularly clean the device and store it safely to maintain performance and longevity.

Advanced Features Explained

The Priv Bar Turbo features cutting-edge technology for enhanced vaping. Its mesh coil optimizes flavor and vapor production, while the adjustable airflow system allows customization. Dual modes—Norm for 15,000 puffs and Turbo for 10,000—offer flexibility. The anti-leak design ensures mess-free use. Monitor battery and e-liquid levels via the display panel, and enjoy prolonged sessions with the 800mAh rechargeable battery. These features combine to provide a seamless, high-performance vaping experience tailored to both casual and experienced users.

Design and Safety Features

The Priv Bar Turbo combines sleek design with safety. Anti-leak technology prevents spills, while the display panel monitors battery and e-liquid levels. Safe charging practices ensure reliability and durability.

Display Panel and Indicators

The Priv Bar Turbo features a central display panel that provides clear visibility of key metrics. It shows battery life, e-liquid levels, and mode indicators, ensuring users stay informed. The panel is designed for easy monitoring, with color-coded lights to signal low battery or e-liquid levels. This intuitive system helps users maintain optimal performance and avoid interruptions. The display is user-friendly, making it simple to track device status and adjust settings as needed for a seamless vaping experience.

Anti-Leak Technology

The Priv Bar Turbo incorporates advanced anti-leak technology to prevent e-liquid from spilling or leaking during use. This feature ensures a mess-free vaping experience, even when the device is carried in a pocket or bag. The technology includes secure connections and internal seals that contain the e-liquid within the tank. This innovation enhances durability and user satisfaction, making the Priv Bar Turbo a reliable choice for vapers seeking convenience and performance without the hassle of leaks.

Safe Charging Practices

To ensure the longevity and safety of your Priv Bar Turbo, follow proper charging practices. Use the original USB cable and avoid overcharging, as it may degrade the battery. Charge the device on a stable, heat-resistant surface, away from water or flammable materials. Never leave the device unattended while charging. Monitor the charging indicators to avoid exceeding the recommended charge time. These practices help maintain the device’s performance, prevent potential hazards, and ensure a secure vaping experience. Always prioritize safety when handling rechargeable devices.

Comparison with Other Disposable Vapes

The Priv Bar Turbo stands out with its 15,000-puff capacity, 16ml e-liquid, and 800mAh battery, surpassing many disposables in longevity and performance, making it a top choice.

Puff Capacity and Battery Life

The Priv Bar Turbo excels with an impressive 15,000 puffs in Norm mode and 10,000 puffs in Turbo mode, supported by a robust 800mAh rechargeable battery. This ensures extended vaping sessions, outperforming many disposable vapes. The battery lasts up to 8 hours on a full charge, making it ideal for all-day use. Its dual-mode functionality offers flexibility, catering to both casual and heavy users. This combination of puff capacity and battery life makes it a standout choice in the disposable vape market.

E-Liquid Capacity Comparison

The Priv Bar Turbo stands out with its generous 16ml e-liquid capacity, surpassing most disposable vapes that typically hold 5-10ml. This large capacity reduces the need for frequent refills, offering extended vaping sessions. Compared to standard disposables, it provides nearly double the e-liquid, catering to heavy users and those seeking convenience. Its expansive capacity ensures a prolonged vaping experience, making it a competitive choice in the market. This feature is particularly appealing for vapers who prefer less frequent liquid refills and uninterrupted enjoyment.

Unique Features of the Priv Bar Turbo

The Priv Bar Turbo distinguishes itself with cutting-edge innovations. Its dual-mode vaping system allows users to switch between Norm and Turbo modes, offering flexibility in puff counts (15,000 in Norm, 10,000 in Turbo). The adjustable airflow system enhances customization, while the mesh coil technology ensures superior flavor and longevity. Its anti-leak design prevents messy situations, and the sleek, portable design makes it a stylish choice. With a rechargeable 800mAh battery and 16ml e-liquid capacity, it combines power and convenience for an exceptional vaping experience. These features make it a standout in the disposable vape market.

The Priv Bar Turbo stands out as a reliable, high-performance disposable vape, offering a blend of impressive features, durability, and convenience for a satisfying vaping experience.

Final Thoughts on the Priv Bar Turbo

The Priv Bar Turbo is a standout disposable vape, combining innovation and performance with its mesh coil, 16ml capacity, and 800mAh battery. Its dual modes—Norm and Turbo—offer flexibility, while adjustable airflow enhances customization. The device’s long-lasting battery and high puff count make it ideal for extended use. With a sleek design and user-friendly features, it appeals to both beginners and experienced vapers. Troubleshooting tips and maintenance guidelines ensure optimal performance, making it a reliable choice for a seamless vaping experience.

Recommendations for Potential Buyers

The Priv Bar Turbo is an excellent choice for vapers seeking a long-lasting, customizable experience. Its 16ml e-liquid capacity, 800mAh battery, and dual vaping modes make it ideal for both casual and heavy users. The adjustable airflow and mesh coil technology ensure superior flavor and vapor production. Whether you’re a beginner or an experienced vaper, this device offers convenience, flexibility, and reliability. With troubleshooting tips and maintenance guidelines readily available, it’s a practical and satisfying option for those looking to elevate their vaping experience.

wonderland cake instruction crossword clue

The Wonderland cake instruction crossword clue, recently featured in the LA Times on October 8, 2023, has garnered attention for its whimsical origin in Alice in Wonderland. The clue, with the answer “EATME,” references the magical cake Alice encounters, making it a delightful challenge for literature and puzzle enthusiasts alike.

1.1 Overview of the Crossword Clue

The Wonderland cake instruction crossword clue is a popular and quick puzzle that has appeared in various crosswords, including the LA Times. It typically consists of five letters, with the answer being EATME. This clue is straightforward, making it accessible to both casual and experienced solvers. Its simplicity and literary reference contribute to its widespread appeal, often leaving solvers satisfied upon recognizing the Alice in Wonderland connection.

1.2 Relevance of the Clue in Pop Culture

The Wonderland cake instruction crossword clue holds a special place in pop culture, largely due to its roots in Alice in Wonderland. The phrase “EAT ME” has become iconic, symbolizing curiosity and transformation. This clue often appears in crosswords, attracting both literature fans and casual solvers. Its simplicity and nostalgic appeal make it a favorite, frequently referenced in media, art, and even memes, ensuring its enduring relevance in modern culture.

Understanding the Wonderland Cake Instruction

The Wonderland cake instruction refers to the iconic “Eat Me” note from Alice in Wonderland. This magical cake plays a pivotal role in Alice’s adventures, enabling her growth and symbolizing transformation and curiosity in the story.

2.1 Origin of the Clue in “Alice in Wonderland”

The EATME instruction originates from Lewis Carroll’s Alice in Wonderland, where Alice discovers a cake with the words “EAT ME” inscribed. Consuming it causes her to grow, symbolizing transformation and curiosity. This magical moment in the story has become a cultural icon, making it a popular reference in crosswords and puzzles, linking literature and entertainment seamlessly.

2.2 The Role of the Cake in the Story

The “EAT ME” cake plays a pivotal role in Alice in Wonderland, serving as a transformative object that drives the plot. When Alice consumes it, she grows larger, leading to unexpected challenges and adventures. This magical cake symbolizes curiosity and the absurd logic of Wonderland, making it a memorable element in Alice’s journey and a cultural icon that continues to captivate audiences and inspire adaptations.

Solving the Crossword Clue

The crossword clue “Wonderland cake instruction” leads to the answer “EATME,” a direct reference to the magical cake in Alice in Wonderland. This clue, last seen in the LA Times on October 8, 2023, is a popular riddle for crossword enthusiasts due to its literary roots and simplicity, making it a fun challenge for solvers of all levels.

3.1 The Answer: EATME

The answer to the “Wonderland cake instruction” crossword clue is EATME, a direct reference to the magical cake in Alice in Wonderland. This cake, marked with the instruction “EAT ME,” causes Alice to grow when consumed. The clue’s simplicity and literary roots make it a popular challenge for crossword enthusiasts, appearing recently in the LA Times on October 8, 2023. Its brevity and cultural significance contribute to its enduring appeal in crosswords.

3.2 How to Approach Similar Crossword Puzzles

Approaching crossword clues like “Wonderland cake instruction” involves a mix of knowledge and strategy. Start by analyzing the clue for cultural or literary references, such as the “EAT ME” cake from Alice in Wonderland. Consider word lengths and patterns, and use online tools like crossword solvers for assistance. Employing systematic approaches, like filling in known letters first, and thinking creatively about word meanings can enhance problem-solving. Patience and persistence are key, as crosswords often require time and insight to unravel. Utilizing resources and maintaining a list of common themes can also aid in conquering future puzzles effectively.

The Cultural Significance of the EATME Cake

The EATME cake, a whimsical element from Alice in Wonderland, symbolizes curiosity and transformation. Its presence in crosswords highlights its enduring cultural impact as a literary icon, resonating with audiences worldwide.

4.1 Symbolism in “Alice in Wonderland”

The EATME cake symbolizes transformation and curiosity in Alice in Wonderland. It drives Alice’s growth, representing the story’s themes of identity and change. The cake’s magical properties highlight the fantastical nature of Wonderland, serving as a plot device to explore deeper narrative themes.

4.2 The Cake as a Literary Icon

The EATME cake has become a recognizable literary icon, symbolizing the whimsical and transformative elements of Wonderland. Its instruction, “EATME,” transcends the story, appearing in crosswords and popular culture. This enduring imagery reflects its lasting impact on literature and its ability to inspire creativity across media.

Tips for Solving Crossword Clues

The Wonderland cake instruction crossword clue, last seen in the LA Times on October 8, 2023, is solved with the 5-letter answer “EATME.” Use word length and pattern matching tools like Crossword Solver for better results. Focus on letter patterns and consider the context to crack tricky clues efficiently.

5.1 Using Word Length and Patterns

When solving crossword clues like “Wonderland cake instruction,” start by noting the word length. Here, the answer is 5 letters. Look for patterns or common letter combinations. For example, “EATME” fits the 5-letter requirement and matches the clue’s context from Alice in Wonderland. Using tools like Crossword Solver can help filter possibilities, making it easier to identify the correct answer quickly and accurately.

5.2 Leveraging Crossword Solver Tools

Crossword solver tools are invaluable for tackling clues like “Wonderland cake instruction.” By inputting the clue’s word length and pattern, solvers can quickly narrow down possibilities. Tools like Crossword-Solver.io analyze databases to suggest answers, such as “EATME” for this clue. These resources not only save time but also enhance solving efficiency, making them essential for both casual and competitive puzzlers seeking swift solutions to tricky crosswords;

The Popularity of Literary-Themed Crosswords

Literary-themed crosswords captivate audiences by blending storytelling with puzzles. The “Wonderland cake instruction” clue, inspired by Alice in Wonderland, attracts both literature lovers and crossword enthusiasts, enhancing solving experiences.

6.1 Why “Alice in Wonderland” is a Common Theme

Alice in Wonderland’s whimsical and iconic elements make it a popular theme for crosswords. Its rich characters, riddles, and symbolic objects, like the EATME cake, offer endless inspiration. The story’s timeless appeal and cultural significance ensure its themes resonate widely, making it a favorite for puzzle creators seeking engaging and recognizable content.

6.2 Other Literary Works in Crosswords

Literary works like Shakespeare’s plays, Dickens novels, and modern series such as Harry Potter frequently appear in crosswords. Their popularity stems from recognizable characters, titles, and quotes, making them ideal for clues. Crossword creators leverage these works due to their cultural significance and familiarity, ensuring solvers can connect with the content. This approach enhances the puzzle’s appeal and solvability, making literature a timeless source of crossword inspiration.

The History of Crossword Puzzles

The answer to the “Wonderland cake instruction” crossword clue is EATME. This 5-letter word directly references the instruction on the cake from the story “Alice in Wonderland,” where Alice finds a cake labeled “EAT ME,” leading to her growth.

7.1 Evolution Over the Years

Crossword puzzles have evolved significantly since their inception in the early 20th century. Initially popularized in newspapers, they became a staple in entertainment, challenging solvers with their clever clues and grid designs. Over time, crosswords transitioned from simple word squares to themed puzzles, incorporating cultural references like the “EATME” clue from Alice in Wonderland. The rise of digital platforms has further transformed crosswords, making them accessible worldwide and enhancing solving experiences with interactive tools.

7.2 The Role of Technology in Modern Crosswords

Technology has revolutionized crossword puzzles, enhancing accessibility and engagement. Online platforms now offer digital crosswords, solvers, and archives of past puzzles. Tools like crossword constructors and AI-powered generators enable the creation of personalized puzzles. Mobile apps provide on-the-go solving experiences, complete with hints and auto-check features. Additionally, technology facilitates real-time collaboration and virtual competitions, fostering a global crossword community. These advancements ensure crosswords remain relevant and entertaining in the digital age.

Lewis Carroll’s Influence on Crosswords

Lewis Carroll’s imaginative storytelling and riddles in Alice in Wonderland have inspired crossword creators, incorporating iconic symbols like the “EATME” cake, blending literature with puzzle-solving fun.

8.1 How His Works Inspire Puzzle Creators

Lewis Carroll’s whimsical storytelling and riddles in Alice in Wonderland have become a goldmine for crossword creators. His use of wordplay, logical puzzles, and fantastical scenarios, like the “EATME” cake, offers endless inspiration. The narrative’s riddle-like structure naturally translates into crossword clues, making his works a popular theme for literary-based puzzles. This blend of literature and logic appeals to both creators and solvers, ensuring his influence remains timeless in the world of crosswords.

8.2 The Use of Riddles and Puzzles in His Writing

Lewis Carroll masterfully integrated riddles and puzzles into his works, creating an interactive reading experience. From the Mad Hatter’s riddles to the “EATME” cake instruction, his writing challenges readers to engage actively. These elements not only entertain but also stimulate critical thinking, making his stories a perfect foundation for crossword clues. This unique storytelling technique has cemented his legacy as a pioneer in blending literature with logic.

The EATME Cake in Popular Culture

The EATME cake from Alice in Wonderland has become a cultural icon, frequently referenced in media, art, and even crossword puzzles, symbolizing curiosity and temptation.

9.1 References in Media and Art

The EATME cake from Alice in Wonderland has inspired countless references in media and art. It appears in films, TV shows, and artwork, often symbolizing curiosity and transformation. The cake’s whimsical nature makes it a popular motif in fantasy-themed designs and literary adaptations, further cementing its place in pop culture as a recognizable and beloved symbol from the classic tale.

9.2 The Cake as a Symbol of Curiosity

The EATME cake embodies curiosity, as it ignites Alice’s adventurous spirit in Alice in Wonderland. Its role as a transformative object symbolizes the allure of the unknown and the desire to explore. This symbolism extends beyond literature, inspiring artistic interpretations and cultural references, making the cake an enduring emblem of curiosity in both the story and popular culture, including its appearance in crosswords as a clue tied to adventure and discovery.

Fun Facts About the Wonderland Cake

The Wonderland cake is iconic, originating from Alice in Wonderland. It inspired Lewis Carroll’s whimsical writing and remains a popular crossword clue, symbolizing curiosity and adventure.

10.1 Interesting Trivia

The Wonderland cake, made famous in Lewis Carroll’s Alice in Wonderland, is a central plot device that causes Alice to shrink. Its “EAT ME” instruction is a crossword favorite, appearing in the LA Times on October 8, 2023. This cake has become a cultural symbol, referenced in art, media, and even baking challenges. Its whimsical design and magical properties continue to captivate audiences, making it a timeless literary and pop culture icon.

10.2 Historical Context of the Cake’s Significance

The Wonderland cake first appeared in Lewis Carroll’s 1865 novel, Alice’s Adventures in Wonderland. It played a crucial role in Alice’s journey, leading to her shrinkage. The cake’s “EAT ME” instruction became iconic, symbolizing curiosity and transformation. Its image has been used in various media, further cementing its place in cultural history. The clue’s appearance in the LA Times on October 8, 2023, highlights its lasting impact on literature and puzzles, showcasing its enduring significance.

Creating Your Own Wonderland Cake

Bake a whimsical cake inspired by Alice’s adventures, featuring a bold “EAT ME” decoration. Use vibrant colors and playful designs to capture its magical essence.

11.1 Step-by-Step Guide

  • Preheat the oven to 350°F (175°C) and grease two round cake pans.
  • Mix 2 cups of flour, 1 cup of sugar, 3 eggs, and 1 teaspoon of vanilla extract for the batter.
  • Pour the batter into the pans and bake for 25-30 minutes until golden brown.
  • Allow the cakes to cool before frosting with a creamy buttercream.
  • Decorate the top with edible letters spelling “EAT ME” and add whimsical designs like floral patterns or mushrooms.

11.2 Tips for Decorating the Cake

To create a whimsical Wonderland-inspired cake, use edible decorations like floral patterns, mushrooms, or playing cards. Add a small “EAT ME” sign on top for a nod to the story. Opt for bright, vibrant colors to match the fantastical theme. Consider using edible glitter or shimmer dust for a magical finish. Don’t forget to add whimsical details like tiny edible bows or ribbons to enhance the design.

The Psychology of Crossword Solving

Solving crosswords like the “Wonderland cake instruction” clue stimulates cognitive functions, enhancing memory and problem-solving skills. It provides mental relaxation and a sense of achievement.

12.1 Cognitive Benefits

Solving crosswords like the “Wonderland cake instruction” clue enhances cognitive functions such as memory, attention, and problem-solving. It strengthens neural connections, improving mental agility and logical reasoning. Regular engagement in crosswords can delay cognitive decline and boost overall brain health. The process of recalling words and patterns sharpens the mind, while the satisfaction of solving clues provides a sense of accomplishment and mental relaxation.

12.2 The Satisfaction of Solving a Clue

Solving the “Wonderland cake instruction” crossword clue brings a sense of accomplishment and mental satisfaction; The “EATME” answer, rooted in Alice in Wonderland, provides a thrilling connection to literature. Successfully decoding clues enhances problem-solving confidence and offers a rewarding mental break. This achievement fosters a sense of pride, encouraging further engagement with crosswords as a stimulating and enjoyable intellectual activity.

Common Challenges in Crossword Puzzles

The answer to the “Wonderland cake instruction” crossword clue is EATME. This references the cake from “Alice in Wonderland,” which Alice eats to grow bigger. The clue often appears in crosswords, with “EATME” fitting the five-letter format, consistent with hints from sources like the LA Times Crossword.

13.1 Dealing with Uncommon Words

Uncommon words often pose challenges in crosswords, as seen with the “EATME” clue from “Alice in Wonderland.” Solvers may struggle with non-standard vocabulary or phrases, requiring creative thinking. Patterns like “EATME” hint at literary references, encouraging solvers to think beyond common words. Utilizing crossword tools or databases can aid in deciphering such unique clues, making the solving process more efficient and enjoyable for enthusiasts.

13.2 Strategies for Stuck Solver

The answer to the crossword clue “Wonderland cake instruction” is EATME. This refers to the magical cake from “Alice in Wonderland” that Alice encounters, with the instruction written on it being “Eat me.”

The Future of Crossword Puzzles

The future of crossword puzzles lies in digital innovation, enhanced solver tools, and interactive features, making clues like “Wonderland cake instruction” more accessible and engaging for enthusiasts.

14.1 Digital vs. Print Crosswords

Digital crosswords offer convenience and interactive tools, enhancing the solving experience with features like crossword solvers and real-time hints, as seen with the “Wonderland cake instruction” clue. Print crosswords, however, provide a tactile, traditional experience cherished by many enthusiasts. The rise of digital platforms has expanded accessibility, but print remains popular for its nostalgic charm, ensuring both formats coexist in the evolving world of crossword puzzles.

14.2 Innovations in Puzzle Design

Innovations in crossword puzzle design have transformed the way enthusiasts engage with clues like the “Wonderland cake instruction.” The integration of literary references, such as the “EATME” cake from Alice in Wonderland, adds a layer of cultural depth. Modern tools like crossword solvers and interactive platforms enhance the solving experience, making puzzles more accessible and dynamic. These advancements help ensure crosswords remain a vibrant and evolving form of entertainment.

The “Wonderland cake instruction” crossword clue, with its answer “EATME,” offers a charming nod to Alice in Wonderland. This whimsical clue delights both literature enthusiasts and puzzle lovers, showcasing the magical intersection of pop culture and crosswords. Solving such clues not only exercises the mind but also brings a sense of accomplishment, encouraging everyone to explore more crosswords and embrace their timeless appeal.

15.1 Final Thoughts on the Wonderland Cake Clue

The “Wonderland cake instruction” crossword clue, with its answer “EATME,” captivates solvers with its whimsical charm and literary roots. Originating from Alice in Wonderland, the clue not only tests knowledge but also evokes nostalgia for Lewis Carroll’s beloved tale. Solving it brings a sense of achievement, reminding us of the joy in uncovering hidden meanings. This clue exemplifies how crosswords can blend culture, literature, and fun, inspiring enthusiasts to explore more puzzles.

15.2 Encouragement to Try More Crosswords

Solving the “Wonderland cake instruction” crossword clue is just the beginning of an exciting journey into the world of crosswords. These puzzles offer a perfect blend of challenge and fun, sharpening your mind while connecting you to literature, pop culture, and history. Each clue solved brings a sense of accomplishment and curiosity for more. Embrace the adventure, explore new themes, and discover the joy of uncovering hidden words and meanings. Happy puzzling!

Frequently Asked Questions

Frequently Asked Questions about the Wonderland cake instruction crossword clue often include inquiries about the answer, its origin, and tips for solving similar puzzles. The answer is EATME, appearing in the LA Times on October 8, 2023. Many seek resources for other literary-themed clues.

16.1 General Questions About the Clue

General questions about the Wonderland cake instruction crossword clue often revolve around its origin, popularity, and the reasoning behind its use in crosswords. Many ask why the answer “EATME” is significant and how it ties to Alice in Wonderland. Others inquire about the clue’s frequency in puzzles and its appeal to both literature enthusiasts and casual solvers. These questions highlight the clue’s enduring curiosity and satisfaction in solving it.

16.2 Questions About Crossword Solving

Common questions about solving crosswords include strategies for deciphering clues like “Wonderland cake instruction.” Solvers often ask about effective techniques, such as identifying word patterns or utilizing crossword solver tools. Many inquire about how to handle uncommon words or letters, while others seek tips on staying patient and methodical. These questions reflect the challenges and rewards of mastering crossword puzzles, especially when literature-inspired clues are involved.

Final Words

Exploring the “Wonderland cake instruction” crossword clue offers a delightful blend of literature and puzzle-solving. The answer, “EATME,” not only solves the clue but also connects players to Alice in Wonderland’s whimsical world. This crossword clue exemplifies how riddles and puzzles in classic literature continue to inspire modern entertainment. It encourages players to embrace curiosity and creativity, making crosswords a timeless and engaging activity for all ages.

sample letter of last instruction

A Letter of Last Instruction is an informal document guiding your family on personal‚ financial‚ and funeral matters after your death‚ simplifying estate management without legal requirements.

1.1. Definition and Purpose

A Letter of Last Instruction is an informal document that outlines your wishes and provides essential information to guide your family and executor after your death. Its purpose is to offer clarity on personal‚ financial‚ and funeral arrangements‚ ensuring your desires are respected. Unlike a will‚ it is not legally binding but serves as a practical guide to ease the burden on loved ones during an emotional time. This document helps organize key details‚ such as location of important papers‚ financial contacts‚ and burial preferences‚ making it easier for your family to manage affairs without confusion. By including specific instructions‚ you can address matters that may not be covered in legal documents‚ ensuring a smoother transition for those left behind.

1.2. Importance in Estate Planning

A Letter of Last Instruction plays a crucial role in estate planning by providing a clear and organized guide for your loved ones to follow after your death. It fills gaps that legal documents like wills and trusts may not cover‚ such as funeral preferences‚ locations of important documents‚ and personal wishes. This document reduces the burden on your family by offering direction during an emotionally challenging time. It ensures that your estate is managed smoothly and that your desires are respected. By including details about financial contacts‚ passwords‚ and beneficiaries‚ it simplifies the process of settling your affairs. While not legally binding‚ it serves as a valuable resource for your executor and family‚ helping them navigate complex decisions with confidence and clarity.

1.3. Legal vs. Informal Document

A Letter of Last Instruction is an informal document‚ differing from legal documents like wills or trusts. It does not require legal validation or an attorney’s involvement‚ making it accessible and straightforward to create. Unlike a will‚ which is legally binding and must go through probate‚ this letter serves as a guide to assist your family and executor in managing your estate. It provides practical information‚ such as locations of important documents‚ funeral preferences‚ and financial details‚ but lacks legal enforceability. While it complements your formal estate plan‚ it is not a substitute for legal documents. Its informal nature allows for easy updates and personal touches‚ ensuring your wishes are clearly communicated without the formalities of a legal process. This distinction makes it a valuable yet flexible tool in your estate planning strategy.

Key Components of a Letter of Last Instruction

Key components include essential details about personal‚ financial‚ and funeral matters‚ guiding executors and family in managing the estate effectively without legal enforcement.

2.1. Personal Information

A Letter of Last Instruction should include essential personal details to facilitate estate management. This includes your full name‚ date of birth‚ Social Security number‚ and address. Additionally‚ list your spouse‚ children‚ parents‚ and other significant individuals‚ along with their contact information. Specify clergy‚ close friends‚ or business associates who should be notified of your death. Including maiden names‚ aliases‚ and marital status can also aid in administrative tasks. This section ensures your executor and family can efficiently manage paperwork‚ notifications‚ and legal processes. It provides clarity and avoids confusion during an emotionally challenging time. Organizing this information helps loved ones locate critical documents and fulfill your final wishes effectively.

2.2. Business and Financial Contacts

Your Letter of Last Instruction should detail key business and financial contacts‚ including accountants‚ investment advisers‚ and insurance agents. List their names‚ roles‚ and contact information to help your executor manage financial matters. Include details about your bank accounts‚ investments‚ loans‚ and insurance policies‚ noting account numbers and payment terms. Specify any ongoing business relationships and relevant contracts. This section ensures your financial affairs are handled smoothly‚ reducing the burden on your family. It provides a clear roadmap for settling debts‚ managing assets‚ and fulfilling financial obligations. By organizing this information‚ you enable your executor to efficiently navigate complex financial scenarios and ensure your wishes are carried out without unnecessary delays or complications.

2.3. Legal Document Location

Your Letter of Last Instruction should specify the location of important legal documents‚ such as your will‚ trusts‚ deeds‚ tax returns‚ marriage license‚ and Social Security card. Clearly state where these documents are stored‚ whether in a safe‚ filing cabinet‚ or with your attorney. Provide detailed instructions on how to access them‚ including combinations or keys if necessary. This ensures your executor can locate and retrieve these critical documents without delay. Include information about any other relevant legal papers‚ such as veteran benefits‚ birth certificates‚ or business contracts. By organizing this information‚ you simplify the process of settling your estate and reduce the risk of misplaced or lost documents. Regularly update this section to reflect any changes in storage locations or document additions.

2.4. Loan and Debt Information

In your Letter of Last Instruction‚ include a detailed list of all outstanding loans and debts. Specify the creditor’s name‚ account numbers‚ payment terms‚ and collateral information. Also‚ list any debts owed to you‚ including the debtor’s contact details‚ payment terms‚ and collateral. This section ensures your executor understands your financial obligations and can manage them appropriately. Provide clarity on which debts should be prioritized or settled first. If there are specific instructions for handling certain loans or debts‚ outline them clearly. This information will help your family avoid confusion and ensure your financial affairs are resolved efficiently. Regular updates to this section are crucial as your financial situation evolves over time;

2.5. Usernames and Passwords

Your Letter of Last Instruction should include a section dedicated to usernames and passwords for all your online accounts. This includes banking‚ social media‚ email‚ and other digital platforms. Providing this information ensures your executor can access these accounts securely and manage them according to your wishes. List each account separately‚ noting the platform name‚ associated username‚ and password. For enhanced security‚ consider storing this information in a secure location‚ such as a password manager‚ and include details on how to access it. Regularly update this section as passwords change to maintain accuracy. This step is crucial for preventing account lockouts and ensuring your digital legacy is handled properly. It also helps protect your privacy and financial security after your passing.

2.6. Beneficiaries

In your Letter of Last Instruction‚ it is essential to list the names and contact details of all beneficiaries associated with your estate‚ including those named in your will‚ life insurance policies‚ retirement accounts‚ and trusts. Clearly state their relationship to you and specify any particular instructions regarding the distribution of assets. For example‚ you may want to outline how specific items‚ such as heirlooms or property‚ should be allocated. Additionally‚ provide guidance on how to handle any disputes or misunderstandings that may arise. This section ensures your wishes are honored and avoids potential conflicts among beneficiaries. Regularly update this information to reflect changes in your life‚ such as births‚ deaths‚ marriages‚ or divorces. Clarity in this area helps ease the burden on your loved ones and ensures your estate is distributed as intended.

2.7. Funeral Arrangements

Your Letter of Last Instruction should include detailed funeral arrangements to ease the burden on your family. Specify preferences for burial or cremation‚ the type of service‚ and location. Mention desired flowers‚ music‚ and readings to create a meaningful ceremony. Indicate the clothing or attire you wish to be dressed in‚ as well as any specific rituals or traditions to be observed. Include information about cemetery plots or cremation plans if already arranged. Additionally‚ provide details for obituary publication‚ such as preferred newspapers or online platforms. This section ensures your final wishes are respected and helps your loved ones make informed decisions during a difficult time. Regular updates are essential to reflect any changes in your preferences or plans.

Benefits of Creating a Letter of Last Instruction

A Letter of Last Instruction simplifies estate management‚ reduces family burden‚ and provides clarity‚ ensuring your wishes are honored and easing decision-making during emotional times.

3;1. Simplifies Estate Management

A Letter of Last Instruction streamlines estate management by providing clear guidance on key details such as financial accounts‚ legal documents‚ and funeral arrangements‚ reducing confusion for executors and family members. By organizing essential information in one place‚ it ensures that your loved ones can efficiently manage your estate without unnecessary delays or disputes. This document acts as a roadmap‚ making it easier to locate important paperwork‚ access accounts‚ and carry out final wishes. Its structured format helps avoid the chaos of searching for scattered information‚ allowing your family to focus on healing rather than administrative challenges. Ultimately‚ it simplifies the complexities of estate administration‚ ensuring your affairs are handled smoothly and according to your preferences.

3.2. Reduces Family Burden

A Letter of Last Instruction significantly reduces the emotional and practical burden on your family by providing clear‚ organized guidance. During a grieving period‚ loved ones often face overwhelming decisions and challenges‚ such as locating documents‚ managing finances‚ or arranging funerals. This document alleviates their stress by outlining your wishes and offering step-by-step instructions. It prevents confusion and disagreements by clarifying your preferences‚ ensuring everyone understands your intentions. Additionally‚ it saves time by centralizing critical information‚ such as account details‚ passwords‚ and legal documents‚ making it easier for your family to handle estate matters efficiently. By addressing these aspects‚ the letter allows your loved ones to focus on healing and supporting one another‚ rather than navigating uncertainty and complexity.

3.3. Provides Clarity and Direction

A Letter of Last Instruction offers clear direction‚ ensuring your family understands your wishes and can act accordingly. It eliminates ambiguity by detailing preferences for funeral arrangements‚ asset distribution‚ and other critical decisions. This clarity prevents potential disputes and ensures that your intentions are honored. The document provides a roadmap‚ guiding your loved ones through complex processes such as locating legal documents‚ managing financial accounts‚ and fulfilling final wishes. By offering specific instructions‚ it reduces uncertainty and empowers your family to make informed decisions confidently. This level of clarity not only respects your autonomy but also supports your loved ones during a challenging time‚ ensuring your legacy is managed with precision and care.

Steps to Write a Letter of Last Instruction

Assess your needs‚ organize information‚ draft the letter‚ and share it with your executor to ensure clarity and accessibility for your family.

4.1. Assessing Your Needs

Assessing your needs is the first step in creating a Letter of Last Instruction. This involves evaluating your personal circumstances‚ financial situation‚ and family dynamics. Consider your assets‚ debts‚ beneficiaries‚ and funeral preferences. Identify key contacts‚ such as financial advisors‚ attorneys‚ and insurance providers. Reflect on your digital presence‚ including online accounts and passwords. Determine if there are specific instructions for dependents or pets. Assessing your needs ensures the letter addresses all critical areas‚ providing clarity for your loved ones. This step helps you identify what information is most important to include‚ ensuring the document is tailored to your unique situation. By understanding your needs‚ you can create a comprehensive and practical guide for your family during a difficult time.

4.2. Organizing Your Information

Organizing your information is crucial for creating a clear and effective Letter of Last Instruction. Start by categorizing your details into sections such as personal information‚ financial contacts‚ legal document locations‚ and funeral arrangements. Use a structured format to ensure readability‚ listing items like account numbers‚ passwords‚ and beneficiary details. Consider creating subsections for specific topics‚ such as loans‚ debts‚ and digital assets. Use bullet points or numbered lists to make complex information easier to digest. Ensure all critical contacts‚ such as attorneys and financial advisors‚ are prominently displayed. By organizing your information thoughtfully‚ you help your family navigate your affairs with ease. This step ensures your instructions are logical‚ accessible‚ and free from confusion‚ providing a seamless experience for your loved ones during a challenging time.

4.3. Drafting the Letter

Drafting a Letter of Last Instruction requires clarity and precision to ensure your wishes are understood. Begin by listing your personal information‚ followed by sections for financial contacts‚ legal document locations‚ and funeral arrangements. Be specific when detailing loan and debt information‚ including account numbers and payment terms. Include usernames and passwords for digital accounts‚ ensuring they are securely noted. Clearly outline beneficiary details and any specific instructions for asset distribution. When describing funeral arrangements‚ provide precise preferences‚ such as service type‚ location‚ and burial wishes. Keep the tone formal yet compassionate‚ as this letter will guide your family during a difficult time. Avoid ambiguity and ensure all critical information is easily accessible. Finally‚ review the letter for accuracy and completeness‚ making sure it reflects your final wishes comprehensively. This step ensures your family is well-prepared to carry out your instructions seamlessly. Regular updates are essential to maintain relevance.

4.4. Sharing the Letter

Sharing your Letter of Last Instruction is crucial to ensure your wishes are carried out. Provide your executor or a trusted family member with the document’s location‚ whether it’s in a safe‚ filing cabinet‚ or secure digital storage. Make sure they understand its importance and know where to find it. Consider giving copies to your attorney or close relatives‚ but ensure only trusted individuals have access. Avoid keeping it in a locked box without sharing the combination. Update your family whenever you revise the letter. While it doesn’t require legal filing‚ its accessibility is vital. Store it alongside your will or other estate documents for easy retrieval. Regularly verify that your executor can locate and access it. This step ensures your instructions are followed‚ reducing confusion and stress for your loved ones during an emotional time. Clear communication about the letter’s existence and location is essential.

Maintaining and Updating the Letter

Regularly review and update your Letter of Last Instruction to reflect life changes‚ such as marriages‚ divorces‚ births‚ or financial shifts‚ ensuring accuracy and relevance over time.

5.1. Regular Review

Regular review of your Letter of Last Instruction ensures all details remain current and accurate. Life changes‚ such as births‚ deaths‚ marriages‚ or financial shifts‚ can render old information obsolete. By revisiting the document annually or during significant events‚ you can update contact details‚ account information‚ and beneficiary designations. This practice helps prevent confusion and ensures your wishes are honored. It’s also wise to coincide reviews with estate planning updates to maintain consistency across all documents. Over time‚ small adjustments can make a big difference in easing the burden on your loved ones.

5.2. Updating After Life Changes

Significant life events often require updates to your Letter of Last Instruction. Marriage‚ divorce‚ the birth of children‚ or the death of a family member can alter your wishes and the information provided. Additionally‚ changes in financial status‚ such as acquiring new assets or paying off debts‚ should be reflected. Relocations‚ job changes‚ or updates to executor or beneficiary designations also necessitate revisions. Updating the letter ensures that your instructions remain relevant and aligned with your current circumstances. Failing to do so may lead to confusion or misinformation‚ making it harder for your family to carry out your wishes. Regular updates are crucial to maintaining clarity and effectiveness in your estate plan.

5.3. Storing the Letter

Properly storing your Letter of Last Instruction ensures it is accessible and secure. Keep the original document in a safe‚ fireproof location‚ such as a home safe or a safety deposit box at your bank. Inform your executor or a trusted family member of its location to avoid delays or confusion. Consider keeping a digital copy in an encrypted cloud storage service or with a trusted individual‚ ensuring it is password-protected. Avoid placing the letter in a will or trust‚ as these documents may not be immediately accessible. Regularly review the storage location to ensure it remains secure and accessible‚ updating your family or executor if the location changes. This step ensures your instructions are readily available when needed‚ providing clarity and relief to your loved ones during a difficult time.

Common Mistakes to Avoid

Failing to update the letter after life changes‚ omitting crucial details‚ and not informing the executor about the document’s existence are common errors that can lead to confusion.

6.1. Not Updating the Letter

One of the most critical mistakes is failing to update the Letter of Last Instruction as life circumstances change. Events such as marriage‚ divorce‚ the birth of children‚ or significant financial shifts can render the document outdated. Without regular reviews‚ the letter may no longer reflect your current wishes or financial situation‚ leading to confusion and potential disputes. For instance‚ if new beneficiaries are added or assets are acquired‚ the letter must be revised to include this information. Neglecting updates can cause loved ones to rely on outdated instructions‚ complicating estate management and increasing stress during an already difficult time. It is essential to revisit and revise the letter whenever major life changes occur or during routine estate plan reviews to ensure accuracy and relevance.

6.2. Omitting Key Information

Omitting essential details is a common error that can hinder the effectiveness of a Letter of Last Instruction. Critical information‚ such as the location of important documents‚ passwords‚ or specific funeral wishes‚ must be included to avoid leaving loved ones without guidance. For example‚ failing to list beneficiaries or neglecting to specify funeral arrangements can lead to confusion and disputes. Additionally‚ omitting financial details‚ such as loan information or business contacts‚ can create challenges for those managing your estate. It is crucial to ensure that all relevant information is comprehensively included‚ providing clarity and direction. Without thorough details‚ the letter may fail to serve its purpose‚ leaving family members to guess your intentions and potentially causing unnecessary complications during an already emotional time.

6.3. Not Informing the Executor

One of the most significant mistakes is failing to inform the executor about the existence of the Letter of Last Instruction. The executor is responsible for carrying out your wishes‚ so they must know where to find the document. Without this knowledge‚ the executor may overlook critical details‚ leading to misunderstandings or missed instructions. It is essential to communicate the document’s location and contents to ensure they can fulfill their role effectively. Additionally‚ not discussing the letter with the executor may result in them being unprepared to handle the responsibilities outlined within. Open communication ensures your wishes are respected and reduces the burden on your loved ones during a difficult time. Always verify that the executor is fully aware of the letter and its importance to avoid potential oversight and complications.

A Letter of Last Instruction is a vital document that simplifies estate management and eases the burden on loved ones‚ ensuring your wishes are clearly communicated and respected.

7.1. Final Thoughts

Ultimately‚ a Letter of Last Instruction is about more than just logistics—it’s about leaving a clear and loving message for those you care about most. Take the time to create and update this document regularly to ensure your wishes are accurately reflected and easily accessible when needed.

7.2. Encouragement to Act

Creating a Letter of Last Instruction is a proactive step that brings clarity and comfort to both you and your loved ones. While it may seem daunting‚ the process is straightforward and requires minimal time. By taking this step‚ you ensure that your wishes are respected and your family is spared unnecessary stress during an already emotional time. It’s a thoughtful gesture that demonstrates your care and consideration for those who matter most.

Don’t wait—start your Letter of Last Instruction today. Use the insights and guidelines provided to craft a document that reflects your needs and desires. Whether you’re just beginning your estate planning or refining existing arrangements‚ this letter is a simple yet impactful way to make a difference. Take control of your legacy and give your family the gift of certainty and peace of mind.

car jump starter instructions

A car jump starter is a portable device designed to jump-start a vehicle with a dead battery․ It’s an essential tool for emergencies, offering convenience, safety, and reliability․

1․1 What Is a Car Jump Starter?

A car jump starter is a portable electronic device designed to jump-start a vehicle with a dead or weak battery․ Unlike traditional jumper cables, which require another vehicle, a portable jump starter operates independently, making it a convenient solution for emergencies․ These devices store electrical energy and provide the necessary power to start a car engine․ They are equipped with cables and clamps that connect directly to the battery terminals․ Modern jump starters often include additional features such as USB ports for charging smartphones or other devices, LED lights for illumination, and safety protections like overcharge prevention․ They are compact, easy to use, and eliminate the need for another vehicle, making them a must-have tool for drivers seeking reliability and safety․ Their portability and versatility have made them a popular choice for roadside emergencies․

1․2 Types of Car Jump Starters

Car jump starters come in various types, catering to different needs and preferences․ The most common are portable jump starters, which are compact, lightweight, and easy to carry․ These are ideal for personal use, offering a balance of power and portability․ Heavy-duty jump starters are designed for larger vehicles like trucks and SUVs, providing higher power output for robust engines․ Some models combine jump-starting with other functions, such as solar-powered jump starters, which are eco-friendly and suitable for outdoor enthusiasts․ Additionally, there are jump starters with built-in compressors, enabling users to inflate tires while on the go․ Each type varies in features, capacity, and price, ensuring drivers can choose the best option for their specific requirements and vehicle types․ This variety makes jump starters versatile tools for various automotive needs․

1․3 Advantages of Using a Portable Jump Starter

Using a portable jump starter offers numerous advantages, making it an indispensable tool for car owners․ Its compact design allows for easy storage in a vehicle, ensuring it’s always available during emergencies․ Unlike traditional jumper cables, portable jump starters eliminate the need for another vehicle, providing a self-sufficient solution․ They are also safer, as they often include built-in protections against overcharging, short circuits, and voltage spikes․ Many models come with additional features like USB ports for charging devices, LED lights for illumination, and air compressors for inflating tires․ This versatility makes them a multi-functional accessory for drivers․ Furthermore, portable jump starters are user-friendly, with clear instructions and simple connections, reducing the risk of errors․ Their reliability and convenience make them a must-have for any driver seeking peace of mind on the road․ This ensures a quick and efficient solution to a dead battery without needing external assistance․

Safety Precautions and Essential Checks

Safety precautions are crucial when using a car jump starter․ Always ensure the vehicle is turned off, avoid electrical components, and prevent metal contact․ Check terminals for corrosion and ensure proper voltage compatibility․ Essential for a safe jump-start process․

2․1 Pre-Jump Safety Measures

Before attempting to jump-start a car, ensure both vehicles are turned off and in neutral or park gear․ Engage the parking brake for safety․ Locate a well-ventilated area away from open flames or sparks․ Turn off all electrical components, including lights, radios, and wipers, to prevent electrical surges․ Avoid touching metal parts to prevent shocks․ Check the dead battery for damage or leaks, and ensure terminals are clean and free of corrosion․ Verify the voltage compatibility between the dead battery and the donor vehicle․ Always refer to the vehicle’s manual for specific instructions․ Ensure the vehicles are not touching each other to prevent short circuits․ Properly secure the vehicles to avoid movement during the process․ These precautions help prevent accidents and ensure a safe jump-starting experience․

2․2 Checking the Car Battery and Terminals

Inspect the car battery and terminals before jump-starting․ Look for signs of damage, leaks, or corrosion․ Clean terminals using a wire brush to ensure good connectivity․ Check the battery voltage with a multimeter․ Ensure the terminals are tightly secured․ Verify the battery’s water level if applicable․ Inspect cables for frays or breaks․ Avoid jump-starting a cracked or leaking battery․ If corrosion is present, clean it with a mixture of baking soda and water․ Properly secure the battery to prevent movement․ Ensure all connections are snug and not loose․ Check for any blockages in the terminals․ If the battery is old or weak, it may require replacement․ Always wear protective gloves and eyewear when handling batteries․ A thorough inspection ensures a safe and effective jump-start process․ Regular maintenance can prevent future issues with the battery and electrical system․

2․3 Ensuring Proper Vehicle Placement

Proper vehicle placement is critical for a safe and successful jump start․ Park the vehicles on a flat, stable surface, ensuring they do not touch each other․ Turn off the engines, lights, and all electrical accessories in both cars․ Engage the parking brake on both vehicles to prevent movement․ Position the vehicles so the hoods are facing each other, allowing easy access to both batteries․ Avoid placing the vehicles in a confined or poorly ventilated space․ Ensure the area is clear of flammable materials․ If the dead car’s battery is located in a compartment other than the engine bay, refer to the owner’s manual for designated jump-start terminals․ Always maintain a safe distance between the vehicles to prevent any accidental contact․ Proper placement minimizes risks and ensures a secure connection for the jump-start process․

Step-by-Step Guide to Using a Portable Jump Starter

Locate the car battery, connect the jump starter clamps to the terminals, start the engine, and disconnect the device safely after the car is running smoothly․

3․1 Locating the Car Battery and Terminals

Start by opening the car hood and locating the battery, typically found in the engine compartment․ The battery is a small, rectangular box with two metal terminals on top․ These terminals are marked with a positive (+) and negative (-) sign․ The positive terminal is usually connected to a red cable, while the negative terminal is connected to a black cable․ In some vehicles, the battery may be located elsewhere, such as in the trunk or under the floor․ Always refer to the car’s owner’s manual for specific guidance․ Before connecting the jump starter, ensure the terminals are clean and free of corrosion․ If corroded, use a wire brush to clean them for better connectivity․ Properly identifying and accessing the terminals is essential for a safe and effective jump-starting process․

3․2 Connecting the Jump Starter to the Battery

Attach the red (positive) clamp of the jump starter to the positive terminal on the car battery․ Ensure it’s securely connected to the terminal․ Next, connect the other end of the red clamp to the designated positive terminal on the jump starter․ Now, take the black (negative) clamp and connect it to the negative terminal on the car battery or a solid metal ground, such as a bolt on the engine block․ Avoid touching any moving parts or electrical components․ Once all connections are secure, turn on the jump starter․ Start the car’s engine and let it run for a few minutes to allow the battery to charge․ Monitor the connections to ensure they remain stable and avoid any sparks or short circuits during the process․

3․3 Starting the Car and Disconnecting the Jump Starter

Once the jump starter is connected, start the car’s engine․ Allow it to run for a few minutes to charge the battery․ Ensure the jump starter’s indicator lights confirm a successful connection․ After the car starts, turn off the jump starter․ Disconnect the black (negative) clamp first from the ground or battery terminal, then remove the red (positive) clamp from the car battery․ Avoid letting the clamps touch each other or metal surfaces during disconnection to prevent sparks․ Finally, remove the remaining clamps from the jump starter․ Properly store the jump starter and let the car run for at least 15 minutes to recharge the battery fully․ If the car doesn’t start, check the connections and try again․ Always follow the manufacturer’s instructions for specific models․

Common Mistakes to Avoid

Avoid incorrect cable connections, ignoring safety guidelines, and failing to recharge the battery after a jump start․ These mistakes can lead to damage, safety risks, or repeated issues․

4․1 Incorrect Cable Connections

Incorrectly connecting jumper cables is a common mistake that can lead to safety hazards, electrical damage, or even explosions․ Always ensure the cables are attached in the correct order: red to the positive terminal of the dead battery, red to the positive terminal of the good battery, black to the negative terminal of the good battery, and black to an unpainted metal surface on the dead car․ Never connect the black cable to the negative terminal of the dead battery, as this can cause a short circuit․ Mixing up the cables or touching metal parts can spark, risking serious injury or damage․ Always double-check connections before starting the process․ If unsure, consult the device’s manual or seek assistance․ Proper connections are crucial for a safe and successful jump start․

4․2 Ignoring Safety Guidelines

Ignoring safety guidelines when using a car jump starter can lead to dangerous situations, including electrical shocks, explosions, or damage to your vehicle․ Always ensure both vehicles are turned off and in neutral or park gear to prevent any unintended movement․ Disconnect electrical components like lights, radios, and wipers to avoid power surges․ Never touch metal parts of the cables to prevent sparks, as this could ignite hydrogen gas near the battery․ Ensure vehicles are not touching each other, as this can create a short circuit․ Properly follow the connection order: red to dead battery’s positive terminal, red to good battery’s positive terminal, black to good battery’s negative terminal, and black to an unpainted metal surface on the dead car․ Ignoring these steps can result in serious injury or damage․ Always prioritize safety and consult the manual if unsure․

4․3 Failing to Charge the Battery After a Jump Start

Failing to charge the battery after a jump start can lead to repeated breakdowns and potential damage to your car’s electrical system․ After a successful jump start, it’s crucial to allow the alternator to recharge the battery by driving the car for at least 15–20 minutes․ If you don’t, the battery may lose its charge again, leaving you stranded․ Ignoring this step can result in a dead battery, requiring another jump start or even professional assistance․ Over time, this can shorten the battery’s lifespan and strain the alternator․ Always ensure the battery is fully charged after a jump start to prevent further issues and maintain your car’s performance․

Troubleshooting Tips

Troubleshooting your car jump starter is essential for resolving issues quickly and safely․ Common problems include dead batteries, faulty connections, or malfunctioning components․ Always refer to your device’s manual for guidance․

5․1 Diagnosing Why the Car Won’t Start After a Jump

If your car doesn’t start after a jump, check the connections and ensure the jump starter is fully charged․ A weak or old battery may require longer charging․ Also, inspect the alternator, as it may not be recharging the battery properly․ Faulty components like the starter motor or ignition switch could also prevent the car from starting․ Additionally, check for issues like a bad fuel pump or empty fuel tank․ If the problem persists, consult a professional mechanic to diagnose and resolve the issue effectively․

5․2 Understanding Jump Starter Indicator Lights

Indicator lights on a jump starter provide crucial information about its status and operation․ A green light typically indicates the device is fully charged and ready to use, while a red light signals a low battery or potential issue․ Flashing lights may indicate improper connections or errors during the jump-start process․ Refer to the device’s manual to interpret specific light patterns, as they vary by model․ If the lights illuminate incorrectly, ensure the clamps are connected properly and the battery terminals are clean․ Some advanced models may display error codes, which can help diagnose problems like short circuits or overheating․ Always check the lights before and after use to ensure the jump starter is functioning correctly and safely․ This feature enhances user experience and helps troubleshoot common issues efficiently․

5․3 Dealing with a Dead Jump Starter Battery

If your jump starter battery is dead, it won’t function properly․ First, charge it using the provided wall adapter or car charger․ Ensure the charging port is clean and free from debris․ If the battery still doesn’t charge, check the power source and cable connections․ A dead battery may result from prolonged disuse or incorrect storage․ If charging doesn’t resolve the issue, inspect the device for damage or corrosion․ Clean the terminals with a soft cloth and try again․ If the problem persists, the battery may need replacement․ Always refer to the manufacturer’s guide for specific instructions․ Regular maintenance, such as periodic charging, can prevent a dead battery․ If the jump starter is outdated or damaged beyond repair, consider replacing it with a new model․ Proper care ensures your jump starter remains reliable for emergencies․

Maintenance and Storage of Your Jump Starter

Regularly clean the terminals, store in a cool, dry place, and keep the battery charged to maintain your jump starter’s performance and longevity for emergency use․

6․1 Cleaning the Battery Terminals

Cleaning your jump starter’s battery terminals is crucial for maintaining proper conductivity and ensuring reliable performance․ Start by disconnecting the negative terminal to prevent electrical shocks․ Use a wire brush to gently scrub away any corrosion or buildup on both the positive and negative terminals․ For tougher corrosion, mix baking soda and water to create a paste, and apply it to the terminals․ Let it sit for a few minutes before scrubbing․ Rinse with clean water and dry thoroughly with a clean towel․ Regular cleaning prevents corrosion and ensures your jump starter functions effectively․ Additionally, applying a layer of petroleum jelly or silicone spray can help protect the terminals from future corrosion․ Always follow safety guidelines to avoid accidents during the cleaning process․

6․2 Proper Storage Conditions

Storing your portable jump starter correctly ensures its longevity and performance․ Keep it in a cool, dry place, away from direct sunlight and moisture․ Avoid extreme temperatures, as they can drain the battery or cause damage․ Store the device in a protective case or bag to prevent physical damage and dust accumulation․ If you won’t be using it for an extended period, charge it to about 50% capacity and check it every few months to maintain the battery’s health․ Do not store it in a vehicle or areas prone to humidity․ Proper storage conditions help preserve the jump starter’s power and ensure it’s ready for emergencies․ Always refer to the manufacturer’s guidelines for specific storage recommendations․

6․3 Charging and Maintaining the Jump Starter

Regular charging and maintenance are crucial to ensure your portable jump starter remains reliable․ Always follow the manufacturer’s charging instructions to avoid overcharging, which can harm the battery․ Check the battery level using the built-in indicator or by plugging it into a power source․ If the voltage is low or the indicator lights dim, it’s time to charge․ Use the provided charger or a compatible alternative to prevent damage․ Overcharging can reduce the battery’s lifespan, so unplug it once fully charged․ For long-term maintenance, inspect the device every 3-6 months for signs of wear or damage․ Clean the terminals with a soft cloth to ensure proper connections․ If storing for extended periods, charge it every 6 months to maintain battery health․ Proper care ensures your jump starter is always ready for emergencies․

snuggle me washing instructions

Snuggle Me products are designed for comfort and safety, requiring careful washing to maintain quality. This guide provides essential tips for cleaning, ensuring longevity and softness. Proper washing preserves the cozy feel and durability of the fabric, while preventing damage or shrinkage. Learn how to wash your Snuggle Me items effectively, keeping them fresh and safe for your baby. Always check the care label for specific instructions before washing. This section introduces key principles for washing Snuggle Me products, ensuring they remain gentle and safe for your little one. By following these guidelines, you can maintain the softness and shape of your Snuggle Me items. Proper care ensures your baby continues to enjoy the comfort and support they provide. Washing correctly also prevents damage to the materials, keeping them looking new. This guide is your go-to resource for all Snuggle Me washing needs, offering clear and concise advice. Keep your Snuggle Me products clean, fresh, and in great condition with these simple yet effective washing instructions. Regular washing helps maintain hygiene while preserving the product’s quality. Understanding the best washing practices ensures your Snuggle Me items remain a trusted companion for your baby. Start your washing journey with confidence, knowing you’re giving your baby the best care possible. This comprehensive guide covers everything from machine washing to hand washing, ensuring you’re prepared for any situation. Proper washing techniques are vital for extending the life of your Snuggle Me products. Discover how easy it is to keep your Snuggle Me items clean and fresh, even with frequent use. Washing your Snuggle Me products correctly ensures they stay soft, cozy, and safe for your baby. This guide is here to help you every step of the way, providing expert advice for optimal care. Maintain the quality and comfort of your Snuggle Me items with these straightforward washing tips. Keep your baby snug and happy by washing their Snuggle Me products the right way. This guide is your ultimate resource for all Snuggle Me washing needs, ensuring your baby’s comfort and safety. By following these instructions, you’ll be able to enjoy your Snuggle Me products for years to come. Washing your Snuggle Me items has never been easier with these clear and effective guidelines. Keep your baby’s favorite lounger clean and fresh with the best washing practices. This guide is designed to make washing your Snuggle Me products simple and stress-free. Ensure your baby’s comfort by washing their Snuggle Me items with care and attention. Proper washing maintains the softness and shape of the fabric, ensuring it remains gentle against your baby’s skin. This guide provides everything you need to know about washing your Snuggle Me products, from machine washing to hand washing. Keep your Snuggle Me items in pristine condition with these easy-to-follow washing instructions. Washing your Snuggle Me products correctly ensures they continue to provide the comfort and support your baby loves. This guide is here to help you maintain the quality of your Snuggle Me items, ensuring they stay fresh and clean. Discover the best ways to wash your Snuggle Me products, keeping them soft and cozy for your baby. Proper care ensures your Snuggle Me items remain a trusted and comfortable choice for your little one. This guide offers expert advice on washing your Snuggle Me products, helping you maintain their quality and longevity. Keep your baby snug and comfortable by following these simple washing instructions for your Snuggle Me items. Washing your Snuggle Me products correctly ensures they stay in great condition, providing ongoing comfort for your baby. This guide is your complete resource for washing Snuggle Me products, offering clear and effective advice. Ensure your Snuggle Me items remain soft, fresh, and safe for your baby by following these washing guidelines. Proper washing techniques are essential for maintaining the quality of your Snuggle Me products. This guide provides everything you need to know to keep your Snuggle Me items clean and well-maintained. Keep your baby’s Snuggle Me products in excellent condition with these easy-to-follow washing tips. Washing your Snuggle Me items correctly ensures they continue to provide the comfort and support your baby needs. This guide is here to help you maintain the softness and longevity of your Snuggle Me products. Discover the best ways to wash your Snuggle Me items, keeping them fresh and clean for your baby. Proper care ensures your Snuggle Me products remain a comfortable and safe choice for your little one. This guide offers expert advice on washing your Snuggle Me items, helping you maintain their quality and durability. Keep your baby snug and happy by following these simple washing instructions for your Snuggle Me products. Washing your Snuggle Me items correctly ensures they stay in great condition, providing ongoing comfort for your baby. This guide is your complete resource for washing Snuggle Me products, offering clear and effective advice. Ensure your Snuggle Me items remain soft, fresh, and safe for your baby by following these washing guidelines. Proper washing techniques are essential for maintaining the quality of your Snuggle Me products. This guide provides everything you need to know to keep your Snuggle Me items clean and well-maintained. Keep your baby’s Snuggle Me products in excellent condition with these easy-to-follow washing tips. Washing your Snuggle Me items correctly ensures they continue to provide the comfort and support your baby needs. This guide is here to help you maintain the softness and longevity of your Snuggle Me products. Discover the best ways to wash your Snuggle Me items, keeping them fresh and clean for your baby. Proper care ensures your Snuggle Me products remain a comfortable and safe choice for your little one. This guide offers expert advice on washing your Snuggle Me items, helping you maintain their quality and durability. Keep your baby snug and happy by following these simple washing instructions for your Snuggle Me products. Washing your Snuggle Me items correctly ensures they stay in great condition, providing ongoing comfort for your baby. This guide is your complete resource for washing Snuggle Me products, offering clear and effective advice. Ensure your Snuggle Me items remain soft, fresh, and safe for your baby by following these washing guidelines. Proper washing techniques are essential for maintaining the quality of your Snuggle Me products. This guide provides everything you need to know to keep your Snuggle Me items clean and well-maintained. Keep your baby’s Snuggle Me products in excellent condition with these easy-to-follow washing tips. Washing your Snuggle Me items correctly ensures they continue to provide the comfort and support your baby needs. This guide is here to help you maintain the softness and longevity of your Snuggle Me products. Discover the best ways to wash your Snuggle Me items, keeping them fresh and clean for your baby. Proper care ensures your Snuggle Me products remain a comfortable and safe choice for your little one. This guide offers expert advice on washing your Snuggle Me items, helping you maintain their quality and durability. Keep your baby snug and happy by following these simple washing instructions for your Snuggle Me products. Washing your Snuggle Me items correctly ensures they stay in great condition, providing ongoing comfort for your baby. This guide is your complete resource for washing Snuggle Me products, offering clear and effective advice. Ensure your Snuggle Me items remain soft, fresh, and safe for your baby by following these washing guidelines. Proper washing techniques are essential for maintaining the quality of your Snuggle Me products. This guide provides everything you need to know to keep your Snuggle Me items clean and well-maintained. Keep your baby’s Snuggle Me products in excellent condition with these easy-to-follow washing tips. Washing your Snuggle Me items correctly ensures they continue to provide the comfort and support your baby needs. This guide is here to help you maintain the softness and longevity of your Snuggle Me products. Discover the best ways to wash your Snuggle Me items, keeping them fresh and clean for your baby. Proper care ensures your Snuggle Me products remain a comfortable and safe choice for your little one. This guide offers expert advice on washing your Snuggle Me items, helping you maintain their quality and durability. Keep your baby snug and happy by following these simple washing instructions for your Snuggle Me products. Washing your Snuggle Me items correctly ensures they stay in great condition, providing ongoing comfort for your baby. This guide is your complete resource for washing Snuggle Me products, offering clear and effective advice. Ensure your Snuggle Me items remain soft, fresh, and safe for your baby by following these washing guidelines; Proper washing techniques are essential for maintaining the quality of your Snuggle Me products. This guide provides everything you need to know to keep your Snuggle Me items clean and well-maintained. Keep your baby’s Snuggle Me products in excellent condition with these easy-to-follow washing tips. Washing your Snuggle Me items correctly ensures they continue to provide the comfort and support your baby

Understanding the Importance of Proper Washing

Proper washing is essential to maintain the quality, softness, and safety of Snuggle Me products. Improper techniques can lead to fabric damage, shrinkage, or color fading, compromising the product’s integrity. Washing incorrectly may also reduce the lifespan of the materials, affecting their ability to provide comfort and support. Regular cleaning ensures hygiene, preventing the buildup of dirt and odors that could irritate sensitive skin. Following recommended guidelines helps preserve the fabric’s natural texture and prevents damage from harsh detergents or excessive heat. Proper washing not only extends the longevity of Snuggle Me items but also ensures they remain safe and cozy for your baby. By prioritizing gentle care, you protect your investment and maintain the product’s performance. Always adhere to the care label instructions to achieve the best results and keep your Snuggle Me items in pristine condition.

Key Considerations Before Washing

Before washing your Snuggle Me products, check the care label for specific instructions, as different materials may require unique attention. Separate covers and accessories from the main lounger to prevent damage. Use a gentle, dye-free detergent to avoid discoloration or fabric irritation. Avoid pouring detergent directly onto the fabric; instead, add it to the washing machine drum. Wash Snuggle Me items separately from other laundry to prevent snagging or abrasion. For hand washing, gently agitate the water and avoid wringing or twisting, which can stretch the fabric. Always pat dry excess water and allow items to air dry to maintain their shape and softness. Proper preparation ensures a safe and effective cleaning process.

Materials and Fabric Types in Snuggle Me Products

Snuggle Me products are crafted from organic and non-organic fabrics, including soft blends and Snuggle Me Wool. Each material type has specific care requirements for optimal maintenance.

Organic vs. Non-Organic Fabrics: Washing Differences

Snuggle Me organic fabrics are made from natural, chemical-free materials, requiring gentle care to preserve their softness and durability. Non-organic fabrics, while still soft, are more durable and easier to clean. Organic fabrics should be washed with dye-free, gentle detergents to avoid damage, while non-organic fabrics can tolerate mild detergents. Both fabric types benefit from cold water washing to prevent shrinkage and color fading. Organic fabrics may require more delicate cycles or hand washing, depending on the specific material. Proper care ensures both organic and non-organic Snuggle Me fabrics remain soft, cozy, and safe for your baby. Always check the care label for specific instructions tailored to the fabric type.

Care Instructions for Specific Fabric Blends

Snuggle Me fabric blends vary, requiring tailored care to maintain their quality. Organic fabrics should be washed in cold water with gentle, dye-free detergents to preserve their natural softness. Non-organic blends can tolerate mild detergents but still benefit from cold, gentle cycles. Wool blends, if present, may require hand washing or dry cleaning, depending on the specific fabric mix. Always avoid harsh chemicals or bleach, as they can damage fibers. For blended materials, check the care label for specific instructions. Air drying or tumble drying on low settings is recommended to prevent shrinkage. Proper care for fabric blends ensures longevity and maintains the cozy feel of Snuggle Me products. Regular, gentle washing keeps fabrics fresh and soft for your baby.

Machine Washing Guidelines

Snuggle Me items are machine washable. Use a cold, gentle cycle with mild detergent. Avoid pouring detergent directly on the fabric. Wash separately for best results. Air or tumble dry on low settings to maintain softness and prevent shrinkage. Always check the care label for specific instructions before washing. Proper machine washing ensures longevity and keeps the fabric soft and cozy for your baby. Regular washing helps maintain hygiene while preserving the product’s quality. Follow these guidelines to keep your Snuggle Me items fresh and in great condition. Machine washing is convenient and effective when done correctly. Ensure your Snuggle Me products remain clean and comfortable for your little one by following these simple steps. By adhering to these guidelines, you can enjoy your Snuggle Me items for years to come. Proper machine washing is essential for maintaining the quality and softness of the fabric. Keep your Snuggle Me items clean and fresh with these easy-to-follow washing instructions. Machine washing is a quick and efficient way to keep your Snuggle Me products in excellent condition. Always use a gentle cycle and mild detergent to preserve the fabric’s integrity. Regular machine washing helps maintain the comfort and safety of your Snuggle Me items. Follow these guidelines to ensure your baby continues to enjoy the softness and support of their Snuggle Me products. Machine washing is a simple yet effective way to keep your Snuggle Me items clean and fresh. Always use cold water and gentle settings to preserve the fabric’s quality. Proper machine washing ensures your Snuggle Me products remain soft, cozy, and safe for your baby. By following these guidelines, you can maintain the longevity and comfort of your Snuggle Me items. Machine washing is a convenient and effective method for keeping your Snuggle Me products clean and well-maintained. Always use mild detergent and cold water to preserve the fabric’s softness. Regular washing helps maintain hygiene while keeping the fabric fresh and cozy for your baby. Follow these machine washing guidelines to ensure your Snuggle Me items remain in great condition. Proper care ensures your baby continues to enjoy the comfort and support of their Snuggle Me products. Machine washing is a simple yet effective way to keep your Snuggle Me items clean and fresh. Always use a gentle cycle and cold water to preserve the fabric’s quality. By following these guidelines, you can maintain the softness and longevity of your Snuggle Me products. Regular machine washing helps maintain hygiene while preserving the comfort and support your baby loves. Keep your Snuggle Me items in excellent condition with these easy-to-follow washing instructions. Machine washing is a quick and efficient way to keep your Snuggle Me products clean and fresh. Always use mild detergent and gentle settings to preserve the fabric’s integrity. Proper care ensures your Snuggle Me items remain soft, cozy, and safe for your baby. Follow these guidelines to enjoy your Snuggle Me products for years to come. Machine washing is a convenient and effective method for keeping your Snuggle Me items clean and well-maintained. Always use cold water and gentle detergent to preserve the fabric’s quality. Regular washing helps maintain hygiene while keeping the fabric fresh and cozy for your baby. By following these guidelines, you can ensure your Snuggle Me products remain in great condition. Proper machine washing is essential for maintaining the softness and longevity of your Snuggle Me items. Keep your baby snug and happy by following these simple washing instructions. Machine washing is a quick and efficient way to keep your Snuggle Me products clean and fresh. Always use a gentle cycle and mild detergent to preserve the fabric’s softness. Regular washing helps maintain hygiene while keeping the fabric cozy for your baby. Follow these guidelines to ensure your Snuggle Me items remain in excellent condition. Proper care ensures your baby continues to enjoy the comfort and support of their Snuggle Me products. Machine washing is a simple yet effective way to keep your Snuggle Me items clean and fresh. Always use cold water and gentle settings to preserve the fabric’s quality. By adhering to these guidelines, you can maintain the longevity and comfort of your Snuggle Me products. Regular machine washing helps maintain hygiene while preserving the softness and support your baby loves. Keep your Snuggle Me items in great condition with these easy-to-follow washing instructions. Machine washing is a convenient and effective method for keeping your Snuggle Me products clean and well-maintained. Always use mild detergent and gentle cycles to preserve the fabric’s integrity. Proper care ensures your Snuggle Me items remain soft, cozy, and safe for your baby. Follow these guidelines to enjoy your Snuggle Me products for years to come. Machine washing is a quick and efficient way to keep your Snuggle Me items clean and fresh. Always use cold water and gentle detergent to preserve the fabric’s quality. Regular washing helps maintain hygiene while keeping the fabric fresh and cozy for your baby. By following these guidelines, you can ensure your Snuggle Me products remain in great condition. Proper machine washing is essential for maintaining the softness and longevity of your Snuggle Me items. Keep your baby snug and happy by following these simple washing instructions. Machine washing is a quick and efficient way to keep your Snuggle Me products clean and fresh. Always use a gentle cycle and mild detergent to preserve the fabric’s softness. Regular washing helps maintain hygiene while keeping the fabric cozy for your baby. Follow these guidelines to ensure your Snuggle Me items remain in excellent condition. Proper care ensures your baby continues to enjoy the comfort and support of their Snuggle Me products. Machine washing is a simple yet effective way to keep your Snuggle Me items clean and fresh. Always use cold water and gentle settings to preserve the fabric’s quality. By adhering to these guidelines, you can maintain the longevity and comfort of your Snuggle Me products. Regular machine washing helps maintain hygiene while preserving the softness and support your baby loves. Keep your Snuggle Me items in great condition with these easy-to-follow washing instructions. Machine washing is a convenient and effective method for keeping your Snuggle Me products clean and well-maintained. Always use mild detergent and gentle cycles to preserve the fabric’s integrity. Proper care ensures your Snuggle Me items remain soft, cozy, and safe for your baby. Follow these guidelines to enjoy your Snuggle Me products for years to come. Machine washing is a quick and efficient way to keep your Snuggle Me items clean and fresh. Always use cold water and gentle detergent to preserve the fabric’s quality. Regular washing helps maintain hygiene while keeping the fabric fresh and cozy for your baby. By following these guidelines, you can ensure your Snuggle Me products remain in great condition. Proper machine washing is essential for maintaining the softness and longevity of your Snuggle Me items. Keep your baby snug and happy by following these simple washing instructions. Machine washing is a quick and efficient way to keep your Snuggle Me products clean and fresh. Always use a gentle cycle and mild detergent to preserve the fabric’s softness. Regular washing helps maintain hygiene while keeping the fabric cozy for your baby. Follow these guidelines to ensure your Snuggle Me items remain in excellent condition. Proper care ensures your baby continues to enjoy the comfort and support of their Snuggle Me products. Machine washing is a simple yet effective way to keep your Snuggle Me items clean and fresh. Always use cold water and gentle settings to preserve the fabric’s quality. By adhering to these guidelines, you can maintain the longevity and comfort of your Snuggle Me products. Regular machine washing helps maintain hygiene while preserving the softness and support your baby loves. Keep your Snuggle Me items in great condition with these easy-to-follow washing instructions. Machine washing is a convenient and effective method for keeping your Snuggle Me products clean and well-maintained. Always use mild detergent and gentle cycles to preserve the fabric’s integrity. Proper care ensures your Snuggle Me items remain soft, cozy, and safe for your baby. Follow these guidelines to enjoy your Snuggle Me products for years to come. Machine

Recommended Wash Cycle and Settings

For optimal care, Snuggle Me items should be washed using a cold, gentle cycle with mild detergent. Always check the care label for specific instructions. Use a delicate or hand-wash setting to preserve the fabric’s softness and prevent damage. Avoid using harsh detergents or bleach, as they can harm the material. Wash the item separately to prevent friction and color transfer. Cold water is essential to maintain the fabric’s integrity and prevent shrinkage. Gently cycle ensures minimal agitation, protecting the fabric’s structure. Proper wash settings help maintain the product’s quality and longevity. Follow these guidelines to keep your Snuggle Me items soft, cozy, and safe for your baby. Regular washing with the right settings ensures freshness and comfort. Always prioritize gentle care to extend the life of your Snuggle Me products.

Using Gentle Detergents: What to Choose

When washing Snuggle Me items, it’s crucial to use gentle, dye-free detergents to preserve the fabric’s softness and prevent damage. Choose mild, non-toxic detergents specifically designed for delicate or baby items. Avoid harsh chemicals, bleach, or fabric softeners, as they can degrade the material or cause discoloration. Opt for eco-friendly or plant-based detergents, as they are gentler on fabrics and safer for your baby. Always ensure the detergent is free of dyes and fragrances to minimize the risk of irritation or allergic reactions. Using the right detergent helps maintain the fabric’s integrity, ensuring your Snuggle Me products remain soft, cozy, and safe for your baby. Proper detergent selection is key to extending the life of your Snuggle Me items.

Why Cold Water is Essential

Using cold water when washing Snuggle Me items is crucial to maintain their quality and longevity. Cold water prevents shrinking, fading, and damage to the fabric, ensuring the material remains soft and intact. It also helps preserve the color and texture of the fabric, keeping it looking new. Cold water is gentler on the fibers, reducing wear and tear, which is especially important for delicate or organic materials. Additionally, cold water helps prevent the growth of bacteria and odors, keeping your Snuggle Me products fresh. Washing in cold water is also energy-efficient, making it an eco-friendly choice. By choosing cold water, you protect your Snuggle Me items from damage while maintaining their comfort and safety for your baby.

Drying Instructions for Snuggle Me Items

Proper drying is essential for maintaining the quality of Snuggle Me items. Air drying or tumble drying on a low setting is recommended to preserve softness and shape, ensuring freshness and preventing damage to the fabric.

Air Drying vs. Tumble Drying: Pros and Cons

Air drying and tumble drying are the two primary methods for drying Snuggle Me items, each with its own advantages and disadvantages. Air drying is recommended for preserving the softness and shape of the fabric, as it avoids heat damage and prevents shrinkage. However, it requires more time and space to dry thoroughly. On the other hand, tumble drying on a low setting is faster and more convenient but may risk damaging the material if the heat is too high. It’s important to follow the manufacturer’s guidelines to ensure the longevity of your Snuggle Me products. Proper drying techniques help maintain their quality and comfort for your baby.

Best Practices for Flat Drying

Flat drying is an excellent method for preserving the shape and softness of your Snuggle Me items. To ensure optimal results, lay the item flat on a clean, dry surface, reshaping it to its original form before drying. Avoid direct sunlight, as it may cause fading or discoloration. Instead, place it in a well-ventilated area, away from heat sources like radiators or heaters, to prevent shrinkage. Gently smooth out any wrinkles while the item is damp to maintain a sleek appearance. Allow it to air dry completely, flipping it halfway if necessary, to ensure even drying. Never use the item until it is fully dry, as residual moisture could lead to discomfort or damage. Flat drying is a gentle and effective way to maintain the quality of your Snuggle Me products.

Tips for Maintaining Shape and Softness

To maintain the shape and softness of your Snuggle Me items, gently reshape them while damp after washing. Avoid twisting or wringing, as this can stretch or misshape the fabric. Lay items flat to air dry, smoothing out any wrinkles to preserve their original form. For added softness, avoid using fabric softeners, as they can leave a residue. Instead, opt for gentle, dye-free detergents specifically designed for delicate fabrics. Regular washing in cold water on a gentle cycle will help prevent pilling and keep the material plush. By following these care practices, your Snuggle Me products will retain their softness and shape, ensuring continued comfort for your baby.

Hand Washing as an Alternative

Hand washing is a gentle option for Snuggle Me items, ensuring delicate care. Use cold water and mild detergent, gently agitating to clean without stretching or misshaping the fabric.

When to Opt for Hand Washing

Hand washing is ideal for delicate or new Snuggle Me items, ensuring gentle care. It’s best for items with stubborn stains or when you prefer a more meticulous cleaning method. Use cold water and a mild detergent, avoiding harsh chemicals. Gently agitate the fabric to clean without stretching or misshaping. Hand washing is also recommended for smaller or sensitive areas, like nursing pillow covers, to maintain their softness and shape. This method prevents damage from machine agitation, ensuring longevity. For heavily soiled items, hand washing allows for targeted cleaning. Always check the care label for specific advice. Hand washing is a safe alternative for maintaining the quality and comfort of your Snuggle Me products, especially when machine washing isn’t preferred or practical.

Step-by-Step Hand Washing Process

Begin by filling a basin with cold water and adding a small amount of gentle, dye-free detergent. Submerge the Snuggle Me item, gently agitating the fabric with your hands to distribute the detergent evenly. Avoid scrubbing or stretching the material, as this may cause damage. For stubborn stains, lightly massage the area before rinsing. Drain the soapy water and rinse thoroughly with clean, cold water until no suds remain. Gently press out excess water without wringing or twisting. Lay the item flat on a clean towel to air dry, reshaping it to maintain its original form. Avoid direct sunlight or heat to prevent shrinkage or fading. This method ensures a gentle, effective cleaning process for your Snuggle Me items.

Special Care for Covers and Accessories

Wash Snuggle Me covers separately in cold water with a gentle detergent to preserve fabric integrity. Avoid pouring detergent directly on the material to prevent damage. Air dry flat or tumble dry on low to maintain shape and softness. Regularly cleaning accessories ensures hygiene and longevity, keeping them safe and comfortable for your baby. Proper care extends the life of covers and accessories, maintaining their quality and appearance. Always check the care label for specific instructions to ensure optimal results. This attention to detail ensures your Snuggle Me items remain in excellent condition for continued use.