Snuggle Me products are designed for comfort and safety, requiring careful washing to maintain quality. This guide provides essential tips for cleaning, ensuring longevity and softness. Proper washing preserves the cozy feel and durability of the fabric, while preventing damage or shrinkage. Learn how to wash your Snuggle Me items effectively, keeping them fresh and safe for your baby. Always check the care label for specific instructions before washing. This section introduces key principles for washing Snuggle Me products, ensuring they remain gentle and safe for your little one. By following these guidelines, you can maintain the softness and shape of your Snuggle Me items. Proper care ensures your baby continues to enjoy the comfort and support they provide. Washing correctly also prevents damage to the materials, keeping them looking new. This guide is your go-to resource for all Snuggle Me washing needs, offering clear and concise advice. Keep your Snuggle Me products clean, fresh, and in great condition with these simple yet effective washing instructions. Regular washing helps maintain hygiene while preserving the product’s quality. Understanding the best washing practices ensures your Snuggle Me items remain a trusted companion for your baby. Start your washing journey with confidence, knowing you’re giving your baby the best care possible. This comprehensive guide covers everything from machine washing to hand washing, ensuring you’re prepared for any situation. Proper washing techniques are vital for extending the life of your Snuggle Me products. Discover how easy it is to keep your Snuggle Me items clean and fresh, even with frequent use. Washing your Snuggle Me products correctly ensures they stay soft, cozy, and safe for your baby. This guide is here to help you every step of the way, providing expert advice for optimal care. Maintain the quality and comfort of your Snuggle Me items with these straightforward washing tips. Keep your baby snug and happy by washing their Snuggle Me products the right way. This guide is your ultimate resource for all Snuggle Me washing needs, ensuring your baby’s comfort and safety. By following these instructions, you’ll be able to enjoy your Snuggle Me products for years to come. Washing your Snuggle Me items has never been easier with these clear and effective guidelines. Keep your baby’s favorite lounger clean and fresh with the best washing practices. This guide is designed to make washing your Snuggle Me products simple and stress-free. Ensure your baby’s comfort by washing their Snuggle Me items with care and attention. Proper washing maintains the softness and shape of the fabric, ensuring it remains gentle against your baby’s skin. This guide provides everything you need to know about washing your Snuggle Me products, from machine washing to hand washing. Keep your Snuggle Me items in pristine condition with these easy-to-follow washing instructions. Washing your Snuggle Me products correctly ensures they continue to provide the comfort and support your baby loves. This guide is here to help you maintain the quality of your Snuggle Me items, ensuring they stay fresh and clean. Discover the best ways to wash your Snuggle Me products, keeping them soft and cozy for your baby. Proper care ensures your Snuggle Me items remain a trusted and comfortable choice for your little one. This guide offers expert advice on washing your Snuggle Me products, helping you maintain their quality and longevity. Keep your baby snug and comfortable by following these simple washing instructions for your Snuggle Me items. Washing your Snuggle Me products correctly ensures they stay in great condition, providing ongoing comfort for your baby. This guide is your complete resource for washing Snuggle Me products, offering clear and effective advice. Ensure your Snuggle Me items remain soft, fresh, and safe for your baby by following these washing guidelines. Proper washing techniques are essential for maintaining the quality of your Snuggle Me products. This guide provides everything you need to know to keep your Snuggle Me items clean and well-maintained. Keep your baby’s Snuggle Me products in excellent condition with these easy-to-follow washing tips. Washing your Snuggle Me items correctly ensures they continue to provide the comfort and support your baby needs. This guide is here to help you maintain the softness and longevity of your Snuggle Me products. Discover the best ways to wash your Snuggle Me items, keeping them fresh and clean for your baby. Proper care ensures your Snuggle Me products remain a comfortable and safe choice for your little one. This guide offers expert advice on washing your Snuggle Me items, helping you maintain their quality and durability. Keep your baby snug and happy by following these simple washing instructions for your Snuggle Me products. Washing your Snuggle Me items correctly ensures they stay in great condition, providing ongoing comfort for your baby. This guide is your complete resource for washing Snuggle Me products, offering clear and effective advice. Ensure your Snuggle Me items remain soft, fresh, and safe for your baby by following these washing guidelines. Proper washing techniques are essential for maintaining the quality of your Snuggle Me products. This guide provides everything you need to know to keep your Snuggle Me items clean and well-maintained. Keep your baby’s Snuggle Me products in excellent condition with these easy-to-follow washing tips. Washing your Snuggle Me items correctly ensures they continue to provide the comfort and support your baby needs. This guide is here to help you maintain the softness and longevity of your Snuggle Me products. Discover the best ways to wash your Snuggle Me items, keeping them fresh and clean for your baby. Proper care ensures your Snuggle Me products remain a comfortable and safe choice for your little one. This guide offers expert advice on washing your Snuggle Me items, helping you maintain their quality and durability. Keep your baby snug and happy by following these simple washing instructions for your Snuggle Me products. Washing your Snuggle Me items correctly ensures they stay in great condition, providing ongoing comfort for your baby. This guide is your complete resource for washing Snuggle Me products, offering clear and effective advice. Ensure your Snuggle Me items remain soft, fresh, and safe for your baby by following these washing guidelines. Proper washing techniques are essential for maintaining the quality of your Snuggle Me products. This guide provides everything you need to know to keep your Snuggle Me items clean and well-maintained. Keep your baby’s Snuggle Me products in excellent condition with these easy-to-follow washing tips. Washing your Snuggle Me items correctly ensures they continue to provide the comfort and support your baby needs. This guide is here to help you maintain the softness and longevity of your Snuggle Me products. Discover the best ways to wash your Snuggle Me items, keeping them fresh and clean for your baby. Proper care ensures your Snuggle Me products remain a comfortable and safe choice for your little one. This guide offers expert advice on washing your Snuggle Me items, helping you maintain their quality and durability. Keep your baby snug and happy by following these simple washing instructions for your Snuggle Me products. Washing your Snuggle Me items correctly ensures they stay in great condition, providing ongoing comfort for your baby. This guide is your complete resource for washing Snuggle Me products, offering clear and effective advice. Ensure your Snuggle Me items remain soft, fresh, and safe for your baby by following these washing guidelines. Proper washing techniques are essential for maintaining the quality of your Snuggle Me products. This guide provides everything you need to know to keep your Snuggle Me items clean and well-maintained. Keep your baby’s Snuggle Me products in excellent condition with these easy-to-follow washing tips. Washing your Snuggle Me items correctly ensures they continue to provide the comfort and support your baby needs. This guide is here to help you maintain the softness and longevity of your Snuggle Me products. Discover the best ways to wash your Snuggle Me items, keeping them fresh and clean for your baby. Proper care ensures your Snuggle Me products remain a comfortable and safe choice for your little one. This guide offers expert advice on washing your Snuggle Me items, helping you maintain their quality and durability. Keep your baby snug and happy by following these simple washing instructions for your Snuggle Me products. Washing your Snuggle Me items correctly ensures they stay in great condition, providing ongoing comfort for your baby. This guide is your complete resource for washing Snuggle Me products, offering clear and effective advice. Ensure your Snuggle Me items remain soft, fresh, and safe for your baby by following these washing guidelines; Proper washing techniques are essential for maintaining the quality of your Snuggle Me products. This guide provides everything you need to know to keep your Snuggle Me items clean and well-maintained. Keep your baby’s Snuggle Me products in excellent condition with these easy-to-follow washing tips. Washing your Snuggle Me items correctly ensures they continue to provide the comfort and support your baby
Understanding the Importance of Proper Washing
Proper washing is essential to maintain the quality, softness, and safety of Snuggle Me products. Improper techniques can lead to fabric damage, shrinkage, or color fading, compromising the product’s integrity. Washing incorrectly may also reduce the lifespan of the materials, affecting their ability to provide comfort and support. Regular cleaning ensures hygiene, preventing the buildup of dirt and odors that could irritate sensitive skin. Following recommended guidelines helps preserve the fabric’s natural texture and prevents damage from harsh detergents or excessive heat. Proper washing not only extends the longevity of Snuggle Me items but also ensures they remain safe and cozy for your baby. By prioritizing gentle care, you protect your investment and maintain the product’s performance. Always adhere to the care label instructions to achieve the best results and keep your Snuggle Me items in pristine condition.
Key Considerations Before Washing
Before washing your Snuggle Me products, check the care label for specific instructions, as different materials may require unique attention. Separate covers and accessories from the main lounger to prevent damage. Use a gentle, dye-free detergent to avoid discoloration or fabric irritation. Avoid pouring detergent directly onto the fabric; instead, add it to the washing machine drum. Wash Snuggle Me items separately from other laundry to prevent snagging or abrasion. For hand washing, gently agitate the water and avoid wringing or twisting, which can stretch the fabric. Always pat dry excess water and allow items to air dry to maintain their shape and softness. Proper preparation ensures a safe and effective cleaning process.
Materials and Fabric Types in Snuggle Me Products
Snuggle Me products are crafted from organic and non-organic fabrics, including soft blends and Snuggle Me Wool. Each material type has specific care requirements for optimal maintenance.
Organic vs. Non-Organic Fabrics: Washing Differences
Snuggle Me organic fabrics are made from natural, chemical-free materials, requiring gentle care to preserve their softness and durability. Non-organic fabrics, while still soft, are more durable and easier to clean. Organic fabrics should be washed with dye-free, gentle detergents to avoid damage, while non-organic fabrics can tolerate mild detergents. Both fabric types benefit from cold water washing to prevent shrinkage and color fading. Organic fabrics may require more delicate cycles or hand washing, depending on the specific material. Proper care ensures both organic and non-organic Snuggle Me fabrics remain soft, cozy, and safe for your baby. Always check the care label for specific instructions tailored to the fabric type.
Care Instructions for Specific Fabric Blends
Snuggle Me fabric blends vary, requiring tailored care to maintain their quality. Organic fabrics should be washed in cold water with gentle, dye-free detergents to preserve their natural softness. Non-organic blends can tolerate mild detergents but still benefit from cold, gentle cycles. Wool blends, if present, may require hand washing or dry cleaning, depending on the specific fabric mix. Always avoid harsh chemicals or bleach, as they can damage fibers. For blended materials, check the care label for specific instructions. Air drying or tumble drying on low settings is recommended to prevent shrinkage. Proper care for fabric blends ensures longevity and maintains the cozy feel of Snuggle Me products. Regular, gentle washing keeps fabrics fresh and soft for your baby.
Machine Washing Guidelines
Snuggle Me items are machine washable. Use a cold, gentle cycle with mild detergent. Avoid pouring detergent directly on the fabric. Wash separately for best results. Air or tumble dry on low settings to maintain softness and prevent shrinkage. Always check the care label for specific instructions before washing. Proper machine washing ensures longevity and keeps the fabric soft and cozy for your baby. Regular washing helps maintain hygiene while preserving the product’s quality. Follow these guidelines to keep your Snuggle Me items fresh and in great condition. Machine washing is convenient and effective when done correctly. Ensure your Snuggle Me products remain clean and comfortable for your little one by following these simple steps. By adhering to these guidelines, you can enjoy your Snuggle Me items for years to come. Proper machine washing is essential for maintaining the quality and softness of the fabric. Keep your Snuggle Me items clean and fresh with these easy-to-follow washing instructions. Machine washing is a quick and efficient way to keep your Snuggle Me products in excellent condition. Always use a gentle cycle and mild detergent to preserve the fabric’s integrity. Regular machine washing helps maintain the comfort and safety of your Snuggle Me items. Follow these guidelines to ensure your baby continues to enjoy the softness and support of their Snuggle Me products. Machine washing is a simple yet effective way to keep your Snuggle Me items clean and fresh. Always use cold water and gentle settings to preserve the fabric’s quality. Proper machine washing ensures your Snuggle Me products remain soft, cozy, and safe for your baby. By following these guidelines, you can maintain the longevity and comfort of your Snuggle Me items. Machine washing is a convenient and effective method for keeping your Snuggle Me products clean and well-maintained. Always use mild detergent and cold water to preserve the fabric’s softness. Regular washing helps maintain hygiene while keeping the fabric fresh and cozy for your baby. Follow these machine washing guidelines to ensure your Snuggle Me items remain in great condition. Proper care ensures your baby continues to enjoy the comfort and support of their Snuggle Me products. Machine washing is a simple yet effective way to keep your Snuggle Me items clean and fresh. Always use a gentle cycle and cold water to preserve the fabric’s quality. By following these guidelines, you can maintain the softness and longevity of your Snuggle Me products. Regular machine washing helps maintain hygiene while preserving the comfort and support your baby loves. Keep your Snuggle Me items in excellent condition with these easy-to-follow washing instructions. Machine washing is a quick and efficient way to keep your Snuggle Me products clean and fresh. Always use mild detergent and gentle settings to preserve the fabric’s integrity. Proper care ensures your Snuggle Me items remain soft, cozy, and safe for your baby. Follow these guidelines to enjoy your Snuggle Me products for years to come. Machine washing is a convenient and effective method for keeping your Snuggle Me items clean and well-maintained. Always use cold water and gentle detergent to preserve the fabric’s quality. Regular washing helps maintain hygiene while keeping the fabric fresh and cozy for your baby. By following these guidelines, you can ensure your Snuggle Me products remain in great condition. Proper machine washing is essential for maintaining the softness and longevity of your Snuggle Me items. Keep your baby snug and happy by following these simple washing instructions. Machine washing is a quick and efficient way to keep your Snuggle Me products clean and fresh. Always use a gentle cycle and mild detergent to preserve the fabric’s softness. Regular washing helps maintain hygiene while keeping the fabric cozy for your baby. Follow these guidelines to ensure your Snuggle Me items remain in excellent condition. Proper care ensures your baby continues to enjoy the comfort and support of their Snuggle Me products. Machine washing is a simple yet effective way to keep your Snuggle Me items clean and fresh. Always use cold water and gentle settings to preserve the fabric’s quality. By adhering to these guidelines, you can maintain the longevity and comfort of your Snuggle Me products. Regular machine washing helps maintain hygiene while preserving the softness and support your baby loves. Keep your Snuggle Me items in great condition with these easy-to-follow washing instructions. Machine washing is a convenient and effective method for keeping your Snuggle Me products clean and well-maintained. Always use mild detergent and gentle cycles to preserve the fabric’s integrity. Proper care ensures your Snuggle Me items remain soft, cozy, and safe for your baby. Follow these guidelines to enjoy your Snuggle Me products for years to come. Machine washing is a quick and efficient way to keep your Snuggle Me items clean and fresh. Always use cold water and gentle detergent to preserve the fabric’s quality. Regular washing helps maintain hygiene while keeping the fabric fresh and cozy for your baby. By following these guidelines, you can ensure your Snuggle Me products remain in great condition. Proper machine washing is essential for maintaining the softness and longevity of your Snuggle Me items. Keep your baby snug and happy by following these simple washing instructions. Machine washing is a quick and efficient way to keep your Snuggle Me products clean and fresh. Always use a gentle cycle and mild detergent to preserve the fabric’s softness. Regular washing helps maintain hygiene while keeping the fabric cozy for your baby. Follow these guidelines to ensure your Snuggle Me items remain in excellent condition. Proper care ensures your baby continues to enjoy the comfort and support of their Snuggle Me products. Machine washing is a simple yet effective way to keep your Snuggle Me items clean and fresh. Always use cold water and gentle settings to preserve the fabric’s quality. By adhering to these guidelines, you can maintain the longevity and comfort of your Snuggle Me products. Regular machine washing helps maintain hygiene while preserving the softness and support your baby loves. Keep your Snuggle Me items in great condition with these easy-to-follow washing instructions. Machine washing is a convenient and effective method for keeping your Snuggle Me products clean and well-maintained. Always use mild detergent and gentle cycles to preserve the fabric’s integrity. Proper care ensures your Snuggle Me items remain soft, cozy, and safe for your baby. Follow these guidelines to enjoy your Snuggle Me products for years to come. Machine washing is a quick and efficient way to keep your Snuggle Me items clean and fresh. Always use cold water and gentle detergent to preserve the fabric’s quality. Regular washing helps maintain hygiene while keeping the fabric fresh and cozy for your baby. By following these guidelines, you can ensure your Snuggle Me products remain in great condition. Proper machine washing is essential for maintaining the softness and longevity of your Snuggle Me items. Keep your baby snug and happy by following these simple washing instructions. Machine washing is a quick and efficient way to keep your Snuggle Me products clean and fresh. Always use a gentle cycle and mild detergent to preserve the fabric’s softness. Regular washing helps maintain hygiene while keeping the fabric cozy for your baby. Follow these guidelines to ensure your Snuggle Me items remain in excellent condition. Proper care ensures your baby continues to enjoy the comfort and support of their Snuggle Me products. Machine washing is a simple yet effective way to keep your Snuggle Me items clean and fresh. Always use cold water and gentle settings to preserve the fabric’s quality. By adhering to these guidelines, you can maintain the longevity and comfort of your Snuggle Me products. Regular machine washing helps maintain hygiene while preserving the softness and support your baby loves. Keep your Snuggle Me items in great condition with these easy-to-follow washing instructions. Machine washing is a convenient and effective method for keeping your Snuggle Me products clean and well-maintained. Always use mild detergent and gentle cycles to preserve the fabric’s integrity. Proper care ensures your Snuggle Me items remain soft, cozy, and safe for your baby. Follow these guidelines to enjoy your Snuggle Me products for years to come. Machine
Recommended Wash Cycle and Settings
For optimal care, Snuggle Me items should be washed using a cold, gentle cycle with mild detergent. Always check the care label for specific instructions. Use a delicate or hand-wash setting to preserve the fabric’s softness and prevent damage. Avoid using harsh detergents or bleach, as they can harm the material. Wash the item separately to prevent friction and color transfer. Cold water is essential to maintain the fabric’s integrity and prevent shrinkage. Gently cycle ensures minimal agitation, protecting the fabric’s structure. Proper wash settings help maintain the product’s quality and longevity. Follow these guidelines to keep your Snuggle Me items soft, cozy, and safe for your baby. Regular washing with the right settings ensures freshness and comfort. Always prioritize gentle care to extend the life of your Snuggle Me products.
Using Gentle Detergents: What to Choose
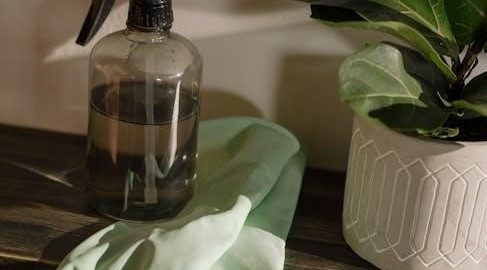
When washing Snuggle Me items, it’s crucial to use gentle, dye-free detergents to preserve the fabric’s softness and prevent damage. Choose mild, non-toxic detergents specifically designed for delicate or baby items. Avoid harsh chemicals, bleach, or fabric softeners, as they can degrade the material or cause discoloration. Opt for eco-friendly or plant-based detergents, as they are gentler on fabrics and safer for your baby. Always ensure the detergent is free of dyes and fragrances to minimize the risk of irritation or allergic reactions. Using the right detergent helps maintain the fabric’s integrity, ensuring your Snuggle Me products remain soft, cozy, and safe for your baby. Proper detergent selection is key to extending the life of your Snuggle Me items.
Why Cold Water is Essential
Using cold water when washing Snuggle Me items is crucial to maintain their quality and longevity. Cold water prevents shrinking, fading, and damage to the fabric, ensuring the material remains soft and intact. It also helps preserve the color and texture of the fabric, keeping it looking new. Cold water is gentler on the fibers, reducing wear and tear, which is especially important for delicate or organic materials. Additionally, cold water helps prevent the growth of bacteria and odors, keeping your Snuggle Me products fresh. Washing in cold water is also energy-efficient, making it an eco-friendly choice. By choosing cold water, you protect your Snuggle Me items from damage while maintaining their comfort and safety for your baby.
Drying Instructions for Snuggle Me Items
Proper drying is essential for maintaining the quality of Snuggle Me items. Air drying or tumble drying on a low setting is recommended to preserve softness and shape, ensuring freshness and preventing damage to the fabric.
Air Drying vs. Tumble Drying: Pros and Cons
Air drying and tumble drying are the two primary methods for drying Snuggle Me items, each with its own advantages and disadvantages. Air drying is recommended for preserving the softness and shape of the fabric, as it avoids heat damage and prevents shrinkage. However, it requires more time and space to dry thoroughly. On the other hand, tumble drying on a low setting is faster and more convenient but may risk damaging the material if the heat is too high. It’s important to follow the manufacturer’s guidelines to ensure the longevity of your Snuggle Me products. Proper drying techniques help maintain their quality and comfort for your baby.
Best Practices for Flat Drying
Flat drying is an excellent method for preserving the shape and softness of your Snuggle Me items. To ensure optimal results, lay the item flat on a clean, dry surface, reshaping it to its original form before drying. Avoid direct sunlight, as it may cause fading or discoloration. Instead, place it in a well-ventilated area, away from heat sources like radiators or heaters, to prevent shrinkage. Gently smooth out any wrinkles while the item is damp to maintain a sleek appearance. Allow it to air dry completely, flipping it halfway if necessary, to ensure even drying. Never use the item until it is fully dry, as residual moisture could lead to discomfort or damage. Flat drying is a gentle and effective way to maintain the quality of your Snuggle Me products.
Tips for Maintaining Shape and Softness
To maintain the shape and softness of your Snuggle Me items, gently reshape them while damp after washing. Avoid twisting or wringing, as this can stretch or misshape the fabric. Lay items flat to air dry, smoothing out any wrinkles to preserve their original form. For added softness, avoid using fabric softeners, as they can leave a residue. Instead, opt for gentle, dye-free detergents specifically designed for delicate fabrics. Regular washing in cold water on a gentle cycle will help prevent pilling and keep the material plush. By following these care practices, your Snuggle Me products will retain their softness and shape, ensuring continued comfort for your baby.
Hand Washing as an Alternative
Hand washing is a gentle option for Snuggle Me items, ensuring delicate care. Use cold water and mild detergent, gently agitating to clean without stretching or misshaping the fabric.
When to Opt for Hand Washing
Hand washing is ideal for delicate or new Snuggle Me items, ensuring gentle care. It’s best for items with stubborn stains or when you prefer a more meticulous cleaning method. Use cold water and a mild detergent, avoiding harsh chemicals. Gently agitate the fabric to clean without stretching or misshaping. Hand washing is also recommended for smaller or sensitive areas, like nursing pillow covers, to maintain their softness and shape. This method prevents damage from machine agitation, ensuring longevity. For heavily soiled items, hand washing allows for targeted cleaning. Always check the care label for specific advice. Hand washing is a safe alternative for maintaining the quality and comfort of your Snuggle Me products, especially when machine washing isn’t preferred or practical.
Step-by-Step Hand Washing Process
Begin by filling a basin with cold water and adding a small amount of gentle, dye-free detergent. Submerge the Snuggle Me item, gently agitating the fabric with your hands to distribute the detergent evenly. Avoid scrubbing or stretching the material, as this may cause damage. For stubborn stains, lightly massage the area before rinsing. Drain the soapy water and rinse thoroughly with clean, cold water until no suds remain. Gently press out excess water without wringing or twisting. Lay the item flat on a clean towel to air dry, reshaping it to maintain its original form. Avoid direct sunlight or heat to prevent shrinkage or fading. This method ensures a gentle, effective cleaning process for your Snuggle Me items.

Special Care for Covers and Accessories
Wash Snuggle Me covers separately in cold water with a gentle detergent to preserve fabric integrity. Avoid pouring detergent directly on the material to prevent damage. Air dry flat or tumble dry on low to maintain shape and softness. Regularly cleaning accessories ensures hygiene and longevity, keeping them safe and comfortable for your baby. Proper care extends the life of covers and accessories, maintaining their quality and appearance. Always check the care label for specific instructions to ensure optimal results. This attention to detail ensures your Snuggle Me items remain in excellent condition for continued use.