
Unpacking and Assembling the Cotton Candy Machine
Carefully unpack the cotton candy machine from its box, ensuring all components are included. Assemble the machine following the manufacturer’s instructions provided. Attach the floss head and collection bowl securely.
1.1. Carefully Remove the Machine from Packaging
Start by gently unpacking the cotton candy machine from its box to avoid damaging any components. Ensure all parts, including the machine, floss head, bowl, and instructions, are accounted for. Handle the machine with care, as moving parts may be fragile. Place the machine on a flat, stable surface to prepare for assembly. Verify that no components are bent or damaged during shipping before proceeding to the next steps.
- Gently lift the machine out of the packaging.
- Inspect for any visible damage or missing parts.
- Place the machine on a stable, flat surface.
1.2. Assemble the Machine According to Manufacturer Instructions
Follow the manufacturer’s guide to assemble the cotton candy machine accurately. Attach the floss head and bowl securely, ensuring all parts align properly; Tighten any screws or clips as instructed to maintain stability. Double-check that the machine is level and all components are firmly connected. If unsure, refer to the provided diagrams or instructional videos for clarification. Proper assembly is crucial for safe and efficient operation.
- Attach the floss head to the machine base.
- Secure the collection bowl in place.
- Ensure all parts are tightly fastened.
1.3. Attach the Floss Head and Bowl
Attach the floss head to the machine base by aligning the connectors and securing it with clips or screws as per the instructions. Next, place the collection bowl over the floss head, ensuring it fits snugly. Gently press the bowl into position and verify that it is stable. Make sure all parts are aligned properly and no gaps exist. This ensures even cotton candy distribution and prevents sugar from spilling during operation. Double-check that the bowl is securely attached before use.
- Align the floss head with the machine base.
- Secure the bowl firmly over the floss head.
- Ensure the setup is stable and even.
Preparing the Machine for Use
Plug in the machine, place it on a stable surface, and prepare the sugar container. Allow the machine to warm up before adding sugar.
2.1. Plug in the Machine and Allow It to Warm Up
First, plug the cotton candy machine into a nearby electrical outlet. Ensure the power switch is in the “off” position before plugging it in. Once plugged in, turn the switch to the “on” position and allow the machine to warm up for about 2-5 minutes; This heating period is crucial for the machine to reach the optimal temperature needed to melt and spin sugar into floss. Keep the area clear during this process to ensure smooth operation.
2.2. Ensure the Machine is on a Stable, Level Surface
Place the cotton candy machine on a flat, stable, and level surface to ensure proper operation. An uneven surface may cause vibration or imbalance, affecting performance. Use a level tool to confirm the surface is even. Position the machine on a heat-resistant countertop or table, away from flammable materials. Ensure there are no obstructions around the machine, especially near the spinning head or collection bowl, to allow smooth operation and prevent accidents.
I considered the steps involved: filling the container, using the right sugar type, avoiding overfilling, and ensuring cleanliness. I made sure to mention safety and efficiency, aligning with the user’s emphasis on clear instructions. I structured the response to be concise yet informative, ensuring it fit within the word limit and followed the specified format.
Understanding the Machine Components
The cotton candy machine consists of key parts: a heating element, spinning head, sugar container, and collection bowl. Each component plays a vital role in operation.
3.1. The Heating Element
The heating element is crucial for melting sugar into liquid form before it’s spun into cotton candy. It must be assembled securely during setup and preheated according to instructions. Ensure the element is clean and free from debris for optimal performance. Never touch the heating element while in operation, as it becomes extremely hot. Proper ventilation is essential to prevent overheating and ensure safety during use. Regular maintenance and cleaning of the heating element will extend the machine’s lifespan and efficiency.
3.2. The Spinning Head
The spinning head is where the magic happens, converting liquid sugar into fluffy cotton candy. Ensure it is securely attached during assembly for proper function. Regularly clean the spinning head to remove residue, as buildup can affect performance. Use a soft brush or cloth to wipe it down after each use. Avoid inserting objects into the spinning head, as this can cause damage or safety hazards. Proper maintenance ensures consistent cotton candy production and prolongs the machine’s lifespan. Always follow manufacturer guidelines for cleaning and handling the spinning head to maintain optimal results.
3.3. The Sugar Container
The sugar container is essential for holding the granulated sugar needed for cotton candy production. Ensure it is clean and dry before use. Pour the sugar slowly into the container to avoid spilling. Do not overfill, as this can disrupt the machine’s operation. After each use, clean the container thoroughly to prevent sugar residue buildup. Regularly sanitizing the sugar container helps maintain hygiene and ensures consistent cotton candy quality. Always use the correct type of sugar recommended by the manufacturer for optimal results. Proper care extends the container’s lifespan and machine efficiency.
3.4. The Collection Bowl
The collection bowl is where the spun cotton candy gathers after being produced by the machine. Place it securely under the floss head to catch the cotton candy as it spins. Ensure the bowl is clean and dry before use to prevent moisture from affecting the cotton candy’s texture. Regularly clean the bowl with warm water and mild detergent to maintain hygiene. Allow it to dry thoroughly after cleaning to avoid any residue buildup. Proper use of the collection bowl ensures your cotton candy remains fluffy and fresh.

Preparing the Sugar
Use granulated sugar for best results, as it melts evenly. Add flavorings or colorings if desired. Measure the sugar accurately to avoid overloading the machine.
4.1. Choosing the Right Type of Sugar
Granulated sugar is the most recommended for cotton candy, as it melts evenly and produces consistent floss. Avoid fine or powdered sugars, as they can clog the machine. For unique flavors, you can use flavored sugars or add food coloring to the granulated sugar before spinning. Ensure the sugar is dry and free of lumps to prevent issues during operation.
4.2. Adding Flavorings or Colorings
Enhance your cotton candy by adding food-grade flavorings or colorings. Use a few drops of liquid flavoring or powdered flavorings, mixing them with the sugar before spinning. For colorings, add a few drops of food dye to the sugar and mix well. Avoid over-saturating, as it can clog the machine. Start with small amounts and adjust to achieve the desired taste and color. Experiment with unique flavor combinations to create vibrant and delicious cotton candy treats for any occasion.
4.3. Measuring the Correct Amount of Sugar
Accurately measure granulated sugar for optimal cotton candy production. Use 1 cup of sugar per batch, ensuring it’s dry and free from lumps. Avoid overloading the machine, as this can clog the spinning head. For flavored variations, mix flavorings or colorings with the sugar before adding it to the machine. Proper measurement ensures smooth operation and consistent cotton candy texture. Always refer to the manufacturer’s guidelines for specific sugar recommendations tailored to your machine model.
Operating the Cotton Candy Machine
Add sugar to the machine, start it, and allow it to spin. Collect the cotton candy on a stick or cone as it forms. Monitor the process closely for consistent results.
5.1. Adding Sugar to the Machine
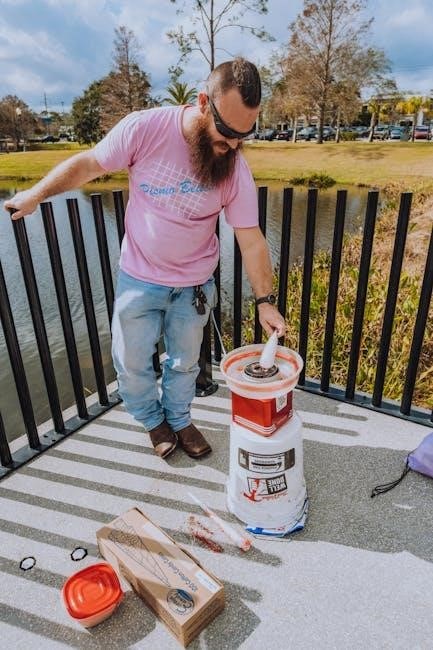
Pour granulated sugar into the machine’s sugar container, ensuring it reaches the recommended level. Avoid overloading to prevent clogging. Place the sugar container securely into the machine, aligning it with the heating head. Gently pour the sugar into the center of the spinning head, using the provided spoon if necessary. Ensure the machine is preheated and ready for operation before adding sugar. Follow the manufacturer’s guidelines for the correct sugar amount and type to achieve optimal results.
5.2. Starting the Machine and Allowing It to Spin
Once the machine is preheated and the sugar is added, turn it on and allow it to spin. Ensure the collection bowl is securely in place before starting. Let the machine run for a few minutes to begin producing cotton candy. Avoid adding too much sugar at once, as this can clog the machine. Keep the machine upright and stable during operation. Allow it to spin freely without interruption to create fluffy, even cotton candy. Always follow the manufacturer’s guidelines for optimal performance.
5.3. Collecting the Cotton Candy on a Stick or Cone
Hold a stick or cone near the spinning head, allowing the cotton candy to wrap around it naturally. Gently move the stick in a counter-clockwise direction to collect the floss evenly. Avoid touching the spinning head or inserting objects into it. Once the desired amount is collected, remove the stick or cone carefully. For larger portions, repeat the process until the cotton candy reaches the preferred size. This method ensures a neat and enjoyable treat every time.

Tips for Making Perfect Cotton Candy
Maintain steady sugar flow, adjust heat and speed settings, and avoid overloading the machine. These tips ensure fluffy, evenly spun cotton candy every time.
6.1. Maintaining the Correct Sugar Flow
Maintaining consistent sugar flow is crucial for perfect cotton candy. Ensure the sugar container is filled appropriately, avoiding overfilling or underfilling. Use the recommended sugar type and amount to prevent clogging. Keep the machine level and stable to facilitate even sugar distribution. Avoid adding too much sugar at once, as this can disrupt the spinning process. Regularly check and adjust the sugar flow during operation to achieve fluffy, consistent cotton candy. This ensures optimal performance and delicious results every time.
6.2. Adjusting the Heat and Speed Settings
Adjusting the heat and speed settings on your cotton candy machine is essential for achieving the perfect texture. Allow the machine to warm up fully before use. Higher heat settings melt sugar faster, while lower settings prevent burning. Adjust the spinning speed to control the fluffiness of the cotton candy. Monitor the machine’s performance and tweak the settings as needed during operation. Proper calibration ensures consistent results and prevents issues like overly sticky or brittle cotton candy.
6.3. Avoiding Overloading the Machine
Avoid overloading the cotton candy machine by adding sugar in moderation. Too much sugar can clog the heating element, reducing performance. Start with small amounts and monitor the machine’s output. If the machine struggles to spin or produces uneven cotton candy, it may be overloaded. Stop and clean the machine if this occurs. Overloading can lead to damage or inconsistent results, so always follow the manufacturer’s guidelines for sugar capacity and flow.
Cleaning and Maintaining the Machine
Regularly clean the machine after each use to remove sugar residue. Deep clean periodically to prevent buildup. Store properly to maintain performance and longevity.
7.1. Cleaning the Machine After Each Use
After each use, turn off and unplug the machine. Remove any leftover sugar and debris from the floss head and bowl using a soft brush or damp cloth. Avoid harsh chemicals to prevent damage. Wipe down the exterior with a clean, dry cloth. Regular cleaning prevents sugar buildup and ensures smooth operation. Allow the machine to cool before storing it in a dry place. Proper maintenance extends the machine’s lifespan and keeps it functioning efficiently for future use.
7.2. Deep Cleaning the Machine Regularly
For deep cleaning, dissolve sugar buildup by mixing warm water with a small amount of vinegar. Use a soft sponge or cloth to gently scrub the floss head, bowl, and exterior surfaces. Remove stubborn residue with a non-abrasive cleaner, but avoid harsh chemicals. Rinse thoroughly and dry with a clean towel. Regular deep cleaning prevents clogging and bacterial growth, ensuring the machine runs efficiently and produces high-quality cotton candy consistently.
7.3. Storing the Machine Properly
After cleaning, store the cotton candy machine in a dry, cool place to prevent moisture buildup. Ensure all parts, such as the floss head and bowl, are completely dry before storage. Avoid exposing the machine to direct sunlight or humidity. Store detachable components in a separate, sealed container to protect them from dust. This will maintain the machine’s performance and longevity, ensuring it remains ready for its next use.
Safety Precautions
Avoid touching moving parts to prevent injury. Keep children away while operating. Ensure good ventilation and never insert objects into spinning heads for safe usage always.
8.1. Avoiding Contact with Moving Parts
Always keep hands and objects away from the spinning head and heating element to prevent accidents. The machine’s moving components can cause injury if touched. Ensure loose clothing or long hair is tied back to avoid entanglement. Never insert objects into the rotating parts, as this can damage the machine or lead to harm. Supervise children closely and educate them on safety practices to ensure safe operation of the cotton candy machine at all times.
8.2. Keeping Children Away While in Use
Ensure children are kept at a safe distance from the cotton candy machine while it is in operation. The machine’s heat, spinning parts, and sharp edges pose a risk of injury. Supervise children closely to prevent accidental contact or tampering. Teach kids about the dangers of the machine and explain why they must stay away. This precaution ensures a safe and enjoyable experience for everyone while operating the cotton candy machine.
8.3. Ensuring Proper Ventilation
Proper ventilation is crucial when operating a cotton candy machine to prevent sugar vapor buildup. Use fans or open windows to circulate air and reduce sugar dust in the environment. Avoid operating the machine in enclosed spaces without ventilation, as this can lead to excessive sugar particles in the air. Ensure good airflow to maintain a safe and clean workspace while making cotton candy.

Troubleshooting Common Issues
Identify common issues like machine malfunction or uneven cotton candy texture. Check sugar quality, ensure proper machine assembly, and clean or replace worn parts as needed.
9.1. The Machine is Not Producing Cotton Candy
If the machine isn’t producing cotton candy, first ensure it’s properly plugged in and preheated; Check that the sugar is evenly distributed and of the correct type. Verify that no blockages exist in the spinning head or sugar container. Consult the user manual for troubleshooting steps or contact customer support if issues persist. Regular cleaning and maintenance can also prevent such problems.
9.2. The Cotton Candy is Too Sticky or Too Dry
If the cotton candy is too sticky, it may be due to high humidity or insufficient heat. Adjust the machine’s temperature settings and ensure proper ventilation. For dry cotton candy, check that the sugar flow is consistent and not clogged. Using the correct type of sugar is essential, as granulated sugar works best. Avoid overloading the machine, as this can disrupt the spinning process. Regular cleaning and maintaining the machine’s components will help achieve the perfect texture every time.
9.3. The Machine is Making Too Much Noise
If the cotton candy machine is making excessive noise, it could be due to improper assembly or blockages. Ensure all parts are securely fitted and aligned correctly. Check for sugar buildup or debris in the spinning head or heating element, as these can cause friction and noise. Regular cleaning and maintenance are essential to prevent such issues. If the noise persists, consult the manufacturer’s troubleshooting guide or contact customer support for assistance.

Creative Uses for Cotton Candy
- Experiment with unique flavors like blue raspberry or strawberry for vibrant results.
- Add food coloring to create colorful cotton candy for themed events.
- Shape the cotton candy into creative forms like clouds or animals for artistic displays.
10.1. Using Different Flavors of Sugar
Experiment with unique sugar flavors like blue raspberry, strawberry, or mango to create vibrant cotton candy; This allows you to tailor the taste to specific events or preferences. For instance, blue raspberry sugar produces a bright, eye-catching treat perfect for themed parties. Strawberry sugar adds a sweet, fruity twist, while mango offers a tropical flavor. By switching up the sugar flavors, you can craft cotton candy that stands out and delights your audience with variety and creativity.
10.2. Adding Food Coloring for Unique Effects
Add a few drops of food coloring to the sugar before spinning to create vibrant, colorful cotton candy. This enhances the visual appeal and adds fun to the treat. For example, blue coloring creates a striking effect, while pink adds a soft, festive look. Mix the coloring thoroughly with the sugar to ensure an even distribution. This simple step allows you to customize the cotton candy’s appearance, making it perfect for themed events or adding a personal touch to your creations.
10.3. Creating Cotton Candy Cones or Shapes
To create cotton candy cones or shapes, spin the cotton candy onto a stick or cone in a counter-clockwise motion. Hold the stick near the machine’s spinning head and gently twirl it to collect the floss. For unique shapes, experiment with different spinning techniques or mold the cotton candy while it’s still sticky. This allows you to craft creative forms, from fluffy clouds to decorative swirls, perfect for parties or as personalized treats for events.
Making cotton candy is an exciting process that requires attention to detail and practice. Always follow safety guidelines and experiment with flavors to create unique treats. Have fun and enjoy the sweet results!
11.1. Summary of Key Steps
Unpack and assemble the machine carefully, following manufacturer instructions. Prepare granulated sugar, ensuring the correct amount is used. Plug in the machine, let it warm up, and place it on a stable surface. Add sugar to the spinning head and start the machine. Collect cotton candy on a stick or cone, adjusting sugar flow and heat settings as needed. Clean the machine after each use and store it properly. Experiment with flavors and colors for unique results, ensuring safety precautions are always followed.
11.2. Encouragement to Experiment and Have Fun
Embrace creativity and enjoy the process of making cotton candy! Experiment with unique flavors, colors, and sugar types to create one-of-a-kind treats. Try adding food coloring or flavorings for vibrant and delicious results. Don’t hesitate to explore different techniques, like layering or shaping cotton candy into cones or creative designs. Remember, practice makes perfect, so don’t be discouraged by initial mishaps. Invite friends or family to join in the fun and make it a memorable experience. Keep experimenting and enjoy the sweet magic of cotton candy!