
Welcome to the Jensen TV for RV manual, your essential guide for safe installation, operation, and troubleshooting. This manual ensures optimal performance and longevity of your RV TV, providing detailed instructions and safety precautions to prevent damage and ensure seamless entertainment on the go.
Overview of Jensen TVs for RVs
Jensen TVs are specifically designed for RV use, offering durability and lightweight construction to withstand the rigors of travel. These TVs feature HD-ready resolution, ensuring crisp and clear visuals, and are equipped with USB and HDMI ports for seamless connectivity to external devices. With a range of sizes, from 14 to 50 inches, Jensen TVs cater to various RV layouts and entertainment needs. Built-in HDTV tuners and compatibility with 12V DC power systems make them ideal for RV installations. The TVs also come with remote controls and user-friendly interfaces, enhancing the viewing experience. Jensen’s commitment to quality ensures reliable performance, making their TVs a popular choice among RV enthusiasts. Their designs prioritize space efficiency and energy savings, perfect for life on the road.
Importance of Reading the Manual
Reading the Jensen TV for RV manual is crucial for safe and optimal use of your device. It provides essential safety precautions, such as proper power source connections and grounding, to prevent electric shock or damage. The manual outlines installation guidelines, ensuring stable mounting and correct electrical setup. It also offers troubleshooting tips for common issues like connectivity or picture quality problems. By following the manual, you can avoid voiding the warranty and ensure longevity of the TV. Additionally, it explains how to navigate menus, use remote controls, and connect external devices like DVD players or HDMI-compatible equipment. Understanding the manual’s instructions helps maximize entertainment while minimizing risks during RV travel. Regular maintenance tips, such as cleaning the screen and updating settings, are also included to keep your TV functioning seamlessly. Always refer to the manual for specific model details and optimal performance.
Key Features and Specifications of Jensen RV TVs
Jensen RV TVs boast HD LED displays, HDMI/USB ports, and robust durability for travel. They support 12V DC power, ensuring seamless connectivity and performance in any RV setup.
Types of Jensen RV TVs Available
Jensen offers a variety of RV TVs to suit different needs and preferences. Models like the JE3214, JE5015, and JTV19DC provide options in sizes ranging from 14 to 50 inches. They feature HD and Full HD resolutions, ensuring crisp visuals. Some models include built-in HDTV tuners for over-the-air channel access, while others offer DVD player combos for added convenience. Certain Jensen TVs are equipped with HDMI and USB ports, enabling seamless connectivity to external devices. Additionally, select models support smart TV features for streaming apps. Designed for durability, these TVs are built to withstand the vibrations and travel demands of RV life, offering lightweight and energy-efficient solutions. Whether you prefer a compact unit or a larger screen, Jensen provides a range of options to enhance your RV entertainment experience.
Display Technologies and Resolution
Jensen RV TVs feature advanced display technologies designed for enhanced viewing experiences. Models like the JE3214 and JE5015 utilize LED and LCD technologies, offering vibrant colors and sharp imagery. These TVs are available in HD and Full HD resolutions, ensuring clear and detailed visuals. The LED backlighting provides improved brightness and energy efficiency, making them ideal for RV use. With a high contrast ratio, these displays deliver deeper blacks and richer colors, enhancing overall picture quality. Additionally, Jensen TVs support up to 16.7 million colors, ensuring lifelike visuals. Many models also include built-in HDTV tuners for accessing over-the-air channels with superior clarity. Designed to withstand the challenges of mobile environments, Jensen RV TVs combine durability with cutting-edge display technology for an exceptional entertainment experience on the go.
Power Requirements and Compatibility
Jensen RV TVs are designed to operate efficiently within the unique power constraints of recreational vehicles. Most models are compatible with a 12V DC power source, making them ideal for RV installations. Some units also support 110V AC adapters for flexibility. The TVs are engineered to withstand power fluctuations common in RV environments, ensuring reliable performance. With low power consumption, these TVs are energy-efficient, preserving battery life when off-grid. Compatibility with various RV electrical systems is a key feature, allowing seamless integration with existing setups. Additionally, Jensen TVs often include built-in adapters to accommodate different power sources, ensuring versatility for travelers. This design ensures that users can enjoy their entertainment systems without worrying about power compatibility or excessive energy draw while on the move.

Installation and Setup
Proper installation and setup of your Jensen RV TV ensure optimal performance and safety. Follow guidelines for mounting, connecting power, and configuring settings to guarantee stability and functionality on the go.
Mounting Options for RV TVs
Jensen RV TVs offer versatile mounting options to suit different RV setups. Choose from wall mounts, desktop stands, or overhead configurations for secure installation. Ensure the mounting surface is stable and level to prevent vibration damage. Use the included hardware or optional stands like the STD1909 for desktop placement. For wall mounting, select a location with adequate clearance and follow the manual’s torque specifications. Outdoor setups may require additional sealing to protect against moisture. Always refer to the installation guide for specific model recommendations. Proper mounting ensures stability, safety, and optimal viewing angles while traveling. Regularly inspect the mount to prevent loosening and ensure your TV remains secure on the road.
Connecting Power and Cables
Connecting your Jensen RV TV involves attaching the power cord to a 12V DC source or an AC adapter, ensuring compatibility with your RV’s electrical system. Use the provided HDMI cables for high-definition connections to external devices like DVD players or gaming consoles. Coaxial cables are necessary for antenna or cable connections to access local channels. Always unplug the TV before cleaning or servicing to avoid electric shock. Secure all cables neatly to prevent tangling and potential damage during travel. Refer to the manual for specific port locations and compatibility details. Proper connections ensure reliable performance, clear picture quality, and safe operation of your Jensen TV while on the road.
Initial Setup Wizard and Antenna Connection
After powering on your Jensen RV TV, the initial setup wizard will guide you through language selection, display settings, and antenna configuration. Connect the coaxial cable from your RV’s antenna to the TV’s coaxial input to access local channels. Once connected, the TV will automatically scan and store available channels. Ensure the antenna is properly extended and positioned for optimal signal reception. If using an external antenna, consult the manual for specific connection instructions. Follow on-screen prompts to complete the setup wizard, and save your preferences. For troubleshooting antenna issues, refer to the manual’s troubleshooting section. Proper antenna connection ensures clear reception, allowing you to enjoy your favorite shows while on the road.

Operating the Jensen RV TV
Power on the TV using the remote or power button, then navigate the on-screen menu for channel selection, picture settings, and sound adjustments. Use the remote to access features and optimize viewing experiences.
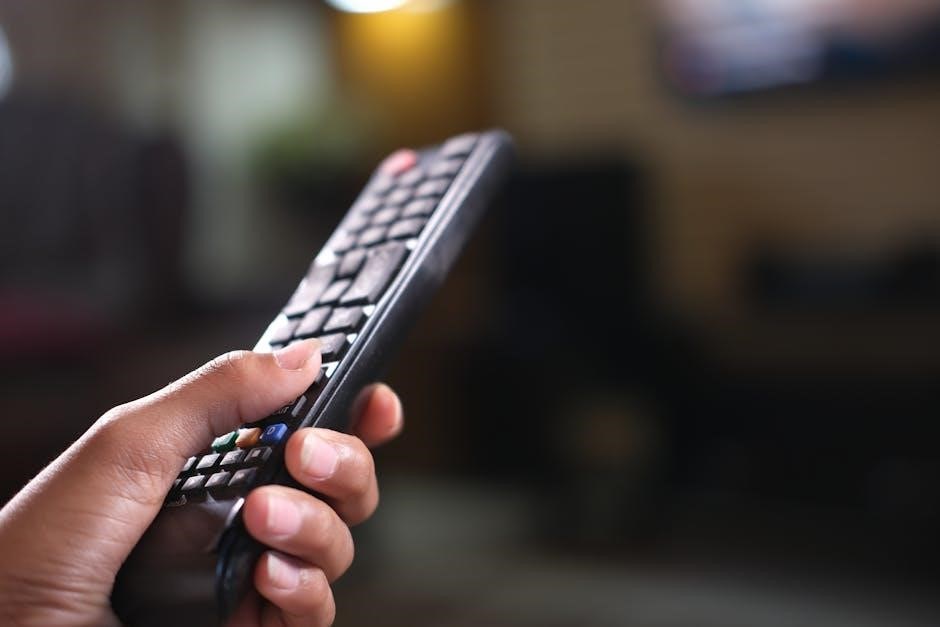
Using the Remote Control
The Jensen RV TV remote control offers intuitive navigation for seamless operation. Press the POWER button to turn the TV on or off. Use the MENU button to access settings, and navigate with the arrow keys. Adjust volume with the VOL+ and VOL- buttons, and mute sound with the MUTE button. Channel selection is easy with the CH+ and CH- buttons. For advanced features, use the number pad or specialized buttons for picture and sound settings. Ensure batteries are installed correctly and replace them when power diminishes. Avoid exposing the remote to moisture or extreme temperatures. Regularly clean the remote with a soft cloth to maintain functionality. Refer to the manual for specific button functions and troubleshooting remote issues. Proper use ensures optimal control and enhances your viewing experience.
Navigating the On-Screen Menu
Accessing and navigating the on-screen menu on your Jensen RV TV is straightforward. Press the MENU button on the remote control to display the main menu. Use the UP and DOWN arrow keys to scroll through options like Picture, Sound, Channel, and Settings. Select a menu item by pressing the OK or ENTER button. Adjust settings using the LEFT and RIGHT arrow keys. For example, in the Picture menu, you can adjust brightness, contrast, and color; In the Sound menu, you can customize equalizer settings or enable surround sound. Save your changes by selecting the EXIT or RETURN button. The menu is user-friendly, allowing quick access to features like antenna setup, HDMI input selection, and system updates. Regularly exploring the menu helps you optimize your viewing experience and discover additional TV functions.

Troubleshooting Common Issues
Identify symptoms like no power, poor picture, or sound issues. Check connections, ensure proper power supply, and reset the TV if necessary. Refer to the manual for detailed solutions.
Power Issues and Connectivity Problems
Common power issues include the TV not turning on or shutting off unexpectedly. Ensure the TV is properly connected to a 12V DC power source or AC adapter. Check for loose connections or damaged cords. If using an AC outlet, verify it is functioning correctly. For DC power, ensure the battery is charged and connections are secure. Connectivity problems may arise from loose coaxial cables or improper antenna alignment. Restart the TV and retry the initial setup wizard to re-establish connections. If issues persist, consult the manual for specific troubleshooting steps or reset the TV to factory settings. Regularly inspect power cords and connections to prevent such problems. Always refer to the manual for detailed guidance on resolving power and connectivity issues effectively.
Picture Quality and Sound Problems
Poor picture quality or sound issues can disrupt your viewing experience. Common causes include weak antenna signals, incorrect TV settings, or loose cable connections. Ensure the antenna is properly aligned and securely connected. Check HDMI ports for damage or dust and use high-quality cables. If sound is muted, verify that the volume is not turned down and mute is off. Adjust picture settings in the on-screen menu for optimal clarity. If issues persist, reset the TV to factory settings or consult the manual for troubleshooting steps. Regularly inspect cables and connections to prevent such problems. For persistent issues, contact Jensen customer support for assistance. Proper maintenance and setup can help maintain clear visuals and crisp audio for enhanced entertainment on the go.
Resetting the TV to Factory Settings
Resetting your Jensen TV to factory settings can resolve persistent issues. Access the on-screen menu using the remote. Navigate to the ‘System’ or ‘Settings’ tab. Select ‘Factory Reset’ and enter the default PIN (usually 0000 or 1234). Confirm the reset to restore default settings. Note that this erases saved channels and preferences. After the TV restarts, reconnect the antenna and run the setup wizard to configure settings again. This process ensures optimal performance and resolves software-related problems. Always refer to the manual for specific instructions and PIN details. Resetting is a simple solution to restore your TV’s original functionality and improve viewing experience.

Maintenance and Care
Regularly clean the TV screen with a dry, soft cloth to prevent dust buildup. Avoid harsh chemicals or liquids. Unplug the power cord before cleaning to ensure safety and prevent damage.
Cleaning the TV Screen and Cabinet
To maintain your Jensen RV TV, clean the screen with a dry, soft cloth to remove dust. For stubborn spots, lightly dampen the cloth with water, ensuring it’s not soaking wet. Avoid harsh chemicals, abrasive cleaners, or liquid sprays, as they may damage the screen or cabinet. Never spray cleaning solutions directly onto the TV; apply them to the cloth instead. For the cabinet, use a soft, dry cloth to wipe away dirt or fingerprints. Regular cleaning prevents dust buildup and ensures optimal picture quality. Always unplug the TV before cleaning to avoid electric shock. Do not open the unit or attempt internal cleaning, as this could void the warranty or cause damage. By following these steps, you’ll keep your Jensen TV in excellent condition for years of reliable performance.
Regular Maintenance Tips
Regular maintenance ensures your Jensen RV TV performs optimally and lasts longer. Start by checking all cable connections to prevent signal loss and ensure secure fittings. Update the TV’s software periodically to access new features and improvements. Inspect the screen and cabinet regularly for dust and dirt, cleaning them as needed with a soft cloth. Avoid exposing the TV to extreme temperatures or moisture, which can damage internal components. During travel, secure the TV firmly to prevent movement-related damage. Store the TV in a protective cover when not in use to shield it from dust. Refer to the manual for specific care instructions tailored to your model. By following these tips, you’ll maintain your Jensen TV’s performance, ensuring reliable entertainment on the road. Regular maintenance also helps prevent common issues and extends the lifespan of your device.
Compatibility with Other Devices
Jensen RV TVs offer seamless connectivity with HDMI, USB, and DVD players, ensuring easy integration with your entertainment systems for a superior viewing experience on the go.
Connecting to DVD Players and External Devices
To connect a DVD player or external device to your Jensen RV TV, use the HDMI or RCA ports for a secure connection. HDMI provides high-quality audio and video, while RCA offers a reliable alternative. Ensure the TV and DVD player are powered on before connecting. For HDMI, simply plug the cable into both devices and select the correct input on the TV. For RCA, match the color-coded cables (yellow for video, red/white for audio) to the corresponding ports. Once connected, the TV will automatically detect the device. You can also use the IR remote control to manage DVD functions seamlessly. Always refer to the manual for specific instructions and ensure the devices are compatible with your TV’s ports for optimal performance.
Using HDMI and USB Ports
Connect external devices like Blu-ray players or gaming consoles to your Jensen RV TV using HDMI ports for high-quality audio and video. Simply plug in the HDMI cable, ensuring the TV is on, and select the correct input using the remote. For USB ports, insert your flash drive or phone to play media. The TV typically recognizes the device automatically. Check compatibility with file formats like MP4 and AVI. Use standard HDMI cables and ensure the TV’s power is sufficient for USB devices. Navigate to the input source via the remote’s input button or through the menu. Troubleshoot by checking connections or restarting the TV if issues arise. Convert files to compatible formats if necessary. Enjoy seamless media playback by following these steps carefully.

Warranty and Support
Jensen TV offers a comprehensive warranty and dedicated customer support for RV TVs, ensuring reliable service, expert technical help, and peace of mind for users on the road.
Understanding the Warranty Coverage
Jensen TV warranties provide coverage for manufacturing defects and ensure your RV TV is protected against malfunctions. The warranty typically lasts 12 months from purchase, covering parts and labor for repairs. Registration is required to validate the warranty, and proof of purchase must be provided. Damage caused by improper installation, misuse, or external factors is excluded. For claims, contact Jensen customer support via phone, email, or their official website. Ensure to review the warranty terms in the manual for specific details, as conditions may vary. Proper maintenance and adherence to guidelines are essential to uphold warranty validity. Visit the Jensen website for the most accurate and updated warranty information.
Contacting Jensen Customer Support
For assistance with your Jensen RV TV, contact their customer support team through various channels. Visit their official website for detailed support options, including phone numbers, email addresses, and live chat. The website also features downloadable manuals, FAQs, and troubleshooting guides. When reaching out, have your TV model number and purchase details ready for efficient service. Additionally, Jensen offers a dedicated support hotline available Monday-Friday, 8AM-5PM PST. For non-urgent inquiries, submit a support ticket online. Their knowledgeable team is ready to address installation issues, technical problems, and warranty-related questions. Regularly check their website for updates and resources to ensure optimal performance of your RV TV.