This manual serves as your comprehensive guide to understanding and operating Husqvarna sewing machines, covering setup, maintenance, and troubleshooting for models like the Viking series.
Overview of the Husqvarna Viking Sewing Machine
The Husqvarna Viking sewing machine is renowned for its versatility, advanced features, and user-friendly design. Designed for both hobbyists and professionals, these machines offer a wide range of stitching options, including embroidery and quilting capabilities. Models like the Viking 610, 620, and Designer Ruby deLuxe are equipped with intuitive interfaces and specialized tools for precise control. With a focus on durability and innovation, Husqvarna Viking machines are a popular choice for creating high-quality sewing projects. Their robust construction and customizable settings ensure optimal performance for various fabrics and techniques.
Importance of Reading the Manual Before Use
Reading the Husqvarna sewing machine manual is essential for safe and effective operation. It provides detailed instructions for setup, maintenance, and troubleshooting, ensuring optimal performance. The manual explains how to use advanced features like embroidery and specialized feet, preventing potential damage. Understanding safety guidelines, such as keeping vents clean and avoiding hazards, is crucial. By following the manual, users can maximize their machine’s capabilities, avoid common issues, and extend its lifespan. It serves as a roadmap for mastering your Husqvarna Viking sewing machine, helping you achieve professional results in your sewing projects.
Model-Specific Guides
Model-specific guides for Husqvarna Viking 610, 620, 630, Freesia 415/425, and Jade 20 provide detailed instructions, ensuring optimal setup, troubleshooting, and performance tailored to each machine’s unique features.
Husqvarna Viking 610, 620, and 630 Sewing Machine Manual
This manual provides detailed instructions for the Husqvarna Viking 610, 620, and 630 models, covering setup, operation, and maintenance. It includes guidance on threading, stitch selection, and troubleshooting common issues. The guide also offers tips for optimizing performance and customization for various fabrics. Users can download the PDF version for easy access, ensuring they master their machine’s advanced features and embroidery capabilities. Regular updates and firmware instructions are included to keep the machine running smoothly. This resource is essential for both beginners and experienced sewists to maximize their sewing experience with these versatile models.
Husqvarna Viking Freesia 415/425 Sewing Machine Instructions
The Husqvarna Viking Freesia 415/425 manual offers step-by-step instructions for seamless operation. It covers unpacking, initial setup, and basic functions, ensuring users can start sewing immediately. The guide details threading techniques, thread tension management, and stitch pattern selection. Troubleshooting tips and maintenance advice, like cleaning and lubricating, are included to extend machine longevity. Available as a free PDF download, this manual is a go-to resource for optimizing the Freesia series’ performance, making it ideal for both novice and experienced sewists looking to enhance their crafting experience with precision and ease.
Husqvarna Viking Jade 20 Sewing Machine Instruction Manual
The Husqvarna Viking Jade 20 manual provides detailed instructions for setting up and operating this versatile sewing machine. It covers basic functions, threading, and stitch selection, along with maintenance tips to ensure optimal performance. The guide includes troubleshooting advice for common issues and step-by-step instructions for customizing settings for various fabrics. Available as a free PDF download, this manual is essential for users seeking to maximize their sewing experience with the Jade 20, offering clear guidance for both novice and experienced sewists to achieve professional-quality results effortlessly.
Setting Up Your Sewing Machine
This section covers unpacking, connecting power, and understanding basic components. It ensures a smooth setup process by following manual guidelines for safe and efficient machine preparation.
Unpacking and Initial Setup
Unpacking involves carefully removing the machine from its box, ensuring all included accessories are accounted for. Place the machine on a stable surface, away from direct sunlight and moisture. Refer to the manual for a list of included parts and tools. Before plugging in, inspect the machine for any visible damage. Familiarize yourself with the control panel and basic components. Secure the machine to prevent movement during operation. Always follow safety guidelines specified in the manual to ensure proper setup and functionality. Proper initial setup is crucial for optimal performance and longevity of your Husqvarna sewing machine.
Connecting the Machine and Power Supply
Connect your Husqvarna sewing machine to a grounded power outlet using the provided cord. Ensure the voltage matches your machine’s specifications. Avoid using extension cords or overloaded circuits. Before plugging in, inspect the cord for damage. If damaged, replace it to prevent hazards. Plug directly into a suitable outlet, ensuring the machine is placed on a stable, flat surface. Keep the power supply away from water and heat sources. Follow manual guidelines for proper electrical connections to ensure safe and efficient operation. Always unplug the machine when not in use or during maintenance. Proper power supply setup is crucial for optimal performance and safety.
Understanding the Basic Components
Familiarize yourself with the key parts of your Husqvarna sewing machine. Locate the power switch, spool pins, bobbin case, and tension dials. The stitch selector and presser foot lever are essential for fabric control. Identify the reverse stitch button and the take-up lever, which regulates thread tension. The needle bar and hook mechanism are vital for forming stitches. Check the accessory compartment for additional feet and tools. Understanding these components ensures proper operation and maintenance. Refer to the manual for detailed diagrams and descriptions to help you identify and use each part effectively for optimal sewing performance and longevity of your machine.
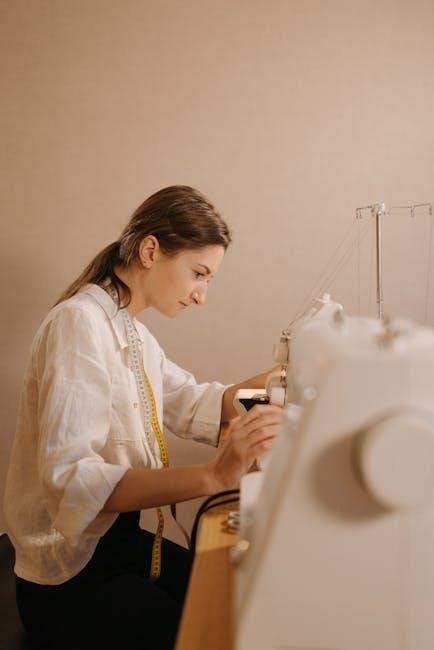
Operating the Sewing Machine
Master your Husqvarna sewing machine with this guide. Learn basic functions, threading, stitch selection, and maintenance. Tailored for models like Viking 610, Freesia 415, and Jade 20, it ensures optimal performance and troubleshooting.
Basic Sewing Functions and Controls
Understand the foundational operations of your Husqvarna sewing machine, including stitch selection, thread tension, and speed control. Familiarize yourself with the control panel, foot pedal, and basic stitch patterns. Learn how to adjust settings for straight stitching, zigzag, and reverse sewing. Proper thread management and bobbin installation are also covered. These essential functions ensure smooth fabric handling and consistent results. Refer to your model-specific manual, such as the Viking 610 or Freesia 415, for detailed instructions tailored to your machine’s features. Mastering these basics will enhance your sewing experience and help you achieve professional-quality results.
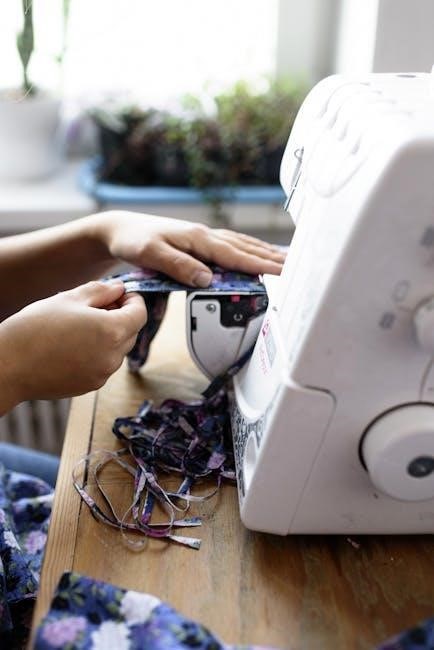
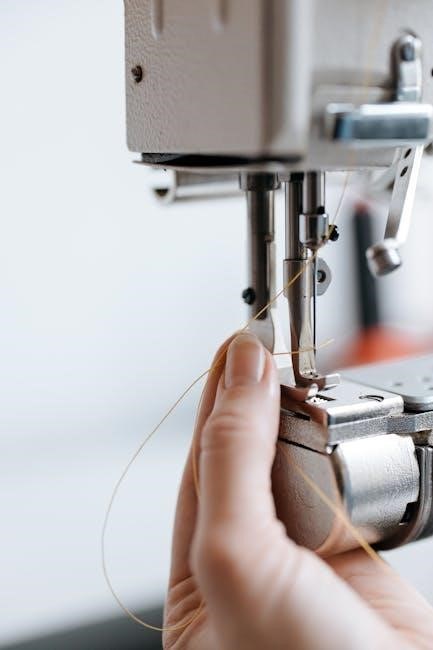
Threading the Machine and Managing Thread Tension
Proper threading and thread tension are crucial for smooth sewing. Start by turning off the machine and gently pulling the thread through the spool pin. Guide the thread through the tension discs, ensuring it’s seated correctly. Pass it through the take-up lever and stitch length regulator before threading the needle. Adjust the tension dial to achieve the right balance—loose tension can cause uneven stitches, while tight tension may break the thread. Refer to your Husqvarna manual for model-specific guidance, such as the Viking 610 or Freesia 415, to ensure optimal thread flow and fabric handling.
Using Different Stitch Patterns and Settings
Explore the versatility of your Husqvarna sewing machine by utilizing various stitch patterns and settings. Select from straight, zigzag, and decorative stitches for different fabrics and projects. Use the control panel to adjust stitch length and width, ensuring optimal results. For embroidery or quilting, switch to specialized modes to access intricate designs. Customize settings for specific fabrics, such as delicate or heavy-duty materials, to achieve professional-quality seams. Refer to your manual for model-specific features, like the Viking 610’s advanced stitch options or the Freesia 415’s embroidery capabilities, to maximize your sewing experience and create tailored, precise stitches every time.
Maintenance and Troubleshooting
Regular cleaning and lubrication ensure smooth operation. Check for lint buildup, thread tension issues, and firmware updates. Address common problems promptly for longevity.
Cleaning and Lubricating the Machine
Regular cleaning and lubrication are essential for maintaining your Husqvarna sewing machine’s performance. Use a soft brush to remove lint and dust from the bobbin area and tension discs. Apply a few drops of sewing machine oil to moving parts, such as the needle bar and hook race, following the manual’s instructions. Avoid over-lubricating, as excessive oil can attract dust. For models like the Viking series, ensure ventilation openings are clear to prevent overheating. Refer to your specific model’s manual for detailed cleaning schedules and lubrication points to keep your machine running smoothly and extend its lifespan.
Common Issues and Solutions
Common issues with Husqvarna sewing machines include thread bunching, machine noise, and error messages. For thread bunching, check tension settings and ensure proper threading. If the machine is noisy, inspect for lint buildup or inadequate lubrication. Error messages often indicate firmware issues or sensor malfunctions. To resolve these, update the machine’s software or reset it by turning it off and on. Always refer to the manual for model-specific solutions. Regular maintenance, such as cleaning and oiling, can prevent many of these issues. Consult the troubleshooting section for detailed guidance to restore your machine’s optimal performance and extend its lifespan.
Updating Firmware and Software
Regularly updating your Husqvarna sewing machine’s firmware and software ensures optimal performance and access to new features. Visit the official Husqvarna website or support portal to check for the latest updates. Download the correct firmware version for your specific model and follow the installation instructions provided in the manual or on the website. Ensure the machine is connected to a power source during the update to prevent interruptions. After installation, restart the machine to apply the changes. Keeping your software up to date enhances functionality, resolves bugs, and maintains compatibility with accessories or embroidery modules, ensuring a seamless sewing experience.
Advanced Features and Techniques
The Husqvarna sewing machine offers advanced features like embroidery, quilting, and specialized feet, enabling intricate stitching and fabric customization for professional-grade results.
Embroidery and Quilting Capabilities
Husqvarna sewing machines offer advanced embroidery and quilting features, allowing users to create intricate designs with precision. The Designer Ruby deLuxe model includes a large embroidery area and customizable stitch patterns. Quilters benefit from specialized feet and even stitch regulation, ensuring perfect fabric control. These capabilities make Husqvarna machines ideal for both hobbyists and professionals, enabling the creation of complex patterns and designs with ease and accuracy. The included software and firmware updates further enhance these features, providing endless creative possibilities for users.
Using Specialized Feet and Attachments
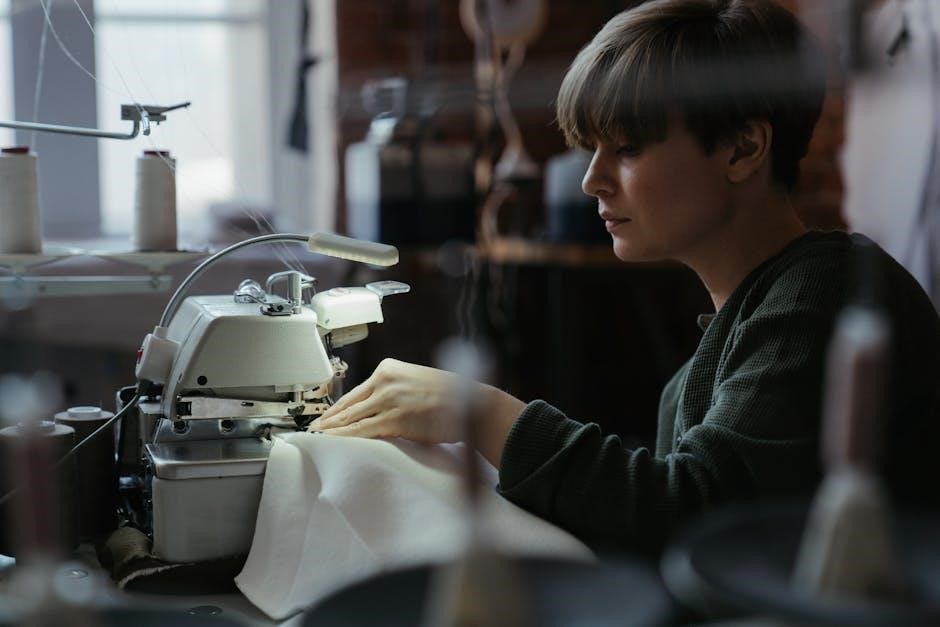
Husqvarna sewing machines offer a variety of specialized feet and attachments to enhance sewing, embroidery, and quilting experiences. These include zipper feet, overlock feet, and quilting feet, each designed for specific tasks. The Nina 9102D Overlocker/Serger, for instance, features a built-in roll hem and flat lock for professional finishes. Attachments like embroidery hoops and extension tables expand creative possibilities. Proper use of these accessories ensures precision and versatility. Regular cleaning of the machine’s ventilation openings and feet is essential to maintain performance. Always refer to the manual for guidance on selecting and using the right tools for your projects.
Customizing Settings for Specific Fabrics
Husqvarna sewing machines allow precise customization for various fabrics, ensuring optimal results. For delicate fabrics, reduce stitch length and tension, while for heavy materials like denim, increase presser foot pressure. The Viking series features adjustable settings for leather, silk, and quilting fabrics. Advanced models like the DESIGNER RUBY deLuxe offer touch-screen controls for fabric-specific stitch patterns. Always consult the manual for recommendations on thread type, needle size, and presser feet. Using the right settings enhances fabric compatibility and prevents damage. Experiment with test scraps to ensure the perfect stitch quality for your project, whether it’s embroidery, quilting, or everyday sewing.
Safety Precautions
Ensure your sewing machine is stable, keep loose clothing tied back, and avoid distractions. Unplug the machine after use and keep it away from children. Always follow the manual’s guidelines for safe operation to prevent accidents and ensure a secure sewing environment.
General Safety Guidelines
To ensure a safe sewing experience, always maintain a clean and stable workspace. Keep loose clothing and long hair tied back, and avoid wearing jewelry that could get caught. Never leave the machine unattended while plugged in, and keep children and pets away. Unplug the machine after use and during repairs. Avoid operating the machine when tired or distracted. Ensure proper ventilation to prevent dust and lint buildup. Regularly clean the machine to remove accumulated debris. Follow all instructions in the manual carefully, and use only recommended accessories to minimize risks and ensure safe, efficient operation.
Protective Gear and Workspace Setup
Always wear protective gear, such as safety glasses, to shield yourself from potential debris. Ensure your workspace is well-lit, clean, and free from clutter. Place the machine on a stable, flat surface, away from water and heat sources. Keep children and pets at a safe distance. Maintain a tidy area to prevent accidents and ensure smooth operation. Use a dust cover when the machine is not in use to protect it from lint and dust buildup. Proper workspace organization enhances safety and efficiency while sewing with your Husqvarna machine.
Emergency Shutdown Procedures
In case of an emergency, immediately disconnect the power supply by unplugging the machine. Stop all operations and ensure no moving parts are active. If the needle is down, carefully raise it to the highest position to prevent fabric damage. Keep loose clothing and long hair tied back to avoid entanglement. Never leave the machine unattended while plugged in. After an emergency, unplug the machine and wait for it to stop completely before addressing the issue. Always prioritize safety and consult the manual for specific guidance on handling emergencies effectively.
Additional Resources
Access free PDF manuals, online support forums, and troubleshooting guides for Husqvarna sewing machines. Visit official websites or authorized service centers for firmware updates and repair assistance.
Downloading Free PDF Manuals
Downloading free PDF manuals for Husqvarna sewing machines is straightforward. Visit official Husqvarna Viking websites or trusted platforms like ManualsLib or SingerSupport. Search for your specific model, such as the Viking 610, Freesia 415, or Jade 20, and download the manual instantly. These guides include detailed setup instructions, maintenance tips, and troubleshooting solutions. Ensure you select the correct model to access accurate information. Additionally, some manuals offer firmware updates and stitch guides to enhance your sewing experience. Always verify the source for authenticity to avoid outdated or incorrect instructions.
Accessing Online Support and Forums
Husqvarna Viking offers extensive online support through their official website and forums. Users can access troubleshooting guides, firmware updates, and user manuals for specific models like the Viking 610. Joining sewing communities and forums allows you to connect with other Husqvarna users, share tips, and resolve issues collectively. Additionally, official support pages provide direct links to download PDF manuals, ensuring you have all the resources needed to maintain and optimize your sewing machine. These platforms are invaluable for both novice and experienced sewists, fostering a supportive environment to enhance your sewing experience.
Finding Repair and Service Centers
To locate authorized repair and service centers for your Husqvarna sewing machine, visit the official Husqvarna Viking website. Use the “Dealer Locator” tool to find certified service providers in your area. Ensure your machine is serviced by professionals trained to handle Husqvarna models, guaranteeing quality repairs. Additionally, contact Husqvarna customer support for recommendations or visit local sewing shops that specialize in Viking machines. Regular maintenance by authorized centers ensures your machine operates efficiently and maintains its warranty. Always verify the center’s credentials before scheduling a service to ensure reliability and expertise in handling your specific model.
Mastering your Husqvarna sewing machine opens up endless creative possibilities. By following this manual, you’ll explore advanced features and maintain optimal performance. Stay updated for continuous improvement.
Maximizing Your Sewing Machine’s Potential
To maximize your Husqvarna sewing machine’s potential, explore its advanced features like embroidery and quilting. Regular maintenance such as cleaning and lubrication ensures optimal performance. Utilize specialized feet and attachments for diverse fabrics and projects. Customizing settings for specific materials enhances results. Stay updated with the latest firmware and software to access new functionalities. Engage with online communities and forums for tips and troubleshooting. By mastering these techniques, you can unlock your machine’s full capabilities and achieve professional-quality stitching every time.
Staying Updated with the Latest Features
Regularly updating your Husqvarna sewing machine’s firmware and software ensures access to the latest features and improvements. Visit the official Husqvarna Viking website or support portal to download updates. These updates often include new stitch patterns, enhanced embroidery capabilities, and improved functionality. By keeping your machine up-to-date, you can explore advanced techniques and maintain optimal performance. Additionally, updated software may introduce compatibility with new accessories or tools, further expanding your creative possibilities. Stay informed about the newest innovations to make the most of your sewing experience.