The S9V2 system is a direct vent furnace designed for efficient and reliable heating solutions. This manual provides essential information for proper installation, operation, and maintenance, ensuring safety and compliance with standards.
1.1 Overview of the S9V2 Model
The S9V2 model is a direct vent furnace designed for residential heating, offering high efficiency and reliable performance. It features advanced combustion technology, ensuring optimal energy use and reduced emissions. The system is designed for safe and straightforward installation, with clear guidelines provided in this manual. Key features include durable construction, user-friendly controls, and compatibility with various venting configurations. The S9V2 is ideal for homeowners seeking a cost-effective, environmentally friendly heating solution. This overview provides a foundational understanding of the system’s capabilities and design, preparing installers for the detailed steps outlined in subsequent sections.
1.2 Purpose of the Installation Manual
This manual serves as a comprehensive guide for the proper installation, operation, and maintenance of the S9V2 system. It ensures compliance with safety standards and optimal performance by detailing step-by-step procedures. The manual addresses site preparation, venting requirements, and electrical connections, providing clear instructions for installers. Additionally, it covers troubleshooting and maintenance tips to prolong system life. By following this manual, users can guarantee efficient and safe operation of the S9V2, adhering to manufacturer recommendations and industry regulations. Adherence to these guidelines is crucial for warranty validity and system reliability.
Safety Precautions
Always follow safety guidelines to prevent hazards. Ensure proper ventilation and avoid gas leaks. Adhere to installation instructions to guarantee safe and efficient system operation.
2.1 General Safety Practices
Safety is critical when installing and operating the S9V2 system. Always follow manufacturer guidelines and local regulations. Read the manual thoroughly before starting any work. Ensure proper ventilation in the workspace to prevent gas leaks or fume accumulation. Avoid open flames or sparks near the system. Use appropriate tools and wear personal protective equipment, such as gloves and safety glasses. Keep the area clear of flammable materials. Never attempt installation without proper training or knowledge. Compliance with these practices ensures a safe working environment and prevents potential hazards.
2.2 Warning Signs and Symbols
Warning signs and symbols are essential for ensuring safe installation and operation of the S9V2 system. These visual indicators alert users to potential hazards, such as electrical risks, gas leaks, or high temperatures. Common symbols include a triangle with an exclamation mark (general warning), a circle with a line through it (prohibition), and an X marking (danger zone). Always interpret these symbols correctly to avoid accidents. Refer to international safety standards for detailed explanations of each symbol. Familiarizing yourself with these signs ensures compliance with safety protocols and prevents mishaps during installation or maintenance.
2.3 Personal Protective Equipment
The installation of the S9V2 system requires the use of personal protective equipment (PPE) to ensure safety. Essential items include safety glasses to protect eyes from debris, gloves to prevent cuts and electrical shocks, and a dust mask for respiratory protection. Steel-toe boots and a hard hat are also recommended to safeguard against falling objects. Proper PPE minimizes risks during handling and electrical work. Always use high-quality equipment that meets safety standards. Substandard PPE can compromise safety and should not be used under any circumstances.

Technical Specifications
The S9V2 is a direct vent furnace designed for high-efficiency heating. It features advanced combustion technology, compatibility with various venting systems, and operates under standard electrical requirements, ensuring reliable performance.
3.1 Key Features of the S9V2
The S9V2 furnace is a high-efficiency, direct vent system designed for reliable performance. It features advanced combustion technology, a modulating burner for consistent heat, and a robust venting system. The unit includes multiple sensors for safety and efficiency, ensuring optimal operation. With a compact design, it suits various installation requirements. The S9V2 also offers compatibility with modern thermostats, including smart home systems, for enhanced control. Its durable construction and low emissions make it a reliable choice for residential heating needs, providing long-term energy savings and comfort.
3;2 Compatibility and Requirements
The S9V2 system is compatible with a wide range of heating systems and components. It requires a direct venting system, compatible with PVC or ABS materials, and must be installed in accordance with local building codes. The furnace operates on natural gas and must be connected to a properly sized gas line. Electrical requirements include a 120V AC power supply and a dedicated circuit. It is designed to work with standard thermostats, including smart home devices, ensuring seamless integration. Compliance with safety standards, such as those set by CSA or UL, is essential for installation and operation. Environmental regulations, including emissions standards, must also be adhered to ensure eco-friendly performance.
3.3 Operating Conditions
The S9V2 system is designed to operate efficiently under specific conditions. It requires a temperature range of -40°F to 120°F for optimal performance. The unit must be installed in a location with proper ventilation to prevent gas buildup. Humidity levels should not exceed 80% to avoid condensation issues. The furnace operates at a maximum altitude of 8,000 feet above sea level. It is essential to maintain these conditions to ensure reliable operation, energy efficiency, and longevity of the system. Compliance with these parameters guarantees safe and effective heating performance throughout its service life. Always refer to the manual for detailed specifications.
Pre-Installation Requirements
Ensure proper site preparation, gather necessary tools and materials, and verify venting system compatibility. Confirm the installation location meets clearance and local regulatory requirements before proceeding.
4.1 Site Preparation
Proper site preparation is crucial for a safe and efficient installation. Ensure the area is clean, level, and free from obstructions. Check for any existing utilities or structural elements that may interfere with the installation. Verify that the site meets all local building codes and regulations. Ensure proper drainage and ventilation routes are identified. Adhere to safety practices, such as maintaining clearances from flammable materials and ensuring proper grounding paths; Refer to the manufacturer’s instructions for specific venting system requirements and equivalent lengths. Inspect the site for any potential hazards before proceeding with the installation.
4.2 Tools and Materials Needed
To ensure a smooth installation, gather the necessary tools and materials. General tools include wrenches, screwdrivers, pliers, and a measuring tape. Specific materials required are venting components, electrical connectors, mounting hardware, and sealing compounds. Ensure all components are compatible with the S9V2 system. Refer to the manufacturer’s specifications for exact requirements. Safety gear, such as gloves and safety goggles, should also be on hand. Proper preparation of tools and materials will streamline the installation process and minimize delays. Always verify compatibility and quality of materials before proceeding.
4.3 Venting System Requirements
The S9V2 system requires a properly designed and installed venting system to ensure safe and efficient operation. Use venting materials and components approved for direct vent furnaces, adhering to local building codes and manufacturer guidelines. The venting diameter and equivalent length must be calculated based on the system’s specifications. Ensure all connections are secure to prevent leaks and maintain proper airflow. Refer to the manufacturer’s venting requirements for detailed instructions. Proper venting installation is critical to avoid performance issues and potential safety hazards. Always follow the recommended venting configuration to meet system performance and safety standards.
4.4 Location and Clearances
Proper location and clearances are essential for safe and efficient operation of the S9V2 system. Ensure the unit is installed in a well-ventilated area, away from flammable materials and heat sources. Maintain minimum clearances of 12 inches from combustible materials and 3 feet from windows or doors. For garage installations, follow specific garage installation guidelines to prevent accidental damage. Ensure the unit is level and securely fastened to the floor. Proper drainage must be provided if installed in an area prone to water exposure. Maintain adequate clearance around the unit for maintenance access and airflow efficiency. Always comply with local building codes and manufacturer recommendations for installation location and clearances.
Installation Process
The S9V2 installation involves mounting the unit, connecting electrical components, installing the venting system, grounding, and final adjustments. Follow manual guidelines for safety and functionality.
5.1 Mounting the S9V2 Unit
Mounting the S9V2 unit requires careful planning to ensure proper installation. Choose a location with adequate clearances, as specified in the manual, to comply with safety standards. Ensure the area is level and free from obstructions. Use the provided mounting hardware or suitable alternatives to secure the unit firmly to the wall or floor. Align the unit correctly to facilitate venting system connections. Refer to the installation diagram for precise measurements and positioning. Double-check all fasteners for tightness to prevent vibration or movement during operation. Proper mounting is crucial for optimal performance and safety. Always follow manufacturer guidelines.
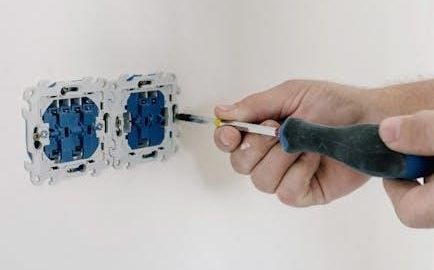
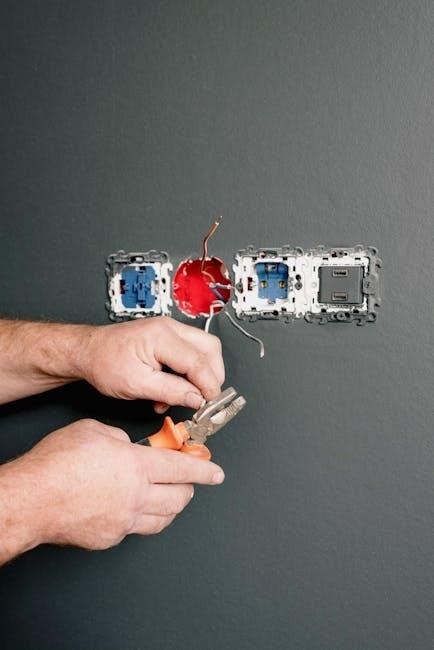
5.2 Connecting Electrical Components
Connecting the electrical components of the S9V2 system requires adherence to the provided wiring diagram and safety guidelines. Begin by ensuring all power sources are disconnected. Connect the ground wire to a suitable grounding point, such as the vehicle’s chassis, to ensure proper electrical safety. Follow the manufacturer’s instructions for wiring the control module, sensors, and alarms. Verify polarity to avoid damage to components. Secure all connections tightly to prevent loose wires. Double-check the wiring diagram for accuracy and consult the manual if uncertainties arise. Proper electrical connections are critical for reliable system operation and functionality. Always test connections before powering up the system.
5.3 Installing the Venting System
Installing the venting system for the S9V2 requires careful adherence to the manufacturer’s guidelines to ensure proper functionality and safety. Begin by selecting the appropriate venting components, such as BAYAIR30AVENTA or BAYVENT200B, as specified in the installation manual. Ensure the venting diameters and equivalent lengths meet the recommended standards to maintain system efficiency. Properly seal all connections to prevent gas leaks and route the venting system away from obstructions. Follow the venting system’s installation instructions to comply with safety regulations and verify the system’s integrity before finalizing the setup. Correct installation is crucial for optimal performance and safety.
5.4 Grounding the Unit
Grounding the S9V2 unit is essential for safety and proper electrical operation. Connect the ground wire to a suitable grounding point on the system or vehicle chassis, ensuring a secure and corrosion-free connection. Avoid grounding to painted or rusty surfaces, as this can compromise the integrity of the ground. Use the recommended grounding wire size and tighten all connections firmly. Refer to the wiring diagram for specific grounding points. Proper grounding prevents electrical hazards and ensures reliable system performance. Always verify the ground connection before powering up the unit to guarantee safety and functionality.
5.5 Final Connections and Adjustments
After completing the installation, verify all connections for tightness and correctness. Ensure the venting system is properly secured and aligned with the unit. Check that all sensors and alarms are correctly connected and functioning. Adjust any settings as required by the manufacturer’s specifications. Double-check the electrical connections for polarity and proper wiring. Ensure the unit is level and securely fastened to prevent vibration. Once all connections and adjustments are confirmed, proceed to the start-up and testing phase. This step ensures the S9V2 system operates safely and efficiently, meeting all design and safety standards.

Start-Up and Testing
Power up the system and ensure all components are functioning correctly. Test sensors, alarms, and verify proper operation. Check for any error codes or malfunctions. Ensure safe and efficient performance.
6.1 Initial Power-Up
Before initiating the power-up, ensure all electrical connections are secure and the venting system is properly installed. Switch on the power supply and observe the control panel for any error codes. If no errors are displayed, proceed to test basic functionalities such as ignition and airflow. Verify that sensors and alarms respond correctly to system operations. Refer to the troubleshooting section if any issues arise during this phase. Proper initialization ensures safe and efficient system operation. Always follow the sequence outlined in the manual to avoid malfunctions.
6.2 Testing Sensors and Alarms
After initial power-up, test all sensors and alarms to ensure proper functionality. Simulate operating conditions, such as blocking airflow or adjusting temperature thresholds, to activate sensors. Verify that alarms sound and error codes display correctly. Check the control panel for notifications and ensure responses align with system specifications. Refer to the troubleshooting guide if any discrepancies occur. Proper sensor and alarm operation is critical for safety and efficient system performance. Always follow the testing sequence outlined in the manual to confirm reliable functionality before full operation. This step ensures all safety features are active and responsive.
6.3 Verifying Proper Functionality
After completing the installation and testing sensors and alarms, verify the system’s overall functionality. Ensure the furnace operates through a full heating cycle, checking for consistent airflow, heat output, and venting performance. Monitor the control panel for stable operation and confirm that all indicators function as expected. Verify that safety features, such as automatic shutdown, activate correctly under fault conditions. Review error codes and clear them if necessary. Ensure all connections and components are secure and functioning properly. This step confirms the system is ready for safe and efficient long-term operation. Always refer to the troubleshooting guide if any issues arise.

Maintenance and Upkeep
Regular maintenance ensures optimal performance and longevity. Schedule routine checks, clean filters, inspect vents, and replace wearable parts as needed. Refer to the manual for detailed procedures.
7.1 Routine Checks and Inspections
Regular inspections are crucial for maintaining the S9V2 system’s efficiency and safety. Ensure the venting system is free from obstructions and damage. Check filters monthly and replace them as needed to maintain airflow. Inspect electrical connections for tightness and signs of wear. Verify that all sensors are functioning correctly and clean them if necessary. Examine wearable parts like belts and hinges for deterioration. Schedule professional servicing annually to address hidden issues. Keep detailed records of inspections and maintenance for future reference and warranty purposes. Always follow the manufacturer’s guidelines for routine checks to ensure optimal performance and longevity of the system.
7.2 Cleaning and Servicing
Regular cleaning and servicing are essential to maintain the S9V2 system’s performance and longevity. Clean or replace filters monthly to ensure proper airflow and efficiency. Inspect and clean the venting system annually to remove debris and prevent blockages. Check electrical connections for corrosion and tighten them if necessary. Lubricate moving parts like fans and motors according to the manufacturer’s recommendations. Clean the exterior and interior surfaces to prevent dust buildup. For complex tasks, such as cleaning the heat exchanger or burner, consult a qualified technician. Always refer to the manual for specific servicing intervals and procedures to ensure safety and optimal functionality.
7.3 Replacing Wearable Parts
Wearable parts, such as belts, pulleys, and seals, should be inspected regularly and replaced as needed to maintain optimal performance. Always refer to the manual for specific replacement procedures. Use genuine or certified replacement parts to ensure compatibility and longevity. Replace filters every 1-3 months, depending on usage, to maintain airflow and efficiency. Lubricate moving parts annually to reduce friction and wear. If a part shows signs of excessive wear or damage, replace it promptly to prevent system failure. Keep a record of replacements to track maintenance history and plan future servicing effectively.

Troubleshooting Common Issues
Identify error codes, check venting systems for blockages, and inspect electrical connections for malfunctions. Reset the system or consult the manual for detailed solutions to resolve issues effectively. If problems persist, contact a certified technician for professional assistance.
8.1 Identifying Error Codes
Error codes on the S9V2 system indicate specific issues, such as E01 for sensor malfunctions or E02 for communication failures. Refer to the manual for code meanings and troubleshooting steps. Resetting the system may resolve minor issues. If errors persist, check connections or sensors. For complex problems, consult the troubleshooting guide or contact a certified technician. Always follow safety precautions when diagnosing issues to avoid further damage or safety risks. Ensure all repairs align with manufacturer guidelines to maintain warranty validity and system performance. Persistent issues may require professional assistance to prevent system downtime or potential hazards.
8.2 Resolving Venting System Problems
Venting issues in the S9V2 system often arise from blockages or improper installation. Check for obstructions in vents and ensure all connections are secure. Refer to the manual for venting requirements. If venting system malfunctions persist, inspect the vent diameter and equivalent lengths, ensuring compliance with manufacturer specifications. Clean or replace damaged components and verify proper sealing to prevent leaks. If problems persist, consult the troubleshooting guide or contact a professional technician to restore system efficiency and safety. Always follow safety guidelines to avoid potential hazards. Proper venting is crucial for optimal performance and system longevity.
8.3 Addressing Electrical Malfunctions
Electrical issues with the S9V2 system can often be resolved by checking connections and ensuring proper wiring. If the system fails to power on, verify that the circuit breaker or fuse is intact. Inspect all electrical connections for looseness or damage. Consult the wiring diagram in the manual to ensure correct installation. If malfunction persists, check for short circuits or faulty components. Always disconnect power before performing repairs. Use appropriate tools and follow safety guidelines to avoid risks. If unresolved, refer to the troubleshooting guide or contact a certified technician for professional assistance. Proper electrical setup is vital for system reliability.
8.4 Resetting the System
To reset the S9V2 system, first ensure the unit is powered off. Locate the reset button, typically found on the control panel or near the electrical compartment. Press and hold the button for 10-15 seconds to clear any stored errors. Release the button and wait for the system to reboot. Once restarted, check if the issue is resolved. If the system does not reset properly, verify that all connections are secure. If problems persist, consult the troubleshooting guide or contact a certified technician. Regular resets can help restore system functionality, but persistent issues may indicate deeper malfunctions. Always follow safety guidelines during this process. Resetting should only be done when necessary and as a last resort before professional intervention. Proper resetting ensures optimal system performance and reliability.
This concludes the S9V2 installation manual. Thank you for following the guide. For further assistance, refer to the troubleshooting section or contact support.
9.1 Summary of Key Steps
The S9V2 installation process involves several critical steps to ensure safe and proper setup. Begin with site preparation, ensuring the location meets clearance and venting requirements. Mount the unit securely, following the provided diagrams. Connect electrical components carefully, adhering to wiring instructions. Install the venting system as specified, ensuring proper connections; Ground the unit to prevent electrical hazards. Complete all final connections and adjustments, then proceed to initial power-up. Test sensors, alarms, and functionality to verify everything operates correctly. Regular maintenance and inspections are essential for long-term efficiency and safety.
9.2 Where to Find Further Assistance
For additional guidance, refer to the official StarLine S9V2 user manual or installation guide, available on the manufacturer’s website. Technical support is accessible via phone or email for specialized inquiries. Authorized service centers offer professional assistance for complex issues. Online forums and communities may provide peer-to-peer advice and troubleshooting tips. Ensure all queries are directed to certified professionals to maintain system integrity and safety. Supplementary resources, such as wiring diagrams and troubleshooting guides, are included in the manual for comprehensive support.