
Welcome to the Sharp Clock Manual, your comprehensive guide to understanding and operating your timepiece. This manual covers essential features, setup instructions, and troubleshooting tips for optimal functionality.
Overview of Sharp Clock Features
Sharp clocks are renowned for their precision and versatility. They offer atomic synchronization, ensuring accurate timekeeping. Models like the SPC900 feature dual alarms, snooze functions, and temperature displays. The clocks support both indoor and outdoor temperature monitoring. Many models include calendar displays and large LED screens for easy readability. Some variants are radio-controlled, automatically adjusting to time signals. They often come with user-friendly controls for setting time, date, and alarms. Advanced features like atomic clock synchronization ensure reliability. These clocks are designed for both wall mounting and tabletop use, catering to various preferences. Their sleek designs and robust functionality make them ideal for home and office environments.
Importance of Reading the Manual
Importance of Reading the Manual
Reading the Sharp clock manual is essential for understanding its advanced features and ensuring proper operation. The manual provides detailed instructions for setting up and configuring your clock, including time, date, and alarm functions. It also explains how to troubleshoot common issues, such as signal reception problems or display malfunctions. By following the manual, you can optimize your clock’s performance and avoid potential errors. Additionally, the manual highlights safety precautions and maintenance tips to extend the lifespan of your device. Familiarizing yourself with the manual ensures you make the most of your Sharp clock’s capabilities while avoiding unnecessary complications.
Benefits of Sharp Clocks
Benefits of Sharp Clocks
Sharp clocks offer precision, reliability, and a range of innovative features. With atomic synchronization, they provide accurate timekeeping, automatically adjusting for daylight saving time. Many models include temperature displays, dual alarms, and snooze functions, enhancing convenience. Their clear, easy-to-read displays ensure visibility, while low-maintenance designs extend durability. User-friendly controls and comprehensive manuals make setup and operation straightforward. Advanced models also offer wireless connectivity and compatibility with outdoor sensors, adding versatility. By combining style, functionality, and cutting-edge technology, Sharp clocks are ideal for both home and office use, ensuring optimal performance and satisfaction for years to come. They truly represent a blend of modern innovation and practicality.
Understanding Your Sharp Clock
Understanding your Sharp clock involves familiarizing yourself with its key components, display, and button functions. This ensures optimal use and troubleshooting of its features effectively.
Key Components and Controls
Your Sharp clock features essential components designed for ease of use. The TIME button allows you to set the time, while the HOUR and MINUTE buttons adjust the time values. The ENTER/CHANNEL button confirms settings and switches between signal channels. Additional controls include the ALARM 1 and ALARM 2 buttons for setting dual alarms. The SNOOZE button provides a temporary delay for alarms. Understanding these controls ensures seamless operation of your clock. Always refer to the manual for specific instructions on button functions and features like temperature unit switching or synchronization modes. Proper use of these components enhances your overall experience with the Sharp clock.
Display Overview
Display Overview
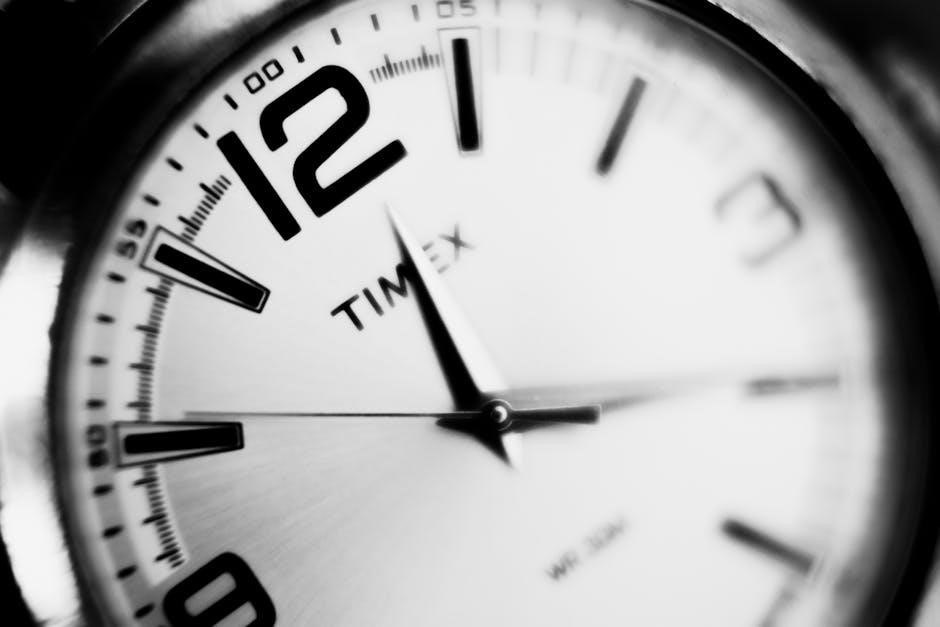
The Sharp clock features a clear and easy-to-read display designed for optimal visibility. The screen shows the current time, date, and temperature, with a large, bold format for easy viewing. Some models include a jumbo display for enhanced readability. The display also indicates AM/PM settings and alarm status. Depending on your model, you can switch between 12-hour and 24-hour time formats. The temperature display can be set to Celsius or Fahrenheit, providing convenience for different preferences. The LED or LCD screen ensures bright, crisp visuals, even in low-light conditions. Understanding your display’s features enhances your ability to navigate and utilize your clock’s functionalities effectively. Regular updates ensure accurate timekeeping and synchronization with radio signals for precision.
Button Functions Explained
Button Functions Explained
Understanding the button functions on your Sharp clock is essential for smooth operation. The TIME button allows you to set the time and date, while the ENTER button confirms your settings. The ALARM buttons (ALARM 1 and ALARM 2) enable you to set and manage dual alarms. The SNOOZE button temporarily disables the alarm, giving you a few extra minutes of rest. The ― and + buttons adjust values like hours, minutes, and temperature units. Some models feature a MODE button to switch between time, alarm, and temperature settings. Refer to your specific model’s manual for detailed button functions, as features may vary slightly. Proper use of these buttons ensures optimal performance and customization of your clock. Regular use will make operation intuitive and straightforward.

Setting Up Your Sharp Clock
Follow these steps to set up your Sharp clock, including time, date, and temperature units. This guide ensures a smooth and easy configuration process for optimal functionality.
Time Setting Instructions
To set the time on your Sharp clock, press and hold the TIME button until the time display flashes. Use the HOUR and MINUTE buttons to adjust the values. Press ENTER to confirm. For atomic clocks, press and hold the TIME button to sync with the radio signal automatically. Ensure the clock is placed near a window for optimal signal reception. If manual setting is preferred, follow the same steps without waiting for the signal. Refer to your model’s specific instructions for additional features like 12/24-hour format or daylight saving adjustments. Proper time setting ensures accurate functionality and seamless operation of your Sharp clock.
Date and Calendar Setup
To set the date on your Sharp clock, press the DATE button until the display flashes. Use the MONTH, DAY, and YEAR buttons to adjust the values. Press ENTER to confirm. For atomic clocks, the date will automatically update once the time is synced with the radio signal. Manual adjustments can be made by repeating the process. Ensure the clock is in a location with strong signal reception for accurate updates; The calendar feature will display the current date and update automatically. Refer to your model’s specific instructions for additional features like leap year adjustments or date format changes. Proper date setup ensures your Sharp clock remains accurate and reliable.
Temperature Unit Configuration
To configure the temperature unit on your Sharp clock, press and hold the TEMP button for 2 seconds. The display will flash, allowing you to toggle between Celsius and Fahrenheit using the / button. Once your preferred unit is selected, press ENTER to save the setting. This feature ensures accurate temperature readings tailored to your preference. Some models may automatically detect the unit based on regional settings during initial setup. Refer to your manual for model-specific instructions. Proper configuration ensures consistent and precise temperature monitoring. This feature enhances the clock’s functionality, making it a versatile addition to your home or office environment.
Troubleshooting Common Issues
Troubleshoot common issues like time signal problems, display malfunctions, and syncing difficulties. Follow diagnostic steps to resolve errors and ensure accurate timekeeping.
Syncing with Radio Signals
The Sharp clock automatically synchronizes with radio signals to ensure accurate timekeeping. If the clock fails to receive the signal, it may stop or fast-forward the hands. Place the clock away from electronic devices like TVs and computers to avoid interference. Ensure the clock is in an optimal location for signal reception. If issues persist, reset the clock by holding the time button for 5 seconds. The clock will retry syncing with the nearest signal tower. For models with dual alarms, ensure both channels are enabled for proper signal detection. Regular syncing ensures your clock remains precise and reliable over time.
Handling Time Signal Reception Problems
If your Sharp clock struggles with time signal reception, ensure it’s placed away from electronic devices like microwaves and computers. Move the clock to a central location, preferably near a window, to improve signal strength. Avoid obstructions like metal walls or furniture; Reset the clock by holding the time button for 5 seconds to reinitiate signal search. If issues persist, check for nearby radio towers or consult the manual for channel settings. Ensure the clock is set to the correct time zone. For persistent problems, contact Sharp support or refer to the troubleshooting section in the manual for further guidance.
Resolving Display Malfunctions
If your Sharp clock’s display is malfunctioning, such as flickering or showing incorrect time, start by resetting the device. Press and hold the TIME button for 5 seconds to reset the clock. Ensure the clock is placed away from direct sunlight and electronic interference. Check the battery level, as low power may cause display issues. Clean the screen gently with a soft cloth to remove dirt or smudges. If the display remains unresponsive, refer to the troubleshooting section in the manual for specific reset procedures or contact Sharp customer support for assistance. Proper care ensures optimal display performance and accuracy.
Maintenance and Care Tips
Regularly clean the display with a soft cloth, replace batteries as needed, and keep the clock away from electronic devices to maintain performance.
Cleaning the Clock
To maintain your Sharp clock’s performance and appearance, clean it regularly. Use a soft, dry cloth to wipe the display and exterior. Avoid harsh chemicals or abrasive materials. For stubborn marks, lightly dampen the cloth with water, but ensure it is not soaking wet. Gently wipe the buttons and sensors without applying excessive pressure. Regular cleaning prevents dust buildup and ensures accurate sensor function. Avoid exposing the clock to direct sunlight or moisture during cleaning. Store the cloth separately to prevent lint transfer. Cleaning once a month is recommended for optimal performance. Always unplug the clock before cleaning to avoid damage or electrical issues. This simple maintenance ensures your clock remains functional and visually appealing.
Battery Replacement Guidelines
Replace the batteries in your Sharp clock when the display dims or the clock stops functioning. Use AAA alkaline batteries for optimal performance. Open the battery compartment, usually located on the back, by sliding it downward or using a small screwdriver. Remove the old batteries and insert the new ones, ensuring the positive (+) and negative (-) terminals align correctly. Avoid mixing old and new batteries or using rechargeable types, as this may affect accuracy. After replacing, close the compartment securely. Dispose of used batteries properly to protect the environment. Regular battery replacement ensures your clock maintains precise timekeeping and functionality. Always handle batteries with care to avoid damage or leakage.
Avoiding Interference from Electronic Devices
To ensure optimal performance, keep your Sharp clock away from devices that emit electromagnetic interference, such as TVs, microwaves, and computers. Place the clock near a window for better radio signal reception. Avoid using rechargeable batteries, as they may cause signal instability. If interference occurs, move the clock to a different location or unplug nearby electronic devices temporarily. Regularly check for updates or reset the clock if issues persist. Proper placement and care will help maintain accurate timekeeping and functionality. Consulting the manual for specific model recommendations can also prevent interference-related problems. This ensures your Sharp clock operates reliably and efficiently.
Advanced Features of Sharp Clocks
Sharp clocks offer advanced features like dual alarms, snooze functions, and atomic synchronization for precise timekeeping. These features enhance functionality and user convenience, ensuring optimal performance.
Dual Alarm Setup Instructions
To set up dual alarms on your Sharp clock, press and hold the ALARM 1 or ALARM 2 button for 2 seconds to activate the alarm setting mode. The HOUR or MINUTE digits will flash on the display. Use the ― or + buttons to adjust the hour and minute values. Once set, press the ENTER button to save your settings. Repeat the process for the second alarm. Ensure both alarms are enabled by checking the alarm indicators on the display. Test the alarms to confirm they activate at the set times. This feature allows you to customize wake-up times or reminders for different events.
Using Snooze Functions
The snooze function on your Sharp clock allows you to temporarily delay the alarm. Press the SNOOZE button once to activate it, delaying the alarm by 10 minutes. The snooze indicator will flash or light up to confirm activation. To deactivate snooze, press any button or wait for the alarm to sound again. If not turned off, the alarm will reactivate after the snooze period. This feature is ideal for those needing a few extra minutes of rest without fully turning off the alarm. Ensure the snooze indicator is off to avoid unintended delays in your schedule.
Atomic Clock Synchronization
Atomic clock synchronization ensures your Sharp clock maintains precise time accuracy. This feature automatically updates the time via radio signals from atomic clocks. To activate, press and hold the SYNC button until the indicator flashes. The clock will search for the signal, which may take a few minutes. Once synchronized, the time and date will be set automatically. For optimal performance, place the clock near a window and away from electronic interference. If synchronization fails, refer to the troubleshooting section for guidance. This advanced feature guarantees your clock stays accurate without manual adjustments, providing reliable timekeeping every day.
Sharp Clock Models and Manuals
Sharp offers various clock models like SPC900, SPC971, and SPC1107, each with unique features. Refer to the correct manual for setup, troubleshooting, and optimal functionality guidance.
Popular Sharp Clock Models
Sharp offers a range of clock models designed for precision and convenience. The SPC900 is a radio-controlled atomic thermo clock, known for its accuracy and temperature display. The SPC971 features a jumbo display, ideal for clear visibility, while the SPC1107 includes dual alarms and snooze functions. These models are popular for their user-friendly interfaces and advanced features like atomic synchronization. Each model is tailored to meet specific needs, ensuring reliable timekeeping and additional functionalities such as temperature monitoring and calendar displays. Refer to the respective manuals for detailed setup and operation guidance.
Downloading the Correct Manual
To ensure you have the correct manual for your Sharp clock, visit official sources like ManualsDir.com or manualshelf.com. These platforms offer free PDF downloads for various Sharp clock models, such as the SPC900 and SPC971. Identify your clock model by checking the packaging or the device itself. Once located, select the appropriate manual and download it for easy reference. Many manuals include detailed instructions for setup, troubleshooting, and advanced features. Additionally, websites like ManualsBase provide user guides for specific models, ensuring you access accurate and relevant information tailored to your Sharp clock.
Model Identification Guide
Identifying your Sharp clock model is crucial for downloading the correct manual. Locate the model number on the packaging or the clock itself, often near the barcode or on the back. Models like SPC900, SPC971, and SPC019A are common. Check online directories such as ManualsDir.com, which list Sharp clock models alphabetically. On the clock, the model number may be printed on a label or etched into the casing. Refer to the user manual section on websites for specific instructions. Accurate model identification ensures you access the right guide, preventing confusion and ensuring proper setup and operation of your Sharp clock.
Sharp Clock Safety and Precautions
Ensure safe usage by following guidelines. Avoid placing clocks near electrical devices like TVs or microwaves to prevent interference. Store manuals securely for future reference.
General Safety Guidelines
To ensure safe and proper use of your Sharp Clock, follow these guidelines:
– Place the clock away from direct sunlight and moisture to avoid damage.
– Avoid exposing the clock to extreme temperatures or physical shocks.
– Keep the clock out of reach of children to prevent accidental damage or tampering.
– Do not submerge the clock in water or expose it to corrosive substances.
– Avoid placing the clock near electrical appliances like TVs, microwaves, or computers to minimize interference.
– Use only the recommended batteries or power sources to prevent overheating or malfunction.
– Regularly clean the clock with a soft, dry cloth to maintain its functionality and appearance.
– Store the clock in a dry, cool place when not in use.
– Refer to the manual for specific safety precautions related to your clock model.
By adhering to these guidelines, you can ensure the longevity and optimal performance of your Sharp Clock.
Storage and Handling Tips
Proper storage and handling are crucial to maintain your Sharp Clock’s performance and longevity.
– Store the clock in a cool, dry place, away from direct sunlight and humidity.
– Avoid exposing the clock to extreme temperatures or physical shocks.
– When storing, use the original packaging or a protective case to prevent scratches and damage.
– Do not stack heavy objects on top of the clock.
– Handle the clock with care, especially the display and buttons, to avoid damage.
– Clean the clock with a soft, dry cloth before storing it for an extended period.
– Ensure all batteries are removed if storing for a long time to prevent leakage.
By following these tips, you can ensure your Sharp Clock remains in excellent condition when not in use.
Electrical Safety Precautions
To ensure safe operation of your Sharp Clock, follow these electrical safety guidelines.
– Avoid exposing the clock to water or moisture, as this may cause electrical malfunction or damage.
– Use only the recommended power sources, such as the provided adapter or specified batteries, to prevent overheating or electrical hazards.
– Keep the clock out of reach of children to avoid accidental tampering or electrical shock.
– Do not attempt to repair the clock yourself, as this may result in electrical hazards or void the warranty.
– If the clock is damaged or malfunctions, disconnect it from the power source immediately.
– Store batteries in a cool, dry place and avoid mixing old and new batteries.
– Handle electrical components with care to prevent short circuits or damage.
By adhering to these precautions, you can ensure safe and reliable operation of your Sharp Clock.

Warranty and Support Information
Your Sharp Clock is backed by a limited warranty. For support, contact our customer service team or visit our official website for online resources and assistance.
Understanding Your Warranty
Your Sharp Clock is protected by a limited warranty that covers manufacturing defects for a specified period. The warranty typically lasts for one year from the purchase date and includes repairs or replacements at no additional cost. To maintain warranty validity, ensure your clock is used as per the manual’s guidelines. Damage from misuse, tampering, or external factors may void the warranty. For detailed terms and conditions, refer to the warranty section in your manual or visit Sharp’s official website. Understanding your warranty ensures you can address any issues promptly and enjoy your product with confidence.
Contacting Sharp Customer Support
For assistance with your Sharp Clock, visit the official Sharp website to access support resources. You can contact customer support via phone, email, or live chat for troubleshooting, repairs, or general inquiries. Ensure you have your product model number and purchase details ready for efficient service. Additionally, Sharp’s website offers downloadable manuals, FAQs, and warranty information to help resolve common issues independently. For in-person support, locate authorized service centers near you. Sharp’s dedicated team is committed to providing timely and effective solutions to ensure your clock operates at its best. Reach out to their support team for any concerns or questions you may have.
Accessing Online Resources
Sharp offers extensive online resources to support your clock’s operation. Visit the official Sharp website to download PDF manuals, access FAQs, and explore troubleshooting guides. You can also find warranty information, user guides, and instructional videos tailored to your specific model. Additionally, Sharp provides online forums and support articles to address common questions and issues. For detailed instructions, refer to the “Downloads” or “Support” section on their website. These resources ensure you can easily navigate any aspect of your clock’s functionality, from setup to advanced features, enhancing your overall user experience with reliable and up-to-date information.
Thank you for exploring the Sharp Clock Manual. This guide has provided a comprehensive overview to help you master your clock’s features and functionality effectively.
Final Tips for Optimal Use
For the best experience with your Sharp Clock, ensure regular synchronization with radio signals to maintain accuracy. Organize alarms for different tasks to streamline your routine. Keep the display clean for clear visibility and avoid placing the clock near electronic devices to prevent interference. Refer to the manual for advanced features like dual alarms and snooze functions. Regularly check and replace batteries as needed to ensure uninterrupted performance. By following these tips, you can maximize the functionality and longevity of your Sharp Clock, making it a reliable companion for years to come.
Encouragement for Further Exploration
Your Sharp Clock is designed to enhance your daily life with its innovative features. Explore advanced functionalities such as dual alarms and atomic synchronization to streamline your routine. These features not only improve efficiency but also provide a seamless timekeeping experience. For those eager to delve deeper, additional resources and detailed guides are available online, offering insights into maximizing your clock’s capabilities. Embrace the opportunity to discover more about your Sharp Clock and unlock its full potential to make the most of your timekeeping experience.