Monthly Archives: March 2026

wood screw size guide

Wood Screw Size Guide: A Comprehensive Overview (Updated 03/26/2026)

Navigating wood screw sizes can be complex, as they are designated by numbers like #6 or #8, and also by fractional or decimal measurements.
This guide provides a detailed overview,
covering major thread diameters and corresponding fractional equivalents,
essential for selecting the correct screw for any woodworking project.

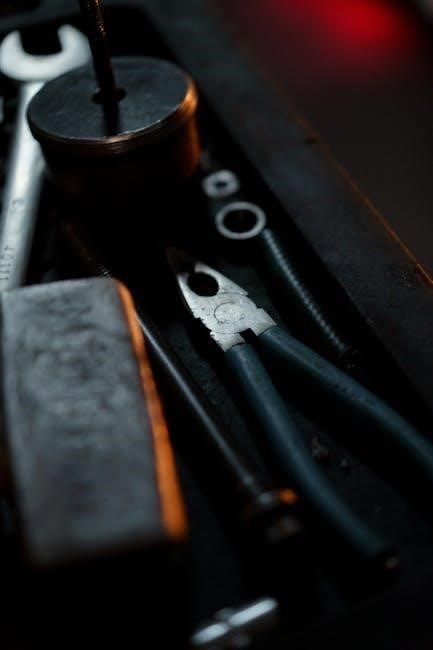
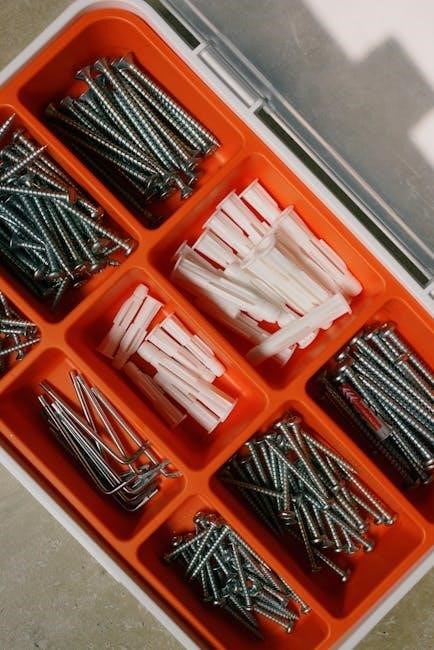
Understanding wood screw sizing is fundamental for successful woodworking and construction projects. Unlike bolts, which rely on a nut for fastening, wood screws create their own threads directly within the wood, demanding precise size selection for optimal holding power and preventing damage to the material. Wood screws aren’t measured by length alone; their size designation incorporates both diameter and thread count.

The numbering system, ranging from #0 to #20, indicates the diameter of the screw. Higher numbers correspond to larger diameters. Alongside this numbering system, wood screws are also defined using fractional or decimal measurements representing the major thread diameter – the largest diameter of the screw’s threads. For instance, a #8 wood screw has a major thread diameter of approximately 0.164 inches, or 5/32 of an inch.

Choosing the correct size involves considering the wood’s density, the joint’s stress, and the desired aesthetic. A screw that’s too small may strip easily, while one that’s too large can split the wood. This guide will delve into the specifics of each size, providing a comprehensive resource for selecting the ideal wood screw for your needs, ensuring strong, durable, and visually appealing results.

Understanding Wood Screw Diameters

Wood screw diameters are crucial for determining a screw’s strength and suitability for a specific application. The diameter isn’t simply the overall width of the screw; it refers to the “major thread diameter,” measured across the outside of the threads themselves. This measurement dictates how much wood the screw displaces as it’s driven in, influencing holding power and the risk of splitting.

Diameters are expressed in both numbering systems (#0, #1, #2, etc.) and fractional/decimal inches. The #0 screw, the smallest commonly available, has a major diameter of just 0.060 inches (1/16″). As the number increases, so does the diameter, culminating in the #20 screw at 0.320 inches (5/16″). Understanding the relationship between these systems is key.

A seemingly small difference in diameter can significantly impact performance. For example, both #4 and #5 screws share a similar fractional equivalent (7/64” and 1/8” respectively), but the #5 offers slightly more material for a stronger hold. Choosing the appropriate diameter ensures a secure and lasting connection, preventing premature failure and maintaining the integrity of your woodworking projects. Always consider the wood type and the load the screw will bear.

Wood Screw Size Chart: Major Thread Diameters

Below is a comprehensive chart detailing the major thread diameters of common wood screw sizes, presented in both decimal inch and nearest fractional measurements. This chart serves as a quick reference for identifying the appropriate screw for your project, ensuring a precise fit and optimal performance. Accurate diameter selection is paramount for achieving strong, reliable wood connections.

Here’s a snapshot of key sizes:

  • #0: 0.060″ (1/16″)
  • #1: 0.073″ (5/64″)
  • #2: 0.086″ (3/32″)
  • #3: 0.099″ (7/64″)
  • #4: 0.112″ (7/64″)
  • #5: 0.125″ (1/8″)
  • #6: 0.138″ (9/64″)
  • #7: 0.151″ (5/32″)
  • #8: 0.164″ (5/32″)
  • #9: 0.177″ (11/64″)
  • #10: 0.190″ (3/16″)
  • #11: 0.203″ (13/64″)
  • #12: 0.216″ (7/32″)
  • #14: 0.242″ (1/4″)
  • #16: 0.268″ (17/64″)
  • #18: 0.294″ (19/64″)
  • #20: 0.320″ (5/16″)

Remember that the major thread diameter is measured on the outside of the threads. Refer to this chart frequently during your woodworking endeavors.

#0 Wood Screw Specifications

The #0 wood screw represents the smallest commonly available size in the wood screw family. Characterized by a minor thread diameter, it’s primarily utilized in delicate woodworking applications where minimal material displacement is crucial. This screw features a major thread diameter of precisely 0.060 inches, which is equivalent to 1/16 of an inch – a remarkably small measurement demanding precision during installation.

Due to its diminutive size, the #0 screw is often employed in projects involving thin wood veneers, model building, or intricate repairs where a larger screw would risk splitting the material. It’s important to note that the holding power of a #0 screw is significantly less than larger counterparts, making it unsuitable for load-bearing applications. Pilot holes are strongly recommended to prevent wood fracturing and ensure smooth screw insertion.

Selecting the correct driver bit is also vital; a specialized small screwdriver or bit is necessary to avoid stripping the screw head. While less frequently used than larger sizes, the #0 wood screw remains a valuable asset for specialized woodworking tasks requiring finesse and minimal intrusion.

#1 Wood Screw Specifications

Moving up in size from the #0, the #1 wood screw offers a slight increase in strength and holding power, while still remaining suitable for delicate applications. Its major thread diameter measures 0.073 inches, closely approximating 5/64 of an inch. This incremental increase makes it a preferred choice when a bit more grip is needed than the #0 screw can provide, without significantly increasing the risk of material splitting.

The #1 screw finds its niche in projects like attaching small hardware, assembling lightweight crafts, or securing thin trim pieces. It’s commonly used in situations where aesthetics are paramount, as its smaller head minimizes visual impact. As with all wood screws, pre-drilling a pilot hole is highly recommended, particularly when working with hardwoods or brittle materials. This prevents wood from cracking and facilitates easier screw insertion.

Selecting the appropriate driver bit is crucial for preventing damage to the screw head. A correctly sized screwdriver or bit will ensure a secure fit and efficient torque transfer. While not as robust as larger screws, the #1 wood screw provides a reliable fastening solution for a variety of light-duty woodworking tasks.

#2 Wood Screw Specifications

The #2 wood screw represents another step up in fastening capability, boasting a major thread diameter of 0.086 inches, which is nearly equivalent to 3/32 of an inch. This size strikes a balance between providing sufficient holding power and minimizing the potential for wood splitting, making it a versatile option for numerous woodworking projects. It’s a popular choice for applications requiring moderate strength and reliability.

Common uses for the #2 screw include assembling drawer boxes, attaching cabinet backs, and securing furniture components. Its slightly larger diameter offers improved resistance to pull-out compared to smaller sizes, enhancing the longevity of the joint. As always, pre-drilling a pilot hole is advisable, especially when working with dense hardwoods. This ensures smooth screw insertion and prevents wood damage.

When driving a #2 wood screw, selecting the correct driver bit is essential. Using the wrong size can lead to stripped screw heads and difficulty completing the task. This screw size is a staple in many workshops, offering a dependable fastening solution for a wide range of everyday woodworking needs.

#3 Wood Screw Specifications

Moving up the scale, the #3 wood screw offers increased strength and holding power, featuring a major thread diameter of 0.099 inches, closely approximating 7/64 of an inch. This size is particularly well-suited for projects demanding a more robust fastening solution than smaller screws can provide, while still remaining manageable for most wood types. It’s a good choice when a bit more grip is needed without being overly aggressive.

Typical applications for the #3 screw include securing larger cabinet components, assembling heavier furniture pieces, and joining thicker wood sections. Its enhanced diameter provides greater resistance to stripping and pull-out, ensuring a durable and long-lasting connection. Pre-drilling pilot holes remains crucial, especially with hardwoods, to facilitate smooth insertion and prevent splitting.

Selecting the appropriate driver bit for a #3 wood screw is vital for efficient and damage-free installation. Using the correct bit ensures a secure fit and maximizes torque transfer. This screw size represents a reliable option for projects where a balance of strength and ease of use is desired, making it a valuable addition to any woodworker’s toolkit.

#4 Wood Screw Specifications

The #4 wood screw represents a further step up in fastening capability, boasting a major thread diameter of 0.112 inches, which is equivalent to 7/64 of an inch. This size strikes a balance between providing substantial holding power and remaining relatively easy to install, making it a versatile choice for a wide range of woodworking applications. It’s often favored when a secure connection is needed without the bulk of larger screws.

Common uses for the #4 screw include assembling drawer boxes, attaching hardware to cabinets, and securing trim pieces; Its increased diameter offers improved resistance to stripping compared to smaller sizes, while still allowing for comfortable driving with standard tools. As with all wood screws, pre-drilling pilot holes is recommended, particularly when working with dense or brittle wood species.

Proper driver bit selection is essential for optimal performance with #4 wood screws. Utilizing the correct bit size ensures a snug fit, minimizing slippage and maximizing torque transfer. This screw size is a dependable option for projects demanding a reliable and durable fastening solution, offering a sweet spot between strength and usability.

#5 Wood Screw Specifications

Moving up the scale, the #5 wood screw offers increased strength and holding power, featuring a major thread diameter of 0.125 inches, precisely 1/8 of an inch. This size is a popular choice for projects requiring a more robust fastening solution than smaller screws can provide, yet it remains manageable for most DIY enthusiasts and woodworking professionals. It’s a frequently selected option for general construction and repair tasks.

Typical applications for #5 screws include assembling furniture frames, attaching plywood to supports, and securing larger trim pieces. The larger diameter enhances resistance to pull-out and shear forces, ensuring a more durable and long-lasting connection. As always, pre-drilling pilot holes is crucial, especially when working with hardwoods or near the edges of wood to prevent splitting.

Selecting the appropriate driver bit is vital for efficient installation. A properly sized bit will minimize cam-out and maximize torque transfer, resulting in a clean and secure screw placement. The #5 wood screw represents a reliable and versatile option for a broad spectrum of woodworking projects, balancing strength, ease of use, and affordability.

#6 Wood Screw Specifications

The #6 wood screw represents a further step up in strength and holding capacity, boasting a major thread diameter of 0.138 inches, or approximately 9/64 of an inch. This size is frequently employed in projects demanding a secure and lasting connection, bridging the gap between lighter-duty applications and those requiring substantial fastening power. It’s a versatile choice for both indoor and outdoor woodworking endeavors.

Common uses for #6 screws encompass assembling cabinets, attaching hardware like hinges and handles, and securing thicker materials such as decking boards or siding. The increased diameter provides enhanced resistance to stripping and pull-out, making it suitable for applications subject to stress or vibration. Remember that pre-drilling pilot holes remains essential, particularly with denser wood types, to prevent cracking and ensure smooth screw insertion.

When installing #6 screws, selecting the correct driver bit is paramount. A properly matched bit will minimize slippage and maximize torque, leading to a clean and efficient installation. The #6 wood screw offers a dependable and cost-effective solution for a wide range of woodworking projects, delivering a balance of strength, durability, and ease of use.

#7 Wood Screw Specifications

Moving up the scale, the #7 wood screw offers increased strength and holding power, featuring a major thread diameter of 0;151 inches, which is equivalent to 5/32 of an inch. This size is a popular choice for projects requiring a more robust fastening solution than smaller screws can provide, yet isn’t as substantial as larger options. It strikes a good balance for many common woodworking tasks.

Typical applications for #7 screws include assembling furniture, attaching trim and molding, and securing components in cabinetry. They are well-suited for use with medium-density hardwoods and softwoods, offering reliable performance in both indoor and outdoor settings. As with all wood screws, pre-drilling pilot holes is highly recommended, especially when working with harder materials, to prevent splitting and ensure easy installation.

Selecting the appropriate driver bit is crucial for successful installation. Using the correct bit minimizes the risk of stripping the screw head and maximizes torque transfer. The #7 wood screw provides a dependable and versatile fastening solution, offering a solid connection for a variety of woodworking projects where a bit more strength is needed.

#8 Wood Screw Specifications

The #8 wood screw is arguably one of the most commonly used sizes in woodworking, boasting a major thread diameter of 0.164 inches, or 5/32 of an inch. Its widespread popularity stems from its versatility and ability to provide a secure hold in a wide range of materials and applications. This size offers a good balance between strength and ease of installation, making it ideal for both novice and experienced woodworkers.

You’ll find #8 screws frequently employed in furniture assembly, cabinet construction, and general repair work. They perform admirably in both hardwoods and softwoods, and are suitable for both indoor and outdoor projects, though exterior applications may benefit from corrosion-resistant coatings. Pre-drilling pilot holes remains a best practice, particularly with denser woods, to prevent splitting and facilitate smooth driving.

Proper driver bit selection is essential for preventing damage to the screw head. The #8 screw’s prevalence means it’s readily available in various lengths and head styles, offering flexibility to suit diverse project needs. It’s a reliable and adaptable fastener, making it a staple in any well-equipped workshop.

#9 Wood Screw Specifications

The #9 wood screw presents a slightly larger diameter than its #8 counterpart, measuring 0.177 inches, which is equivalent to 11/64 of an inch. This incremental increase in size provides enhanced holding power, making it a suitable choice for projects demanding greater strength and stability. It’s often selected when working with thicker materials or applications subject to higher stress.

Applications for #9 screws include heavier-duty furniture construction, robust shelving systems, and projects involving larger timber components. While still versatile, it’s less frequently used than #8 screws due to the increased risk of splitting wood if pilot holes aren’t properly drilled. Careful consideration of the wood type and screw length is crucial for optimal results.

Like other wood screw sizes, #9 screws are available in a variety of head styles and finishes. Selecting the appropriate driver bit is vital to avoid stripping the screw head during installation. This size offers a good compromise between the holding power of larger screws and the ease of use of smaller ones, making it a valuable addition to any woodworker’s toolkit.

#10 Wood Screw Specifications

The #10 wood screw is a commonly utilized size, boasting a major thread diameter of 0.190 inches, or 3/16 of an inch. This makes it a robust option for a wide array of woodworking projects, offering a significant step up in holding power compared to smaller sizes like #8 or #9. It’s frequently chosen for applications requiring substantial strength and durability.

Typical applications for #10 screws include furniture assembly, cabinet construction, and securing heavier components. Its increased diameter necessitates careful pilot hole drilling to prevent wood splitting, particularly in hardwoods. The screw’s versatility extends to both indoor and outdoor projects, depending on the material and finish selected. Corrosion-resistant coatings are recommended for exterior use.

When working with #10 screws, selecting the correct driver bit is paramount to ensure efficient installation and prevent damage to the screw head. This size strikes a balance between strength and manageability, making it a staple in many woodworkers’ arsenals. Proper screw length selection, based on material thickness, is also crucial for a secure and lasting connection.

#11 Wood Screw Specifications

The #11 wood screw represents a further increase in strength and holding power compared to its #10 counterpart, featuring a major thread diameter of 0.203 inches, which is equivalent to 13/64 of an inch. This size is often selected when projects demand a particularly secure fastening solution, bridging the gap between standard sizes and larger, more specialized screws.

Applications for #11 screws commonly include heavier-duty furniture construction, the assembly of robust shelving units, and projects involving thicker wood stock. Due to its larger diameter, pre-drilling pilot holes is absolutely essential to avoid wood splitting, especially when working with dense hardwoods. The pilot hole diameter should be carefully matched to the screw size for optimal results.

Choosing the correct driver bit is vital for efficient installation and preventing damage to the screw head. #11 screws offer a substantial improvement in shear strength, making them ideal for applications where resistance to lateral forces is critical. Consider corrosion-resistant coatings for outdoor projects to ensure longevity and prevent rust.

#12 Wood Screw Specifications

The #12 wood screw is a frequently utilized size, offering a robust fastening solution for a wide array of woodworking applications. It boasts a major thread diameter of 0.216 inches, conveniently corresponding to 7/32 of an inch. This makes it a popular choice for projects requiring significant holding power without being overly bulky or difficult to install.

Common applications for #12 screws include cabinet construction, door and window frame assembly, and general carpentry tasks. Its versatility stems from its ability to effectively grip both softwoods and hardwoods, provided a properly sized pilot hole is drilled beforehand. Pre-drilling is crucial to prevent wood splitting and ensure smooth screw insertion.

When working with #12 screws, selecting the appropriate driver bit is paramount to avoid stripping the screw head. This size provides a noticeable step up in shear strength compared to smaller screws, making it suitable for projects subjected to moderate stress. Consider using coated screws for enhanced corrosion resistance, particularly in outdoor or humid environments.

#14 Wood Screw Specifications

The #14 wood screw represents a substantial step up in fastening power, featuring a major thread diameter of 0.242 inches, which is equivalent to 1/4 inch. This size is ideal for projects demanding exceptional holding strength and durability, making it a go-to choice for more demanding woodworking tasks.

Typical applications for #14 screws include heavy-duty furniture construction, structural framing, and securing larger pieces of wood together. They excel in situations where resistance to pull-out is critical. As with all wood screws, pre-drilling a pilot hole is highly recommended, especially when working with dense hardwoods, to prevent splitting and facilitate easier installation.

Selecting the correct driver bit is essential for preventing damage to the screw head. The #14 screw offers a significant increase in shear strength compared to smaller sizes, making it well-suited for projects that will experience considerable stress or load. Consider using exterior-grade screws for outdoor applications to resist corrosion and ensure long-lasting performance.

#16 Wood Screw Specifications

The #16 wood screw is a robust fastener, boasting a major thread diameter of 0.268 inches, or 17/64 inch. This size provides a significant increase in holding power compared to smaller screws, making it suitable for projects requiring substantial strength and stability. It bridges the gap between common sizes and heavier-duty applications.

Common uses for #16 screws include assembling larger furniture pieces, attaching hardware like hinges and brackets, and securing thicker materials. They are frequently employed in projects where a strong, reliable connection is paramount. Pre-drilling pilot holes is crucial, particularly with hardwoods, to prevent wood splitting and ensure smooth screw insertion.

When working with #16 screws, selecting the appropriate driver bit is vital to avoid stripping the screw head. These screws offer excellent shear strength and are a good choice for projects subject to moderate stress. For outdoor projects, opting for corrosion-resistant coated screws will extend the lifespan and maintain structural integrity.

#18 Wood Screw Specifications

The #18 wood screw represents a substantial step up in size and strength, featuring a major thread diameter of 0.294 inches, equivalent to 19/64 inch. This larger diameter provides exceptional holding power, making it ideal for demanding woodworking applications where a secure and durable connection is essential. It’s a go-to choice for projects requiring significant structural integrity.

Typical applications for #18 screws include heavy-duty furniture construction, securing large brackets, and joining thick lumber. They are frequently used in projects like deck building, framing, and other outdoor structures where resistance to pull-out is critical. As with larger screws, pre-drilling pilot holes is highly recommended to prevent wood splitting and facilitate easier installation.

Selecting the correct driver bit is crucial when working with #18 screws to avoid damaging the screw head. These screws offer excellent resistance to shear forces and are well-suited for projects exposed to considerable stress. Consider using corrosion-resistant coatings for outdoor applications to ensure long-term durability and prevent rust.

#20 Wood Screw Specifications

The #20 wood screw is among the largest commonly available sizes, boasting a major thread diameter of 0.320 inches, which translates to 5/16 inch. This substantial size delivers maximum holding power, making it the preferred choice for heavy-duty woodworking projects demanding exceptional strength and stability. It’s a robust fastener for critical connections.

Applications for #20 screws are typically found in large-scale construction, timber framing, and projects involving exceptionally thick materials. They are frequently employed in securing substantial structural components, such as beams, posts, and heavy brackets. Due to its size, pre-drilling a pilot hole is absolutely essential to prevent wood splitting and ensure smooth installation. Without it, the wood is likely to crack.

When working with #20 screws, selecting the appropriate driver bit is paramount to avoid stripping the screw head. These screws provide superior resistance to both shear and tensile forces, making them ideal for projects subjected to significant stress. For outdoor applications, opting for corrosion-resistant coatings is highly recommended to safeguard against rust and ensure longevity.

Fractional vs. Decimal Wood Screw Sizes

Wood screw sizes are commonly represented in both fractional and decimal formats, often causing confusion for woodworkers. The numbering system (#0, #1, #2, etc.) corresponds to specific major thread diameters, initially defined using fractional measurements like 1/16″, 5/64″, and 3/32″. However, for precision and consistency in manufacturing and engineering, decimal equivalents are increasingly prevalent.

Understanding the conversion between these two systems is crucial. For instance, a #5 wood screw has a major thread diameter of 0.125 inches, which is equivalent to 1/8 inch. While fractional sizes offer a familiar reference point, decimal measurements provide greater accuracy, particularly when using specialized tools or collaborating with professionals who rely on metric conversions.

The major thread diameter, measured on the outside of the threads, is the defining characteristic of a screw’s size. Both systems ultimately refer to this same dimension, simply expressed differently. Familiarizing yourself with both allows for seamless interpretation of specifications and ensures you select the correct screw for your project, regardless of the format presented.

Driver Bit Sizes for Common Wood Screw Sizes

Selecting the correct driver bit is paramount to prevent stripping the screw head and ensuring efficient installation. While a general understanding exists, specific bit sizes correlate directly with wood screw diameters. Unfortunately, readily available charts detailing color-coding for hand drivers are incomplete, but a foundational understanding can guide selection.

Generally, smaller screws like #5, #6, and #7 require smaller bits, while larger screws such as #8, #9, and #10 necessitate progressively larger sizes. Screws #12 and #14 also demand appropriately sized bits to maintain a secure grip; A 5/16 inch driver bit is frequently used for a range of common wood screw sizes.

It’s important to note that bit sizes aren’t always standardized, and slight variations can occur between manufacturers. Always test the fit before driving screws in bulk. Using the wrong size bit can damage both the screw and the surrounding material, leading to project failures. Prioritizing the correct bit ensures a clean, professional finish and long-lasting structural integrity.

unimac washer manual

Unimac Washer Manual: A Comprehensive Guide

This manual provides detailed instructions, from installation and operation to troubleshooting, ensuring optimal performance of your Unimac washing machine.

Unimac washers are renowned for their durability and commercial-grade performance, now accessible for residential use. This guide serves as a comprehensive resource for understanding and maintaining your Unimac washing machine. Originally designed for high-volume laundry facilities, Unimac prioritizes robust construction and reliable operation.

Whether you’re a first-time user or familiar with laundry appliances, this manual will detail essential features, safety precautions, and troubleshooting steps. It covers everything from initial setup to advanced operational techniques, ensuring years of efficient service. Explore the power and longevity of Unimac!

Understanding Your Washer Model

Identifying your specific Unimac washer model is crucial for accessing tailored support and replacement parts; Locate the model and serial number plate, typically found inside the washer door or on the rear panel. This information is essential when contacting Unimac support or ordering components.

Different models offer varying cycle options, capacities, and features. Refer to the model-specific diagrams within this manual to familiarize yourself with the control panel and internal components. Understanding these nuances will optimize your washing experience and ensure proper maintenance.

Installation and Setup

Proper installation is vital for safe and efficient operation. This section details unpacking, connections, leveling, and ensuring correct electrical grounding.

Unpacking and Inspection

Carefully unpack your new Unimac washer, checking for any visible damage incurred during shipping. Inspect the exterior for dents, scratches, or broken parts.

Verify all components are present, referencing the parts list within this manual. Retain all packaging materials until you’ve confirmed the washer functions correctly.

Report any damage or missing parts immediately to the retailer or Unimac support. Do not attempt to operate a damaged machine. Proper inspection prevents future issues.

Connecting Water Supply

Before connecting, ensure the water supply valves are fully closed. Attach the inlet hoses to both the washer and the hot and cold water faucets, using new rubber washers.

Hand-tighten the connections, then use pliers to gently tighten another half-turn. Avoid over-tightening, which can damage the fittings.

Slowly open the water supply valves and check for leaks at both hose connections. Address any leaks immediately before proceeding. Proper connection prevents water damage.

Electrical Requirements and Grounding

This Unimac washer requires a dedicated, properly grounded 120-volt, 60Hz electrical supply. Do not use extension cords or adapters.

The washer must be grounded to minimize the risk of electric shock. The power cord includes a grounding wire with an appropriate plug.

Never remove or alter the grounding prong. If a grounding outlet isn’t available, consult a qualified electrician for proper installation. Incorrect grounding voids the warranty and poses a safety hazard.

Leveling the Washer

Proper leveling is crucial to minimize vibration and noise during operation. Use a bubble level on the top of the washer to check for evenness.

Adjust the leveling legs, located at the bottom corners of the washer, by rotating them clockwise or counterclockwise.

Tighten the lock nuts against the washer’s base after adjusting each leg to secure the leveling. Re-check the level after adjustments, ensuring stability on the floor.

Operating Instructions

Follow these steps for efficient washing: load clothes, add detergent, select a cycle, and start the machine for optimal cleaning results.

Loading the Washer

Proper loading ensures effective cleaning and prevents damage to both your clothes and the Unimac washer. Distribute items loosely within the drum, avoiding overcrowding.

Overloading restricts movement, hindering the wash process. Separate garments by fabric type and color before loading. Check pockets for objects like coins or keys.

For optimal results, leave sufficient space at the top of the drum – approximately one-third empty – to allow for proper agitation and rinsing.

Detergent Dispenser Guide

The Unimac washer features a multi-compartment dispenser for detergent, bleach, and fabric softener. Always use High Efficiency (HE) detergent to prevent excessive suds.

Refer to the detergent packaging for appropriate dosage levels based on load size and soil level. Pour detergent into the designated compartment, avoiding overfilling.

Bleach and fabric softener should be added to their respective compartments, never directly onto clothes. Regularly clean the dispenser to prevent clogs and ensure proper dispensing.

Wash Cycle Selection

Your Unimac washer offers a variety of wash cycles to accommodate different fabric types and soil levels. Common cycles include Normal, Delicate, Permanent Press, and Heavy Duty.

Select the appropriate cycle based on the care label of your garments. For heavily soiled items, choose the Heavy Duty cycle. Delicate fabrics require the gentle Delicate cycle.

Utilize cycle modifiers like temperature and spin speed to further customize your wash. Always consult the manual for specific cycle details and recommended settings.

Start/Pause and Cycle Completion

To begin a wash cycle, press the ‘Start’ button. The washer will automatically fill with water and commence the selected cycle. During operation, pressing ‘Pause’ will temporarily halt the cycle.

To resume, press ‘Start’ again. The display will indicate the remaining cycle time. Upon cycle completion, the washer will beep or display a ‘Done’ message.

Immediately remove clothes to prevent wrinkles and mildew. Ensure the water supply is turned off after use. Refer to the manual for specific indicator light meanings.

Control Panel Overview

The control panel features intuitive displays, buttons, and cycle modifiers for easy operation and customization of your Unimac washer settings.

Display Indicators and Symbols

Understanding the Unimac washer’s display is crucial for efficient operation. The panel utilizes various indicators and symbols to communicate the machine’s status. A flashing light often signifies an active cycle or a specific error code requiring attention. Symbols represent wash cycles – delicate, normal, heavy-duty – and options like temperature settings and spin speed.

Pay close attention to symbols indicating water levels, detergent usage, and cycle completion. Error codes, displayed numerically or alphanumerically, pinpoint potential issues, guiding troubleshooting efforts. Refer to the full manual for a comprehensive decoding of each indicator and symbol, ensuring proper machine monitoring and control.

Button Functions Explained

The Unimac washer’s control panel features intuitively labeled buttons for seamless operation. The ‘Start/Pause’ button initiates or temporarily halts a cycle, while ‘Cycle Select’ allows choosing pre-programmed wash settings. ‘Temperature’ adjusts water heating, and ‘Spin Speed’ controls the final spin intensity.

Buttons for ‘Delay Start’ schedule operation, and ‘Options’ unlock modifiers like extra rinse or soil level adjustments. Understanding each button’s function is key to customizing washes. Consult the manual for detailed explanations and potential combinations, maximizing the washer’s capabilities and achieving optimal cleaning results.

Cycle Modifier Options

Unimac washers offer versatile cycle modifiers to personalize each wash. ‘Extra Rinse’ ensures thorough detergent removal, ideal for sensitive skin or heavily soiled items. ‘Soil Level’ adjusts wash intensity based on dirtiness – light, medium, or heavy. ‘Pre-Wash’ adds a preliminary soak for stubborn stains.

‘Spin Speed’ modification allows reducing wrinkles in delicate fabrics. Explore options like ‘Warm Wash’ or ‘Cold Wash’ for energy savings. Utilizing these modifiers optimizes cleaning performance and fabric care, tailoring each cycle to specific needs. Refer to the manual for detailed descriptions and recommended combinations.

Maintenance and Cleaning

Regular cleaning extends your Unimac washer’s lifespan and maintains optimal performance. This section details procedures for the dispenser, drum, and exterior.

Cleaning the Detergent Dispenser

To ensure optimal washing performance, regularly clean the detergent dispenser. Remove the dispenser drawer by pressing the release clip or button, consulting your model’s specific instructions. Rinse the drawer thoroughly under warm water, removing any accumulated detergent residue, fabric softener, or bleach.

Use a soft brush to scrub away stubborn buildup in the compartments. Inspect the dispenser housing within the washer for any clogs or residue and clean as needed. Ensure all parts are completely dry before reinserting the drawer. A clean dispenser prevents clogs and ensures accurate detergent distribution during each wash cycle.

Cleaning the Washer Drum

Maintaining a clean washer drum is crucial for preventing odors and ensuring effective cleaning. Run a dedicated washer cleaning cycle monthly, utilizing a washer cleaner product specifically designed for front or top-load machines, as appropriate for your Unimac model.

Alternatively, run a hot water cycle with two cups of white vinegar to help dissolve mineral buildup and residue. Wipe down the drum’s interior with a damp cloth after each cleaning cycle. Regularly inspect the rubber door gasket for mold or mildew and clean thoroughly.

Cleaning the Exterior

To preserve the appearance of your Unimac washer, regularly clean the exterior surfaces. Use a mild detergent mixed with warm water and a soft cloth to wipe down the cabinet, control panel, and door. Avoid abrasive cleaners, as they can scratch or damage the finish.

Pay attention to areas prone to buildup, such as around the detergent dispenser and control buttons. Dry all surfaces thoroughly after cleaning to prevent water spots. For stainless steel models, use a stainless steel cleaner for optimal shine.

Filter Cleaning Procedures

Regularly cleaning the washer’s filter is crucial for optimal performance and preventing drainage issues. Locate the filter access panel, typically at the front bottom of the machine. Before opening, prepare a shallow pan and towels to catch any residual water.

Carefully unscrew and remove the filter, cleaning away lint, debris, and small objects. Rinse thoroughly under running water. Reinstall the filter securely, ensuring a watertight seal. Consult your model’s specific diagram for precise filter location.

Troubleshooting Common Issues

This section details solutions for frequent problems like starting failures, drainage blockages, leaks, and excessive vibrations, ensuring smooth operation.

Washer Won’t Start

If your Unimac washer fails to start, first verify the power supply – ensure the unit is properly plugged into a functioning electrical outlet. Check the circuit breaker or fuse box for any tripped breakers or blown fuses. Confirm the door is securely latched, as a safety interlock prevents operation when open.

Next, examine the control panel for any error codes displayed, referencing the manual for specific meanings. A faulty lid switch, timer, or motor could also be the culprit. If issues persist, consult a qualified technician for diagnosis and repair, avoiding self-repair attempts.

Washer Not Draining

If your Unimac washer isn’t draining, initially check the drain hose for kinks or obstructions. Ensure it isn’t excessively bent or clogged with lint or debris. Verify the drain hose is positioned correctly – not too high or too low – to allow gravity to assist the draining process.

Inspect the drain pump filter for blockages; it’s typically located at the front of the machine. A clogged filter is a common cause. If the problem continues, a faulty drain pump may require professional attention. Never operate the washer with standing water.

Leaking Water

Water leaks from your Unimac washer can stem from several sources. First, inspect the water inlet hoses connecting to the machine and the water supply; tighten connections if loose. Examine the drain hose for cracks or improper seals. Check the door boot (if applicable) for damage or debris preventing a tight seal.

Internal leaks might indicate a problem with the pump, tub seal, or internal hoses. If you can’t identify the source, or suspect an internal issue, contact a qualified technician for repair to prevent further damage.

Excessive Vibration

Significant shaking during operation suggests an imbalance within your Unimac washer. Ensure the washer is properly leveled – adjust the feet until stable. Verify the load is evenly distributed inside the drum; avoid washing single, heavy items alone. Confirm the shipping bolts (if present during initial setup) have been removed.

Persistent vibration could indicate worn shock absorbers or suspension components. If leveling and load balancing don’t resolve the issue, schedule a service appointment for professional diagnosis and repair.

Safety Precautions

Always disconnect the power before servicing. Keep children away during operation, and adhere to all electrical safety guidelines for safe usage.

General Safety Guidelines

Prioritize safety during Unimac washer use. Never operate the machine if damaged. Ensure proper ventilation to prevent gas buildup. Do not attempt self-repair; contact qualified technicians. Keep the area around the washer clear of flammable materials. Always supervise children near the appliance.

Avoid overloading the washer, as this can cause damage or injury. Do not insert hands into the drum during operation. Follow detergent guidelines to prevent residue buildup and potential hazards. Regularly inspect hoses for leaks or wear.

Electrical Safety

Ensure electrical safety when using your Unimac washer. Always plug the washer into a grounded outlet matching the voltage specified on the machine’s data plate. Never use extension cords or adapters. Avoid operating the washer with a damaged power cord; replace it immediately.

Do not expose electrical components to water. Disconnect the power supply before performing any maintenance or cleaning. If the outlet is overloaded, it may cause a fire hazard. Contact a qualified electrician for any electrical concerns.

Child Safety

Prioritize child safety around your Unimac washer. Never allow children to operate or play with the appliance. Close supervision is essential when the washer is in use. Keep detergent and other cleaning products out of reach, as they can be harmful if ingested.

Do not allow children to climb on or inside the washer. Always lock the door when not in use to prevent accidental entry. Educate children about the dangers associated with electrical appliances.

Parts Diagram and Replacement

Detailed diagrams identify washer components, facilitating easy replacement of common parts. Locate parts and ensure your Unimac washer’s longevity.

Identifying Washer Components

Understanding the intricate parts of your Unimac washer is crucial for effective maintenance and repair. Key components include the drum, agitator (if applicable), water inlet valves, drain pump, motor, and various hoses and belts. The control panel houses the electronic control board, responsible for managing wash cycles.

Detailed exploded views within this manual illustrate each part’s location and function. Familiarize yourself with these diagrams to accurately identify components during troubleshooting or when ordering replacements. Proper identification prevents incorrect part selection, ensuring compatibility and optimal washer performance.

Ordering Replacement Parts

When replacing parts, always use genuine Unimac components to maintain washer performance and warranty validity. To order, have your model number and the part number readily available. These numbers are found on the washer’s data plate, typically located inside the door or on the back panel.

Contact authorized Unimac parts distributors or visit the official Unimac website. Provide the necessary information for accurate order processing. Ensure correct part selection by cross-referencing with the parts diagram in this manual. Improper parts can cause malfunctions and void your warranty.

Common Parts Requiring Replacement

Over time, certain Unimac washer components experience wear and tear, necessitating replacement. Frequently replaced parts include the drive belt, which can stretch or break, causing the drum to stop rotating. Water inlet valves often fail, preventing water from entering the machine. Drain pumps may become clogged or malfunction, hindering water removal.

Door seals can deteriorate, leading to leaks. Additionally, motor couplings and suspension rods are prone to wear. Regularly inspect these parts during maintenance to proactively address potential issues and prevent larger repairs.

Warranty Information

Unimac washers are covered by a limited warranty protecting against manufacturing defects in materials and workmanship for a specified period.

Warranty Coverage Details

The Unimac washer warranty typically covers defects in materials and workmanship under normal use for a defined timeframe, often one to five years depending on the component. This coverage extends to parts and, in some cases, labor costs associated with repairing or replacing defective components. However, the warranty generally does not cover issues arising from improper installation, misuse, neglect, or unauthorized modifications. Damage caused by acts of nature, commercial use, or wear and tear is also usually excluded. Proof of purchase is essential for validating any warranty claim.

Claim Procedures

To initiate a warranty claim for your Unimac washer, first gather your proof of purchase and a detailed description of the issue. Contact Unimac support directly – details are found within the manual – to obtain a claim number and instructions. You may be required to provide photos or videos documenting the defect.
Authorized service technicians will assess the problem; repairs or replacements will be authorized based on warranty terms. Retain all documentation related to the claim for your records.

Contacting Unimac Support

For assistance with your Unimac washer, several support channels are available. Refer to your washer manual for the most current contact information, including phone numbers and email addresses. Many manufacturers also offer online support portals with FAQs, troubleshooting guides, and live chat options.
Detailed manuals and parts diagrams can often be found on the official Unimac website. Be prepared to provide your model number and serial number when contacting support for efficient assistance.

Technical Specifications

This section details crucial dimensions, weight, water consumption rates, and energy efficiency ratings for your specific Unimac washer model.

Dimensions and Weight

Understanding the physical specifications of your Unimac washer is crucial for proper installation and ensuring it fits comfortably within your laundry space. Precise dimensions, including height, width, and depth, are vital for navigating doorways and alcoves.

The weight of the washer, both empty and fully loaded, impacts floor support requirements and ease of movement during maintenance. Refer to your model’s specific data sheet for accurate measurements, as variations exist between different Unimac series.

Always account for potential clearances needed for hoses and electrical connections when assessing space availability.

Water Consumption

Efficient water usage is a key feature of Unimac washers, contributing to both cost savings and environmental responsibility. Water consumption varies depending on the selected wash cycle, load size, and water level settings.

Understanding your model’s water usage per cycle allows for informed decisions regarding laundry practices. Lower water consumption translates to reduced utility bills and a smaller environmental footprint.

Consult the specifications section of this manual for detailed water usage data for each available wash program. Optimize your loads to maximize efficiency.

Energy Efficiency Ratings

Unimac washers are designed with energy conservation in mind, offering models with impressive efficiency ratings. These ratings, often displayed using Energy Star certifications, indicate the washer’s performance relative to standard models.

Lower energy consumption translates directly into reduced electricity bills and a minimized environmental impact. Understanding these ratings helps consumers make informed purchasing decisions.

Refer to the technical specifications section of this manual for your specific model’s energy efficiency data, including kilowatt-hour usage per cycle. Optimize wash loads for maximum savings.

line 6 dl4 user manual

Line 6 DL4 User Manual: A Comprehensive Guide (Updated 10/03/2026)

This manual details the Line 6 DL4 Delay Modeler’s functions and models, offering a quick reference chart for sound production technology.

Welcome to the world of the Line 6 DL4 Delay Modeler! This iconic pedal has revolutionized guitar effects, offering an unparalleled range of delay sounds. This user manual serves as your comprehensive guide to unlocking the full potential of this powerful tool. Whether you’re a seasoned professional or a budding enthusiast, this manual will equip you with the knowledge to sculpt incredible sonic textures.

The DL4 isn’t just a delay pedal; it’s a versatile sound design instrument. It boasts 16 unique delay models, from classic tape echoes to cutting-edge digital algorithms. Beyond delays, the DL4 features a robust looper function, expanding its creative possibilities. This manual will walk you through every aspect of the DL4, from its interface and controls to advanced programming techniques and troubleshooting.

Prepare to embark on a journey of sonic exploration!

What is the DL4 Delay Modeler?

The Line 6 DL4 Delay Modeler is a groundbreaking digital effects pedal celebrated for its ability to recreate and innovate upon classic delay sounds. Released to widespread acclaim, the DL4 moved beyond simple echo effects, offering 16 distinct delay models – emulations of legendary tape delays, analog delays, and digital units.

It’s more than just a collection of presets; the DL4 allows for deep parameter control, enabling users to meticulously shape each delay’s character. Furthermore, the integrated looper function transforms the DL4 into a powerful performance tool for layering and improvisation. The DL4’s impact on modern music is undeniable, becoming a staple on countless recording and touring rigs.

Essentially, it’s a sonic toolbox for creating atmospheric textures and rhythmic complexity.

DL4 Key Features & Specifications

The Line 6 DL4 boasts 16 distinct delay models, encompassing tape, analog, and digital emulations, alongside unique offerings like Reverse and Pitch Shift delays. It features up to 14 seconds of delay time, providing ample space for expansive soundscapes.

Key specifications include 24-bit A/D/A converters for high-fidelity audio, and a flexible I/O section with stereo inputs and outputs. The integrated looper offers up to 14 seconds of record time. MIDI implementation allows for seamless integration with other gear.

Power requirements are 9V DC, and the unit is built with a robust metal chassis. The DL4’s intuitive interface and extensive parameter control make it a versatile tool for both studio and stage.

Understanding the DL4 Interface

Navigating the DL4 involves mastering its front panel controls, rear panel connections, and display screen for efficient preset editing and delay model selection.

Front Panel Controls Overview

The DL4’s front panel is intuitively designed for real-time control and precise editing. Key elements include the Delay Time knob, crucial for setting the rhythmic spacing of your echoes, and the Feedback control, which dictates the number of repeats and their decay.

Mix adjusts the balance between the dry (original) signal and the wet (effected) signal. The Delay Model selector switch allows quick access to the sixteen distinct delay algorithms. Further refinement is achieved using the Parameter knobs, which modify characteristics specific to each chosen model – think tape saturation, digital clarity, or reverse playback.

Preset selection is handled via dedicated buttons and a footswitch, enabling seamless transitions during live performance. Finally, the Looper controls provide access to the DL4’s powerful looping functionality, offering independent record, play, and overdub options.

Rear Panel Connections Explained

The DL4’s rear panel provides comprehensive connectivity for integrating the unit into various setups. Standard ¼-inch Input and Output jacks handle mono or stereo signals. A dedicated Mix Out allows for sending a dry signal directly to a mixer, preserving the original tone.

MIDI In/Out/Thru ports enable seamless integration with MIDI controllers and sequencers for preset switching and parameter control. An Expression Pedal input allows for real-time manipulation of delay parameters, adding dynamic expression to your sound.

External Footswitch inputs offer hands-free control over preset selection and looping functions. Finally, a standard 9V DC power input provides reliable operation, and an RS-232 port facilitates firmware updates and advanced configuration.

Display Screen & Navigation

The DL4’s display screen is central to navigating its extensive features. It utilizes a backlit LCD, providing clear visibility in various lighting conditions. The screen presents current delay model, preset name, parameter values, and looper information.

Navigation is achieved through a combination of the Enter, Value, and Page buttons. The Enter button selects parameters for editing. The Value knob adjusts parameter settings, offering precise control. The Page buttons scroll through different menus and parameter pages.

A dedicated Preset button allows quick access to saved presets, while the Looper button activates and controls the looper function. Understanding this layout is key to unlocking the DL4’s full potential.

Delay Models: A Deep Dive

The DL4 boasts 16 distinct delay models, including emulations of classic tape, analog, and digital delays, plus unique options like reverse and pitch shifting.

Classic Delay Models (Tape, Analog, Digital)

The DL4 expertly recreates the warmth and character of iconic delay units. The Tape Echo model faithfully simulates the saturation, wow, and flutter of vintage tape machines, offering a lush and organic sound.

Analog Delay delivers the rich, dark tones of classic bucket-brigade devices, known for their subtle modulation and warm repeats.

Digital Delay provides pristine, clear repeats with exceptional clarity and precision, perfect for slapback echoes or long, ambient textures. These core models form the foundation of the DL4’s versatility, allowing users to access a broad spectrum of delay sounds, from subtle thickening to expansive soundscapes. Each model offers adjustable parameters to fine-tune the delay time, feedback, and tone, ensuring a personalized sonic experience.

Unique DL4 Delay Models (Reverse, Pitch Shift)

Beyond the classics, the DL4 unlocks truly experimental sonic territories. The Reverse delay model inverts the audio signal, creating ethereal and otherworldly textures, ideal for adding dramatic effects to leads or pads.

Pitch Shift delay allows for transposition of the delayed signal, opening up possibilities for harmonies, octaves, and unique rhythmic effects. This model is perfect for creating swirling, detuned delays or adding a subtle chorus-like effect.

These distinctive models expand the DL4’s creative potential, offering sounds not easily replicated by traditional delay units. Experimentation with these features unlocks a world of sonic innovation, allowing users to craft truly signature delay sounds.

Detailed Look at the 16 Delay Models

The DL4 boasts sixteen distinct delay models, each meticulously crafted to emulate iconic sounds and explore new sonic landscapes. These range from pristine digital repeats to warm, saturated analog echoes and evocative tape delays.

Key models include the rich Tube Echo, offering a vintage warmth, and the authentic Tape Echo, complete with saturation and flutter. The Digital Delay provides clean, precise repeats. Beyond these, explore Reverse, Pitch Shift, and numerous variations of classic tape and analog delays.

Each model features adjustable parameters, allowing for extensive customization and sound design. This comprehensive selection ensures a delay tone for every musical style and creative vision.

Tube Echo Model

The Tube Echo model within the DL4 faithfully recreates the warm, saturated sound of classic tube-driven tape echo units. This model excels at adding a vintage character to your signal, providing a rich and harmonically complex delay.

Key parameters include ‘Mix’, controlling the blend of dry and wet signals, ‘Delay Time’ for setting the repeat spacing, and ‘Feedback’ to adjust the number of repeats. The ‘Tone’ control shapes the overall frequency response, allowing you to brighten or darken the echo.

Experiment with higher feedback settings to achieve self-oscillation and create unique, swirling textures. This model is ideal for adding depth and warmth to guitars, vocals, and other instruments.

Tape Echo Model

The Tape Echo model on the DL4 meticulously emulates the characteristics of vintage tape delay machines, capturing their inherent imperfections and unique sonic qualities. Expect a warm, slightly degraded sound with subtle pitch fluctuations and tape saturation.

Essential controls include ‘Delay Time’, ‘Feedback’, ‘Mix’, and ‘Wow & Flutter’. ‘Wow & Flutter’ introduces realistic tape speed variations, adding a natural, organic feel to the delay. Adjust ‘Age’ to simulate tape wear, increasing the amount of noise and distortion.

This model is perfect for creating atmospheric textures, adding vintage character to guitars, or simulating the sound of classic studio recordings. Explore different settings to discover the nuances of tape echo.

Digital Delay Model

The Digital Delay model on the DL4 provides pristine, clean, and precise delay repetitions, offering a stark contrast to the warmer analog and tape-based options. This model excels in clarity and definition, ideal for creating rhythmic patterns and spacious effects.

Key parameters include ‘Delay Time’, ‘Feedback’, ‘Mix’, and ‘Filter’. The ‘Filter’ control allows you to shape the tonal character of the delayed signal, ranging from bright and crisp to dark and subdued. Experiment with high feedback settings for self-oscillating effects.

This model is well-suited for creating slapback echoes, rhythmic delays, and ambient soundscapes. Its versatility makes it a staple for a wide range of musical genres.

Programming & Saving Presets

Effectively utilize the DL4’s preset capabilities to store and recall customized delay settings, ensuring quick access to your signature sounds during performance or recording.

Creating New Presets

Initiating a new preset on the DL4 allows for complete customization of your delay sounds. Begin by pressing the “New” button, which will clear the current settings and prepare a blank canvas.

Next, meticulously adjust the delay time, feedback, mix, and modulation parameters to sculpt your desired effect. Experiment with the various delay models – from pristine digital echoes to warm analog tape delays – to find the perfect sonic texture. Don’t hesitate to explore the advanced controls, such as filter and tone shaping, to further refine your sound.

Remember to name your preset descriptively using the DL4’s intuitive naming system. This will aid in quick recall during live performances or studio sessions. Finally, save the preset by pressing the “Save” button, ensuring your creation is securely stored for future use.

Editing Existing Presets

Modifying existing presets on the DL4 is straightforward and allows for nuanced sound design. First, recall the preset you wish to edit by using the preset selection knobs or direct preset number entry. Once loaded, any parameter adjustment will automatically enter “edit mode.”

Carefully tweak the delay time, feedback, mix levels, and modulation settings to achieve your desired sonic alterations. Utilize the DL4’s real-time parameter control for immediate feedback. Explore subtle changes to the filter and tone controls to refine the overall sound character.

Remember to save your edits by pressing the “Save” button, overwriting the original preset or saving as a new one.

Preset Management & Organization

Effective preset management is crucial for maximizing the DL4’s versatility. The DL4 offers ample storage for user-created and factory presets. Utilize the preset naming function to assign descriptive labels, facilitating quick recall during live performance or studio sessions.

Organize presets into logical categories – for example, by musical genre, delay type, or specific application. Consider creating custom banks dedicated to particular projects or artists. Regularly back up your presets to avoid data loss, especially after extensive editing.

The DL4 allows for easy preset copying and swapping, streamlining workflow; Explore these features to build a personalized library of delay sounds.

Advanced DL4 Techniques

Unlock the DL4’s full potential with techniques like utilizing the looper function, external expression pedal control, and comprehensive MIDI implementation.

Using the Looper Function

The DL4’s looper function is a powerful tool for creating layered soundscapes and practicing. Accessing the looper is straightforward; engage it via the dedicated footswitch or through preset assignments. You can record loops of varying lengths, controlled by the DL4’s timing parameters.

Overdubbing allows for building complex arrangements, adding layers on top of existing loops. Experiment with different delay models while looping to introduce unique textures and effects. Loop playback can be adjusted for speed and direction, offering creative possibilities. Remember to utilize the undo/redo functionality for error correction.

The looper’s integration with the DL4’s other features, like expression pedal control, expands its versatility. Mastering the looper unlocks a world of sonic exploration and performance capabilities.

External Expression Pedal Control

The DL4 supports external expression pedal control, significantly expanding its real-time manipulation capabilities. Connect a compatible expression pedal to the designated input on the rear panel. Parameter assignment is key; use the DL4’s menu system to map the pedal to various controls, such as delay time, feedback, or mix levels.

Pedal sensitivity and range are adjustable, allowing for personalized control. Experiment with different parameter assignments to discover unique expressive possibilities. An expression pedal can be used to create dynamic swells, rhythmic modulation, or subtle shifts in delay characteristics.

Consider using an expression pedal for live performance to add a human element to your delay effects. Proper configuration ensures seamless integration and responsive control.

MIDI Implementation & Control

The Line 6 DL4 offers robust MIDI implementation, enabling seamless integration with other MIDI-equipped devices. Connect the DL4 to your MIDI interface via the rear panel’s MIDI In/Out ports. MIDI Control Change (CC) messages can be assigned to virtually any DL4 parameter, allowing for remote control from a MIDI controller or sequencer.

Preset changes can also be triggered via MIDI Program Change messages, facilitating quick and accurate preset selection during live performances or in studio settings. The DL4’s MIDI Learn function simplifies the assignment process, automatically mapping MIDI controllers to desired parameters.

Explore the DL4’s MIDI settings to customize its response and optimize its integration with your existing MIDI setup for advanced control.

Troubleshooting Common Issues

This section addresses frequent problems like power failures, sound quality concerns, and difficulties saving or loading presets on the DL4.

DL4 Not Powering On

If your Line 6 DL4 fails to power on, begin with the basics. First, ensure the power cable is securely connected to both the DL4 and a functioning power outlet. Verify the outlet is delivering power by testing it with another device.

Next, inspect the DL4’s power adapter for any visible damage, such as frayed wires or a broken connector. If the adapter appears faulty, try a known-good replacement. Confirm the correct voltage setting on the power adapter matches your region’s power supply.

If these steps don’t resolve the issue, there might be an internal fuse problem. (Caution: Opening the unit voids the warranty.) Contact Line 6 support for assistance if you suspect an internal issue.

Sound Quality Problems

Experiencing poor sound quality with your Line 6 DL4? Start by checking all cable connections – input, output, and expression pedal. Ensure cables are securely plugged in and undamaged. Try different cables to rule out a faulty connection.

Verify your input signal level isn’t too high, causing distortion, or too low, resulting in a weak signal. Adjust the input gain accordingly. Experiment with different delay models; some are more sensitive to input signal characteristics.

If the problem persists, check for ground loops. Try a different power outlet or a ground lift adapter (use with caution). Finally, ensure the DL4’s firmware is up-to-date via the Line 6 website.

Preset Saving/Loading Errors

Encountering issues saving or loading presets on your Line 6 DL4? First, confirm sufficient memory is available. The DL4 has a limited number of preset slots. Attempting to save to a full bank will result in an error.

Ensure the preset name is unique and doesn’t contain special characters that the DL4 might not recognize. Try saving the preset under a different name. If loading fails, verify the preset file isn’t corrupted.

For persistent errors, consider a factory reset (back up presets first!). Check the Line 6 support website for firmware updates, as these often address bug fixes related to preset management.

Resources & Further Information

Explore the Line 6 DL4 support website and vibrant community forums for troubleshooting, tips, and shared presets from fellow DL4 users.

Line 6 DL4 Support Website

The official Line 6 support website is your primary destination for comprehensive DL4 resources. Here, you’ll find the latest firmware updates to ensure optimal performance and access to new features as they become available.

Detailed FAQs address common issues and provide step-by-step solutions, saving you valuable troubleshooting time. Downloadable resources, including the complete DL4 user manual in PDF format, are readily accessible.

You can also submit support tickets directly to Line 6’s technical support team for personalized assistance with complex problems. The website features instructional videos demonstrating advanced techniques and showcasing the DL4’s capabilities. Regularly check for announcements regarding software compatibility and known issues.

DL4 Community Forums & User Groups

Engage with fellow DL4 users and enthusiasts through dedicated online forums and user groups. These platforms offer a collaborative environment for sharing tips, tricks, and custom presets.

Discover innovative ways to utilize the DL4’s features and learn from the experiences of other musicians. Ask questions, receive troubleshooting advice, and participate in discussions about specific delay models and techniques.

Many user groups organize online events and preset exchanges, fostering a vibrant community around the DL4. Explore resources created by users, such as custom loops and detailed preset breakdowns. These forums are invaluable for expanding your knowledge and maximizing your DL4’s potential.

max payne trophy guide

Max Payne 3 Trophy Guide: A Comprehensive Overview (03/06/2026)

This guide details obtaining the Max Payne 3 Platinum, acknowledging the now-unobtainable multiplayer trophies due to server closure.
Prepare for a challenging, psychological journey, especially with New York Minute Hardcore!

Welcome to the comprehensive Max Payne 3 Trophy Guide! This guide aims to provide a detailed roadmap for achieving Platinum status in this neo-noir action masterpiece. However, a crucial caveat exists: the multiplayer trophies are now permanently unobtainable due to the game’s servers being shut down. This significantly alters the Platinum’s accessibility, making it a single-player focused endeavor.

Be warned, this Platinum is considered challenging, demanding both skillful gameplay and mental fortitude. Many players report significant difficulty with the New York Minute Hardcore (NYMHC) mode, often requiring multiple attempts. The psychological toll of repeated failures on later chapters is frequently cited as a major hurdle. Prepare for a lengthy commitment, potentially exceeding 30-40 hours, depending on your skill level and familiarity with the game.

Difficulty & Estimated Platinum Time

Max Payne 3’s Platinum trophy is rated as a 7/10 in difficulty, largely due to the demanding New York Minute Hardcore (NYMHC) mode. While the base game offers adjustable difficulty settings, NYMHC presents a relentless challenge requiring precise shooting, strategic use of cover, and extensive knowledge of enemy placements. Players often report needing multiple attempts, sometimes failing four or more times, specifically on Chapters 13 and 14.

Estimated Platinum Time: Approximately 30-40 hours. This estimate assumes moderate familiarity with shooter games and excludes the now-impossible multiplayer trophies, which previously added around 20 hours for max rank grinding. Prior experience with the game, and practicing free aim, can significantly reduce completion time.

Trophy List Breakdown

The Max Payne 3 trophy list comprises 51 trophies: 36 Bronze, 10 Silver, 4 Gold, and 1 Platinum. A significant portion of trophies are awarded through story progression, earned simply by completing chapters. However, a core challenge lies within the combat and skill-based trophies, demanding mastery of gunplay and efficient takedowns.

Notably, 16 multiplayer trophies are now unobtainable due to the game’s server closure. The remaining trophies focus on single-player achievements, with the most difficult being tied to completing New York Minute Hardcore. Players should prioritize maximizing skills and headshot accuracy to streamline the process and prepare for the ultimate test.

Offline Trophies

The majority of Max Payne 3’s trophies are attainable offline, focusing on single-player prowess and dedication. These encompass story completion, combat efficiency, and skillful execution of various in-game challenges. Expect to spend considerable time perfecting headshots, mastering weapon proficiency, and optimizing your approach to encounters.

The most demanding offline trophy is undoubtedly New York Minute Hardcore (NYMHC), requiring immense patience, game knowledge, and precise aiming. Preparation is key, including free-aim practice and understanding enemy patterns. Successfully navigating NYMHC demands psychological fortitude, as repeated attempts are almost guaranteed.

Story-Related Trophies

Max Payne 3’s narrative trophies are primarily tied to chapter completion, earned through progressing the main storyline. These trophies are generally straightforward, unlocking as you experience key moments in Max’s journey. However, achieving 100% completion necessitates multiple playthroughs to fully appreciate the intricate plot and unlock associated achievements.

Be prepared for a somber and gritty experience, as the story delves into themes of loss, revenge, and redemption. While not particularly challenging, these trophies form the foundation of your Platinum run. Successfully completing the story multiple times is crucial preparation for the significantly harder New York Minute Hardcore challenge.

Chapter Completion Trophies

These trophies unlock upon finishing each chapter of Max Payne 3’s campaign. They are automatic, requiring only that you successfully complete the story segments. Expect around 16 chapter completion trophies, marking your progress through Max’s harrowing experiences in São Paulo.

While simple to obtain, these trophies are vital for overall completion. Players often recommend multiple playthroughs, not just for story appreciation, but to build familiarity with level layouts and enemy placements. This preparation is invaluable when tackling the demanding New York Minute Hardcore mode, where a single mistake can undo hours of progress. Don’t underestimate their importance!

Combat & Skill-Based Trophies

These trophies test your mastery of Max Payne 3’s gunplay and abilities. Expect challenges centered around headshots, weapon usage, and efficient combat techniques. “Headshot Master” demands precision, while “Gun Nut” requires proficiency with all available firearms. “Brutal Efficiency” encourages stylish takedowns, rewarding skillful players who utilize bullet time and environmental interactions.

Reddit users emphasize practicing free aim from the beginning, as it’s crucial for New York Minute Hardcore. Repeated playthroughs build familiarity, enhancing headshot accuracy and overall combat effectiveness. Mastering these skills isn’t just about trophies; it’s about truly embodying Max Payne’s lethal prowess.

Headshot Master

Achieving “Headshot Master” requires eliminating 50 enemies with headshots. This trophy emphasizes precision aiming and utilizing bullet time effectively. Focus on slowing time during gunfights to line up perfect shots, targeting the head for maximum damage and quicker kills. Practice makes perfect; consistently aiming for the head will become second nature.

Reddit discussions highlight the importance of early practice with free aim, as this skill directly translates to headshot accuracy. Familiarize yourself with weapon recoil patterns and adjust your aim accordingly. Don’t rush; prioritize accuracy over speed. A steady hand and calculated shots are key to unlocking this trophy.

Gun Nut

The “Gun Nut” trophy demands fully upgrading one weapon to its maximum potential. This involves collecting phonograph cylinders scattered throughout the game and using them to unlock weapon modifications. Prioritize a weapon you enjoy using, as you’ll be investing significant time and resources into its upgrades.

Explore levels thoroughly to locate all hidden cylinders. Some are easily accessible, while others require completing challenges or finding secret areas. Experiment with different weapon modifications to discover combinations that suit your playstyle. Fully upgrading a weapon not only unlocks this trophy but also enhances your combat effectiveness.

Brutal Efficiency

Achieving “Brutal Efficiency” requires completing 150 melee takedowns throughout the game. This trophy encourages aggressive, close-quarters combat. Utilize the environment to your advantage, positioning enemies for takedowns against walls or objects. Mastering the timing of counters and disarms is crucial for maximizing your melee opportunities.

Don’t shy away from initiating melee combat whenever possible. While challenging, it’s a rewarding way to dispatch enemies quickly and efficiently. Certain difficulty levels may make this trophy more difficult to obtain, so consider lowering the difficulty if you’re struggling. Remember to combine gunplay with melee for a dynamic combat experience!

New York Minute Hardcore (NYMHC) ⏤ The Ultimate Challenge

New York Minute Hardcore (NYMHC) is widely considered the most difficult aspect of the Max Payne 3 Platinum. It demands completing the game on Hardcore difficulty with free aim enabled, and utilizing only the New York Minute bullet time ability. Preparation is key; extensive knowledge of enemy placements and level layouts is vital.

Expect to fail multiple times – perseverance is crucial. Mastering headshots is paramount, as resources are scarce. Prioritize cover and strategic movement. The psychological toll is significant; maintaining composure after repeated deaths separates successful players. Practice free aim beforehand, as it’s essential for this mode.

Preparation for NYMHC

Thorough preparation is non-negotiable for New York Minute Hardcore. Begin by completing the game at least three times on lower difficulties to internalize level design and enemy behavior. Focus on consistently landing headshots; this skill is critical for resource conservation. Practice extensively with free aim, as it’s mandatory for this challenge – don’t rely on assisted aiming.

Familiarize yourself with every weapon’s strengths and weaknesses. Understand bullet-time mechanics and maximize their efficiency. Mentally prepare for numerous deaths and restarts; the journey is arduous; Prioritize upgrading bullet time duration and recharge rate. Knowing when to use cover and when to aggressively push forward is vital for survival.

NYMHC Strategy & Tips

Aggression tempered with caution is key on NYMHC. Utilize bullet time strategically, prioritizing headshots to conserve ammunition. Master the dive-roll for quick cover and evasion. Don’t hesitate to use environmental explosives to your advantage. Consistently scan your surroundings for threats and plan your engagements carefully.

Prioritize eliminating high-value targets first – snipers and shotgun wielders pose the greatest immediate threat. Learn enemy spawn points to anticipate attacks. Remember, patience is crucial; rushing often leads to unnecessary deaths. Accept that failure is part of the process and learn from each attempt. Maintain composure, even after repeated setbacks.

Common NYMHC Mistakes

Rushing into encounters is a frequent downfall in NYMHC. Players often neglect methodical clearing, leading to overwhelming odds. Ignoring cover and relying solely on bullet time is another critical error. Forgetting to utilize environmental takedowns and explosives wastes valuable resources.

Underestimating enemy aggression and reloading carelessly can prove fatal. Many fail to adapt to changing combat scenarios, sticking to ineffective tactics. Losing composure after multiple deaths leads to reckless play. Neglecting to practice free aim beforehand significantly hinders performance. Remember, NYMHC demands precision, patience, and a resilient mindset – avoid these pitfalls!

Multiplayer Trophies (Now Unobtainable)

Unfortunately, the Max Payne 3 Platinum is currently unattainable for new players due to the closure of the online multiplayer servers. This impacts several trophies tied to rank progression and weapon proficiency. Previously, grinding to the maximum multiplayer rank demanded approximately 20 hours of dedicated playtime.

Crew challenges and achieving specific ranks were also required for completion, now inaccessible. It’s crucial to understand that these trophies are permanently locked. While single-player content remains achievable, the full Platinum experience is no longer possible. Prioritizing multiplayer trophies before server closure was a golden rule for completionists.

Rank Progression

Previously, achieving maximum rank in Max Payne 3’s multiplayer was a significant time investment, reportedly requiring around 20 hours of consistent play. This involved accumulating XP through matches, completing challenges, and consistently performing well. Players focused on maximizing their score in each game to accelerate progression.

Rank unlocks provided access to new weapons, customization options, and perks, enhancing the multiplayer experience. However, with the servers now offline, this progression is irrelevant for trophy hunting. The dedication required to reach the highest rank is no longer rewarded with a Platinum trophy, making it a purely nostalgic pursuit.

Weapon Proficiency

The multiplayer component of Max Payne 3 featured weapon proficiency trophies, demanding players achieve a certain number of kills with each weapon. This necessitated dedicated grinding, focusing on mastering each firearm’s unique characteristics and optimal usage scenarios. Players often utilized specific game modes and strategies to efficiently rack up kills with less-favored weapons.

However, due to the permanent closure of the online servers, these weapon proficiency trophies are now unattainable. The challenge of unlocking them, once a core part of the Platinum experience, is now a relic of the past. This significantly alters the trophy list’s difficulty and completion requirements for current players.

Crew Challenges

Max Payne 3’s multiplayer offered Crew Challenges, requiring coordinated teamwork to complete specific objectives. These challenges fostered a sense of community and encouraged players to strategize and communicate effectively. Success hinged on utilizing diverse loadouts and exploiting map knowledge to overcome opponents. Completing these challenges contributed significantly to rank progression and unlocked exclusive rewards.

Unfortunately, with the servers now offline, Crew Challenges are inaccessible, rendering the associated trophies unobtainable. This loss represents a substantial portion of the original Platinum difficulty. Players who previously dedicated time to crew-based gameplay can no longer earn these achievements, marking a permanent change to the trophy list.

Grinding & Optimization

Efficient trophy hunting in Max Payne 3 necessitates strategic grinding. Maximizing multiplayer rank, before server closure, demanded consistent play and focused objective completion – a reported 20-hour commitment. For offline trophies, repeated playthroughs are crucial, particularly for New York Minute Hardcore (NYMHC). Optimizing gameplay involves mastering headshots and understanding enemy patterns.

Prioritize free aim from the start, as it’s essential for NYMHC. Familiarize yourself with all weapons and their strengths. Replaying earlier chapters builds game knowledge, aiding in later, more difficult sections. Psychological resilience is key; prepare for numerous NYMHC failures and maintain determination.

Useful Tips & Tricks

Success in Max Payne 3 hinges on mastering its mechanics. Utilize bullet time strategically, conserving ammunition and maximizing accuracy. Prioritize headshots – they’re vital for efficiency and certain trophies. Learn enemy spawn locations and patrol routes for a tactical advantage. Don’t underestimate the power of environmental takedowns for quick, brutal eliminations.

For NYMHC, practice sliding and shooting, maintaining momentum while delivering precise fire. Regularly check your surroundings and utilize cover effectively. Remember, patience is paramount; rushing leads to mistakes. Accept that failure is part of the process and learn from each attempt.

Exploits & Glitches (If Any)

As of March 6th, 2026, documented exploits for Max Payne 3 are limited and largely patched. Early reports suggested potential glitches for skipping certain sections, but these have been addressed in subsequent updates. While some players previously utilized save-scumming for difficult encounters, this is generally discouraged due to the time investment required.

Regarding New York Minute Hardcore (NYMHC), no reliable exploits currently exist to bypass its inherent difficulty. Attempts to manipulate game files or utilize external tools are strongly advised against, as they risk account suspension or game corruption. Focus on mastering legitimate strategies and improving your skills.

Trophy Roadmap ⎻ A Step-by-Step Guide

Step 1: Story Completion – Play through Max Payne 3 on any difficulty, focusing on chapter completion trophies. Prioritize understanding enemy patterns and mastering the shooting mechanics. Step 2: Combat & Skill Trophies – Farm headshots, maximize weapon proficiency, and practice brutal efficiency techniques during replayable missions.

Step 3: New York Minute Hardcore (NYMHC) – This is the most challenging step. Practice free aiming, memorize level layouts, and prepare for numerous attempts. Step 4: (Formerly) Multiplayer Trophies – Acknowledge these are now unobtainable due to server closure.

Common Issues & Troubleshooting

NYMHC Difficulty: Frequent deaths on New York Minute Hardcore are normal. Maintain composure and learn from each attempt; the psychological toll is significant. Headshot Trophies: Ensure accurate aiming and utilize bullet time effectively. Practice consistently to improve precision. Game Crashes: While rare, ensure your system meets the minimum requirements and update drivers.

Multiplayer Trophies (Unobtainable): Accept that these trophies are no longer achievable due to server shutdowns. Don’t waste time attempting to unlock them. Progress Loss: Regularly back up your save data to prevent potential data corruption or loss.

Resources & Community Links

PlayStationTrophies.org: https://www.playstationtrophies.org/ offers a detailed guide and roadmap created by dcollins22 and Dark_Raven666. Consider supporting them with a referral upon signup.

Reddit ⏤ r/Trophies: https://www.reddit.com/r/Trophies/ is a valuable resource for discussions, tips, and troubleshooting from fellow players. Search for “Max Payne 3” to find relevant threads. Rockstar Games Newswire: https://www.rockstargames.com/newswire provides official game updates and announcements.

Engage with the community for shared experiences and strategies, especially regarding the challenging New York Minute Hardcore mode.

Platinum Trophy Showcase

Achieving the Platinum in Max Payne 3 is a significant accomplishment, often described as a source of immense pride by players. However, it’s crucial to acknowledge the current impossibility of obtaining it legitimately due to the closure of the game’s multiplayer servers.

Many veterans recall the grueling 20+ hour grind required to max out multiplayer rank, a task now unattainable. The psychological fortitude needed to overcome repeated failures on New York Minute Hardcore, particularly Chapters 13 and 14, is frequently highlighted.

For those who earned it, the Platinum represents dedication, skill, and perseverance. It’s a testament to mastering the game’s mechanics and enduring its challenges.